homage style

when your home is your canvas

schedule a design consult
  • blog
  • services
    • styling & decorating
    • home staging
    • virtual home staging
  • featured
  • about
  • workshops
  • contact
  • subscribe

bachelor bathroom

8 March 2016 by Andrea Leave a Comment

Bachelor BathroomRecently a client purchased a new-build condo and reached out for my design help. The client, being a bachelor, wanted his place to have a very sleek, bachelor pad vibe, which I helped him accomplish, starting with his master bath.

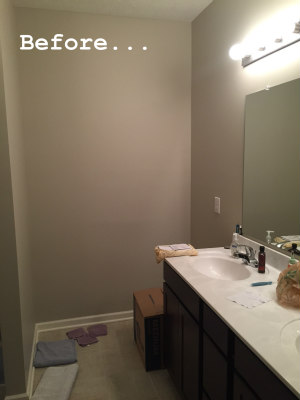
The space has a shower and the option for a tub, but if you didn’t select the tub option, and my client didn’t, it left a large empty space, dying to be filled…

Bathroom BeforeThat space cried out for a large-scale art piece! But did I mention that my client was on a tight budget? Ah yes, the B word…

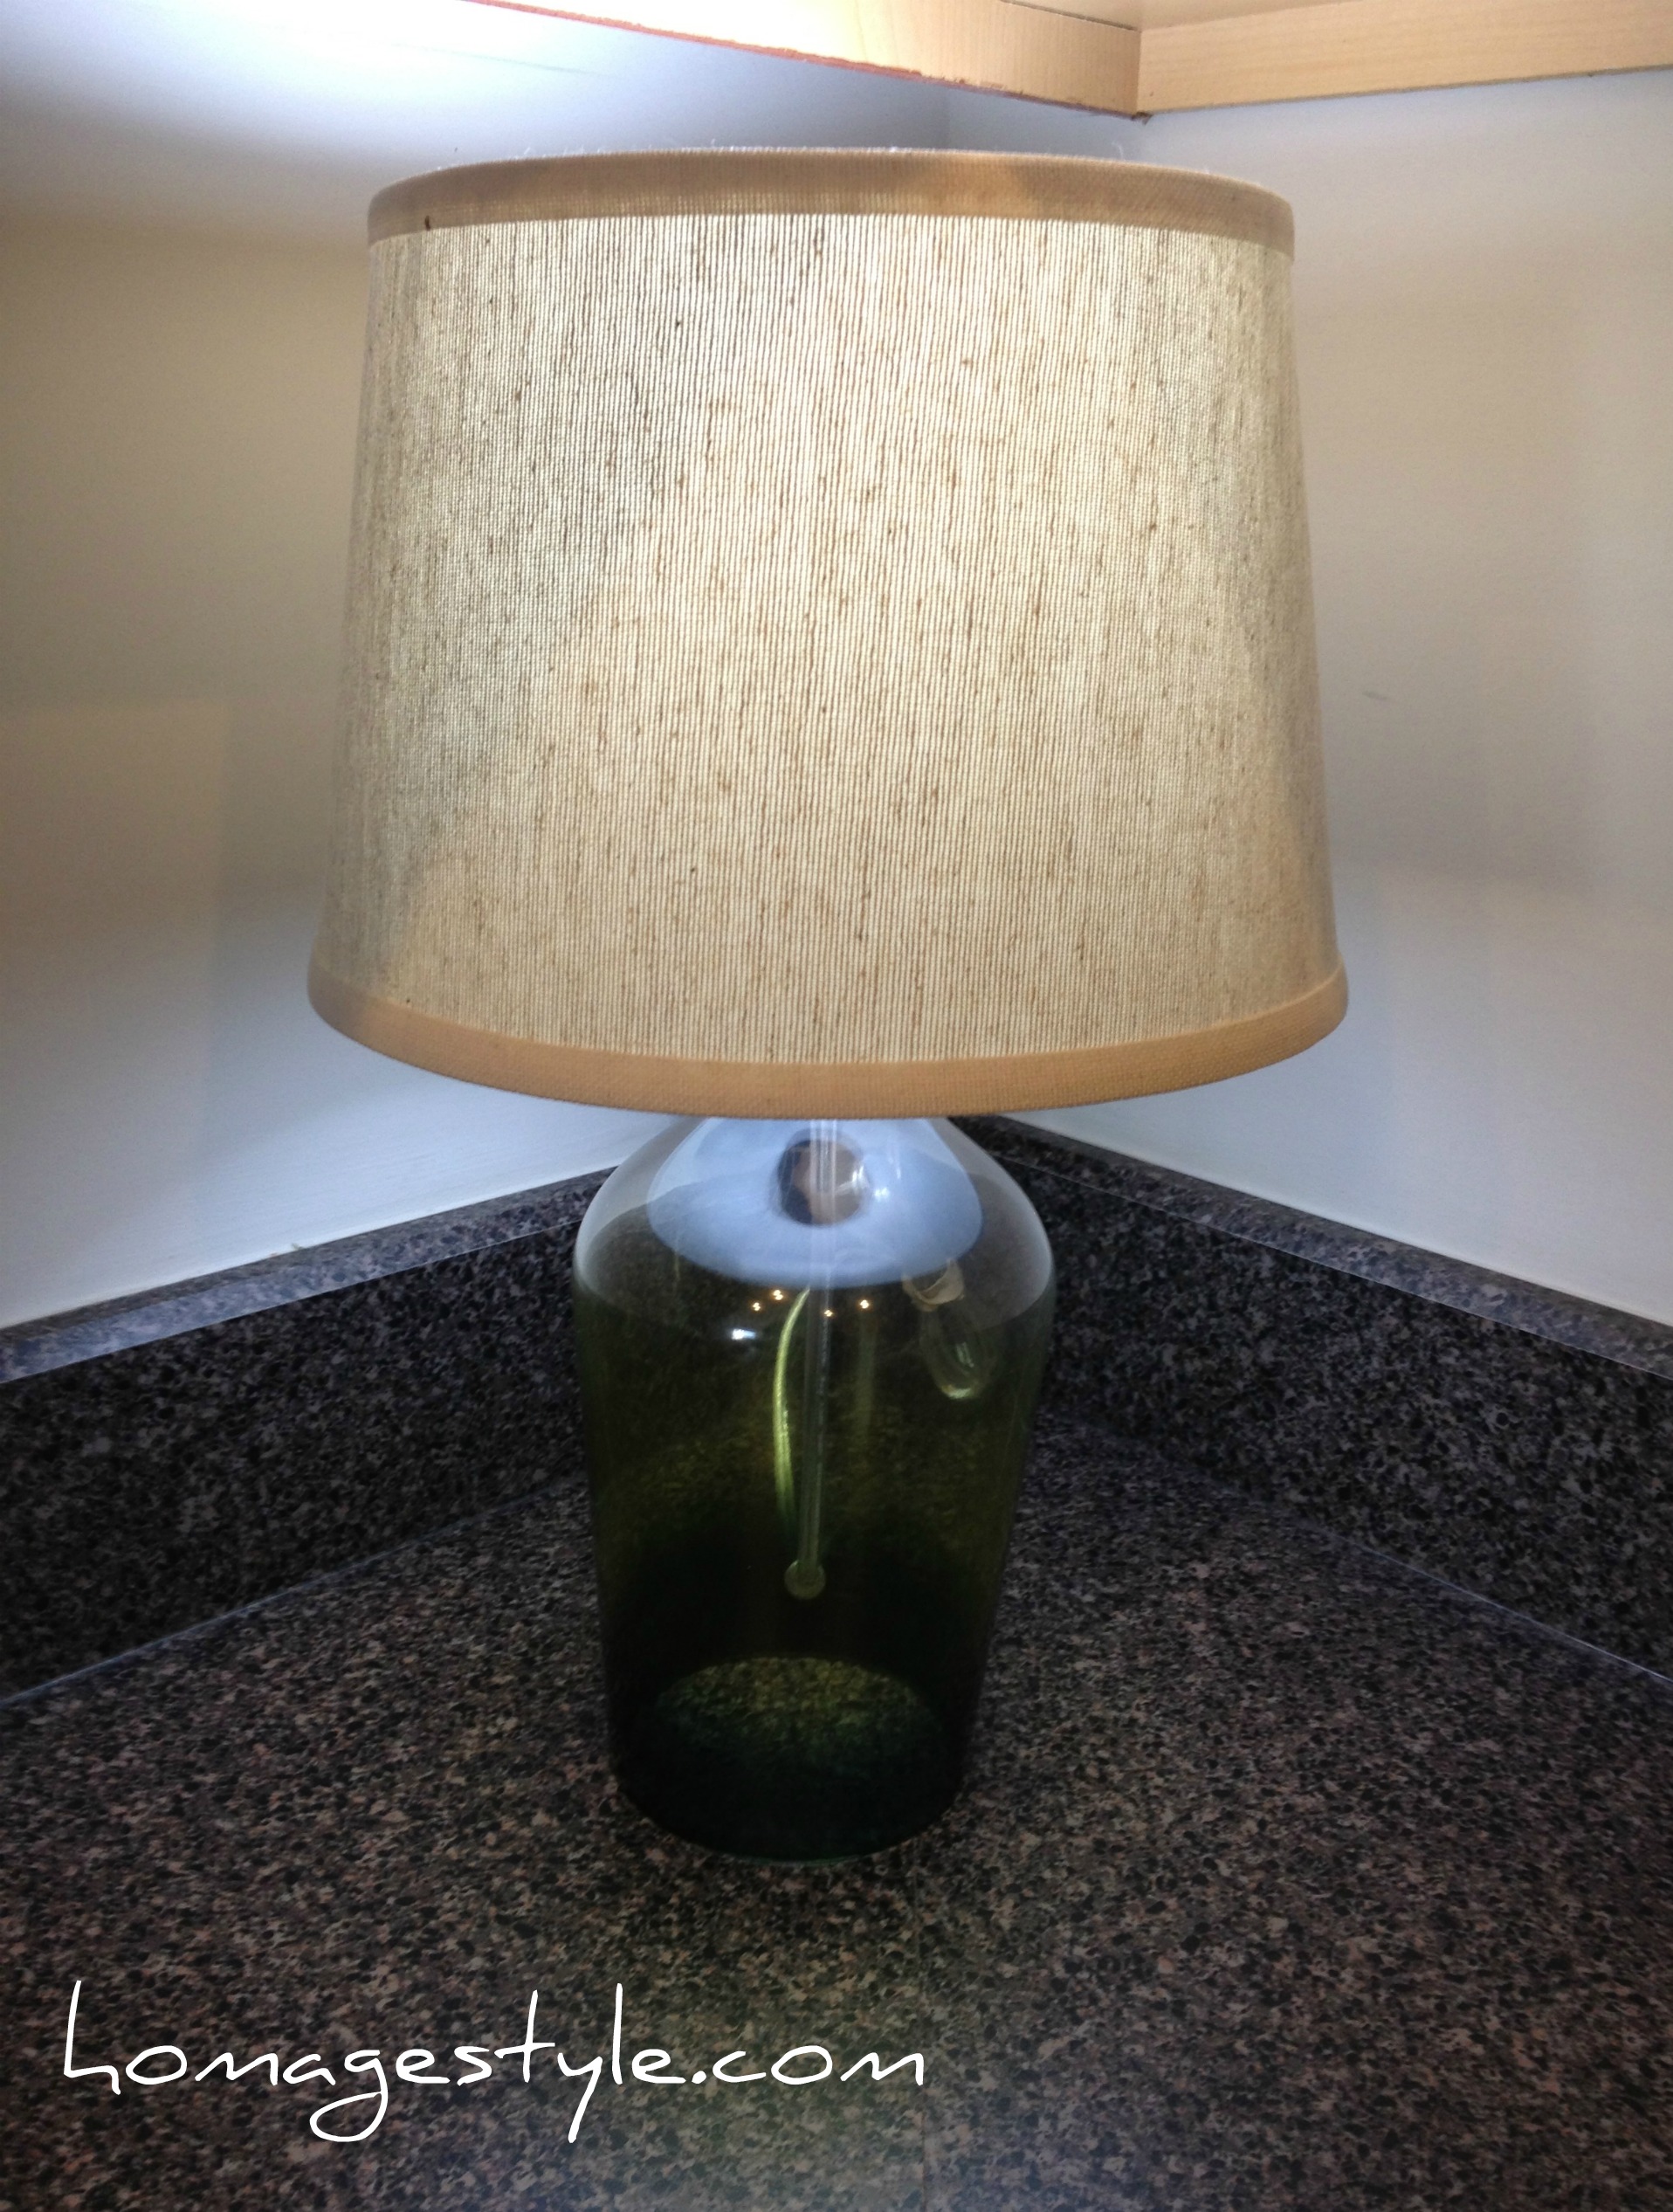
So I took matters into my own hands and painted a 36″ x 42″ geometric piece, speaking to the clean, mod vibe he was looking for.

Painting
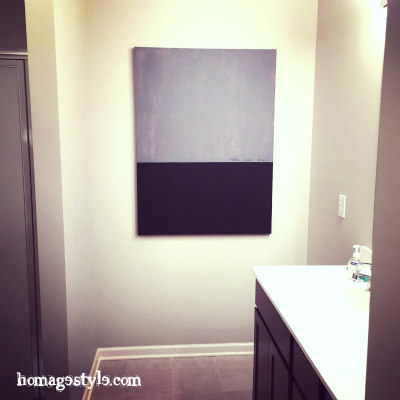
From afar, all you can see is the geometry of it. But up closer, you can see the layers of color and texture, as well as a message…

Follow your heart
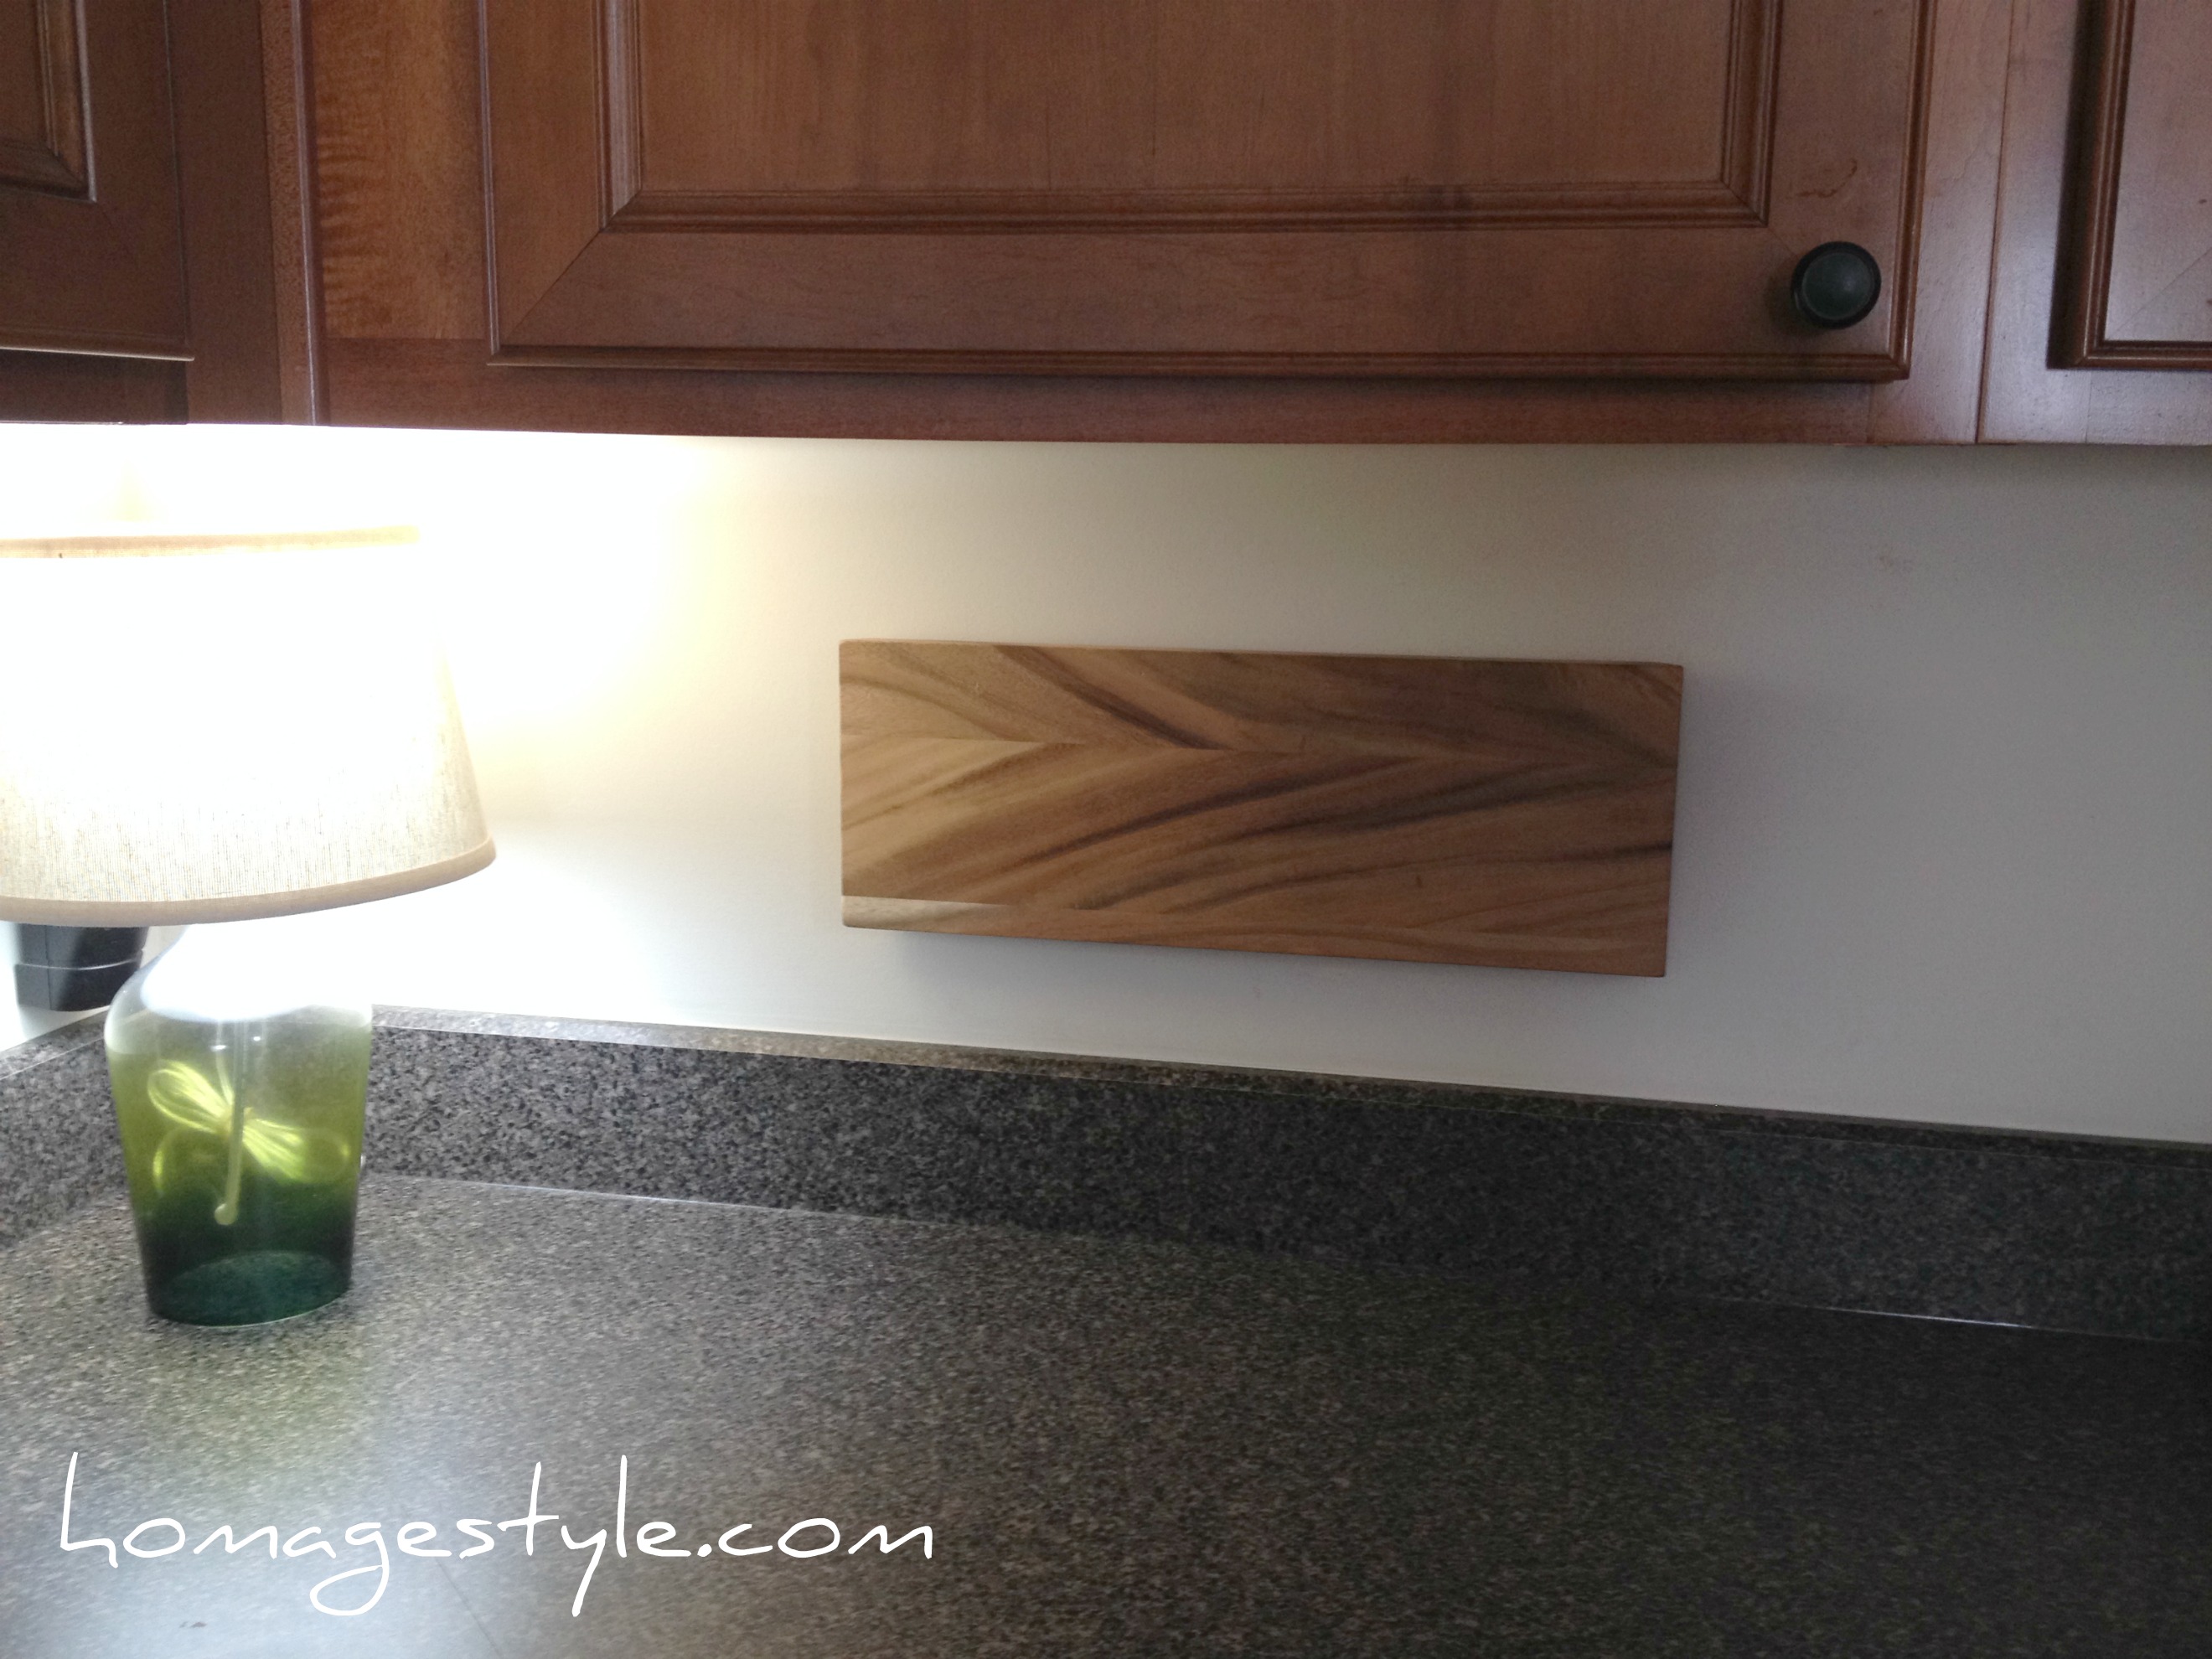
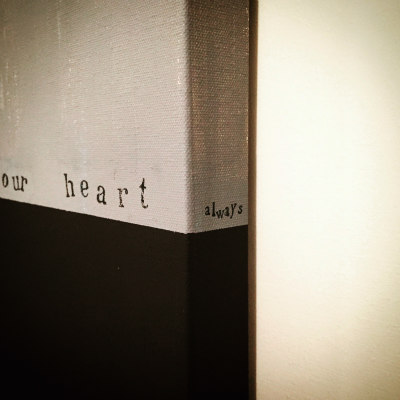
And on the side of the painting, a secret part of the message, only for those who get close enough to touch it…

Always
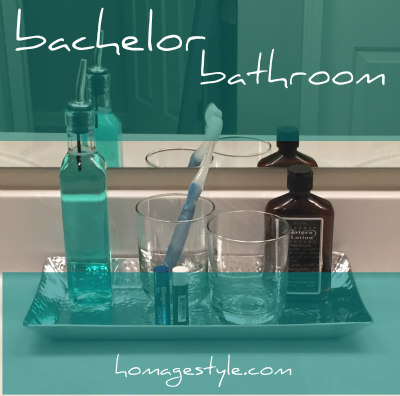
The painting is the focal point when you walk in the room, but when you face the vanity, you see this sharp collection of man-stuff, served up on a silver platter…

Bathroom counter
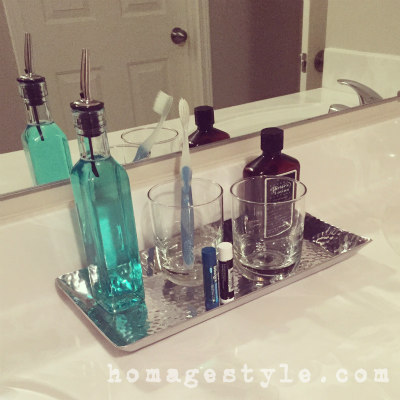
Ok, maybe not a silver platter…a hammered silvertone tray, from Target, for a mere $12.99. The two glorious vintage-look highball glasses, a steal at $1 each at Goodwill! The oil bottle, filled with colorful, minty-fresh mouthwash, is also from Target, for $4.99.

Bathroom counter front
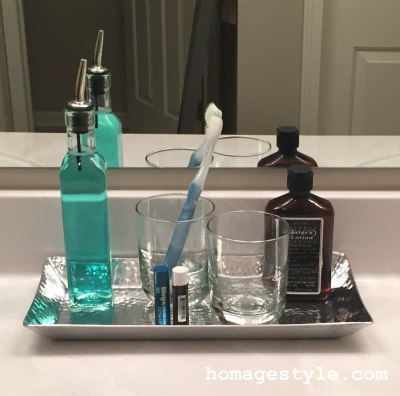
A super sleek, yet affordable way to display your toiletries, and not have them just look like random man-stuff. This is, after all, a super-cool bachelor pad!

the tornado lounge

1 July 2015 by Andrea Leave a Comment

tornado lounge cover Living in central Ohio, there is an occasional tornado. And more frequently than actual tornadoes are tornado warnings.

Things get all conflabbergested when there’s a tornado warning (for those of you not living in the Midwest, this means that a funnel cloud has occurred or is imminent based on radar) – the tornado sirens go on and the TV meteorologists get all serious, trying not to look as excited as they are about the impending weather phenomenon, and people are advised to take shelter.

Where? In your basement if you have one.

Well we have one. It’s unfinished and inglorious. Not exactly a place where people are dying to spend time.

But since we do head down there at least on several occasions each spring and summer for the inevitable tornado warning, I wanted to put together a little something that I call the Tornado Lounge. A mod little place where we can cool our heels while the weather does its thing.

Introducing the Tornado Lounge…

tornado loungeIt’s got a lofty, industrial mod feel with the exposed rafters and the concrete floor and walls. Perfect for the occasional hangout in the basement. (And don’t mind the folding table off to the right of the pic…it *is* my basement after all.)

Just about everything is from Ikea – couch, coffee table, side table, TV stand, and orange chair. The orange chair is actually from Ikea by way of my local town’s Facebook buy/sell housewares page, where I picked it up lightly used for a mere $15! If you’re not already a member of your local Facebook buy/sell, I suggest you check it out.

The coffee table and TV stand are older products from Ikea and no longer available. Ditto for the couch cover. Needless to say, several aspects of this project spent some important curing time. I mean, why should this project be different than any other of my projects? It wasn’t until I asked my gentleman caller for help putting together the TV stand that I was finally able to finish this project.

tornado lounge closeupThe paper lanterns and light kits are from World Market. And the dehumidifier is, well, a necessity.

I figured that the hanging cable wire and lamp kit wires were no big deal in this setting and just add to the industrial feel of the space.

tornado lounge paper lanternNow let me give you fair warning in the event that you’ve never hung a paper lantern before…you need to get rid of your need for perfection, because these damn things will not hang perfectly straight. Trust me. I tried. And tried. And tried again. So get comfortable with imperfection folks.

Not too bad for a Tornado Lounge!

Now off you go to design your own Tornado Lounge…don’t get caught without one in bad weather!


when things get boring in the bedroom

11 September 2014 by Andrea Leave a Comment

when things get boring in the bedroom

Sometimes things get boring in the bedroom. Stale. Just the same old thing, day after day, week after week, month after month. A sense of ennui sets in and all you can think about is how something has to change. You just can’t continue the way things are.

No, I don’t mean that has gotten boring! I mean your decor has. Geez, you people always have your minds in the gutter!

Well, when things have gotten dull, spice it up! Consider it a marriage encounter for your decor!

Recently I was feeling bored (with my decor) and so I decided to spruce things up a bit. As always, I’m on a tight budget, so it included a combination of rearranging some of what I already have, using some things that have been curing for years, and adding a little bit of new to the mix.

In general, I’m moving from a more traditional look to a more eclectic look – vintage and shabby chic marry mod. OK, so that’s more of a threesome than a traditional marriage, but when we’re decorating we don’t always need to follow societal norms!

Let’s start with the armoire. Here’s the before pic, with fake plants that look just fine, but no doubt more in the traditional vein…

Armoire beforeGoodbye fake plants, hello gold dress form trussed in faerie lights!

Armoire after with lightsThe faerie lights were $11.99 plus shipping. Well worth the expense. They’re battery operated, so there are no pesky wires running over the side of the armoire. Plus they run on a timer, so I can turn them on and six hours later they go off automatically. Perfect for when you need to spice things up with some ambiance!

Here’s how it looks during the day with the lights off…

Armoire after in daylightYou will notice that the dress form is off center, and there’s a lot of empty, open space on the top of the armoire. I’m really trying to get OK with imperfection. That includes getting comfortable with negative space and off-center presentation. I’ve actually grown to love the oddness of it all…it really highlights the dress form as the featured element.

Speaking of the dress form, this beauty has been curing for years! I purchased her for $1.25 at a local high school rummage sale. Been waiting to find the perfect place for her. Think I’ve found it!

Moving on…

Let’s take a look at one of my favorite possessions. A Picasso print of A Mother and Child and Four Studies of Her Right Hand. This was my grandmother’s print and I always loved it in her home from the time I was a kid. I’ve had it in my bedroom since I got it, but thought it needed to be featured a little more prominently, so I added some black and white polka dotted washi tape to frame it out…

Picasso print 1I just eyeballed the tape placement, because that’s what I do, but you could always be more precise and measure it out like a normal human.

(If you’re wondering why I have such weird angles with the wall hangings, it’s because I get a lot of light in this room so the angle is the only way to avoid glare in the pic. Carry on…)

Another angle…

Picasso printI love, love, love how this looks! It really brings out the tiny, black rim on the frame, as well as the black in the sketch. Plus the washi tape was a steal – I got 3 rolls for $2.99 at Michaels. More to come later with one of the other rolls of tape.

By the way, polka dots are my fave. Especially black and white polka dots. So this just makes me happy every single day when I see it! Here’s a close-up so you can better see the polka dots (as well as the aforementioned glare)…

Picasso print 2Enough about that. On to the one splurge.

Before the splurge, there was an angel print, accompanied by a broken vintage bracelet…

Angel print with braceletThe splurge was spending $40 on a custom-printed Lumineers poster on Etsy…

Lumineers 2I love the Lumineers and I superlove the poster art! The perfect mod piece to start the sexy love affair with vintage and shabby chic.

Sadly, I won’t be sharing the artist info here, because it took over a month and opening a case on Etsy to finally get the seller to ship, despite having paid. But at least I finally received it and I’m in love!

I tossed it into a basic poster frame and voila! Here it is from another wacky angle…

Lumineers 1And you can see the vintage bracelet remained.

To the left of my bed I tightened up the placement of the pieces that were already hanging on that wall, to give them more of a vignette feel…

frame artAnd on the right side of my bed I added a gorgeous mermaid print I bought a while back on Etsy from artist Amy Huddleston. (You know the drill…it was curing for a while.) I placed it in a mod white frame, which really brought an eclectic feel to the grouping. Talk about mod and vintage and shabby chic!

eclectic art grouping 3The blues and aquas and in mermaid print bring out the blue in the Girl with a Pearl Earring by Vermeer. Which, by the way, I found on the back of a Reader’s Digest magazine and decoupaged to a piece of painted wood.

But the white frame seemed too stark. Something was still missing…know what I mean?

eclectic art grouping 2Oh yeah. Washi tape, part deux.

eclectic art group with washi tapeI added some black and white chevron washi tape – part of my $2.99 three-pack – and it did the trick! Toned down the starkness of the white and tied it to the black in the other two pieces. Here’s a close-up…

eclectic art with washi tapeTaping perfection. Just eyeballed this as well. You could do the same, or maybe even be more precise and measure.

Although those are all awesome, we’re still not finished.

Previously, I had this angel art all lined up in a row…

Angel art beforeVery pristine and orderly, but where’s the flair?

I’ll tell you where the flair is…right here…

angel art groupingI mixed those bad boys up for a touch of the unexpected! We can’t be angelic and perfect all the time, especially when things have gotten boring in the bedroom!

Here’s where they are in the room…

angel artAnd finally, I dug deep into the world of curing and found these vintage mailbox doors that I purchased on eBay approximately 10 years ago.

mailboxes as artI figured that it was time to take the focus off the alarm system and the light switch – boring! – and add something interesting to this spot!

Now mind you, I did slice my finger open adding picture hanging wire to the back of these and heavily debated whether I needed a tetanus shot – I didn’t end up getting one and fortunately lockjaw has not set in – but they were certainly worth the effort!

mailboxes as art 2They just look so cool all lined up and are another metallic element, adding to the mixed metals in the room, accents of silver and gold and bronze.

A  whole new fun, updated bedroom for less than $100. Cheaper than sexy lingerie and a night out on the town! Who’s bored now?

Take my advice…don’t be afraid to mix it up in the bedroom!

organic mod kitchen update

7 September 2014 by Andrea Leave a Comment

A while back I did a little kitchen update but didn’t get around to sharing it here. So it in the spirit of better late than never, I introduce you to my organic mod kitchen update.

My house is kind of traditional, especially considering the kitchen cabinets. I always like to let the house speak to me, rather than forcing a certain style of decor. But I decided to move out of my “funky chicken” phase and into my new phase in which I combine modern, more organic elements with the more traditional style of the house.

But enough yammering on about it…here are the pics!

Let’s start with the simple things…my new napkin holder…

IMG_0433aYes, indeed, you are correct. It is a rock.

Part of what I was going for was bringing in some organic elements – things from nature. What says nature more than a rock? That’s right. Nothing. So a rock it is. Plus it has some sentimental value. It’s a rock that my son found in our yard when he was little and he gave it to me as a gift. Now it has a purpose in our home. And the price was right. Free.

Next I swapped out a chicken lamp – you know, part of the funky chicken phase – to a cool, glass lamp.

Here’s the chicken…

IMG_0428aKind of traditional. A look I’m moving away from.

The new glass lamp…

IMG_0436aIt’s a gorgeous green glass. I have it on a timer, so I never have to mess with it.

To the left of the lamp is the phone and answering machine, along with some funky chicken art covering the phone jack.

IMG_1069bI swapped out the chickart for an amazing art piece of my own making, designed by framing a dish towel. Oh, but not just any dish towel…

IMG_1084bThis amazing dish towel says:

you drink too much. you cuss too much. you have questionable morals. you’re everything i ever wanted in a friend.

The moment I saw this dish towel, I bought one for myself and my best friend! Because it just says it all.

Of course, framing a dish towel is not as simple as one might think. I imagined (in my mind where all projects work perfectly) that I would just lay the towel in this awesome wood and metal frame from Target and that I’d just fold the rest of the towel and tuck it inside the back of the frame. All 24 inches of fabric. Um yeah, that didn’t work out. So I had to cut down the towel and tape it down on the cardboard insert. Me telling this story now makes it sound as if it took about 5 minutes. Trust me…it didn’t. Probably took an hour to get the whole thing worked out to picture hanging perfection. But the time spent was worth it, because it is fun and awesome!

IMG_1083bAnd then there’s my pink fruit tray. Talk about adding a touch of mod! Got this as part of a food gift basket a couple of years ago.

IMG_0434aPlease excuse the fact that there’s hardly any fruit there. Let’s just pretend that we ate it.

Well, if you thought that those were the only incidents of funky chickens in my pre-makeover kitchen, you’d be mistaken. There was also this tray, which was covering an electrical outlet…

IMG_1063aI found this amazing cheese cutting board, also from Target, that I decided I wanted to hang on the wall because it just shouted organic mod to me.IMG_1073aThe wood grain called my name, lulled me into a trance, and made me pick it up and carry it to the cash register.

This is a perfect example of decorating with things that you love and that are beautiful and using them in ways other than they were originally intended. And also a way to decorate on the cheap. I can’t recall the exact price, but I’m thinking it was in the $12.99-$14.99 range.

It was flat on the back as well as the front, so I figured I would hang it with Command picture hanging strips. The chicken tray was hung this way as well. In fact, I had attached it to the outlet cover and thought I would do the same with the cheese board. But the cheese board was heavier than the tray and therefore wasn’t as stable. Plus the tray back was set in, so there was an allowance for the outlet cover, whereas there wasn’t with the cheese board, making it stick out too far, as well as being wobbly. Then this happened…

IMG_1068aYeah, so the outlet cover broke right off the wall. Guess the solid wood cheese board was too heavy for this approach. Fortunately, I have a stash of outlet covers in the basement and then I came up with this brilliant idea…

IMG_1075aI nailed paint stirring sticks to the wall, which were just about flush with the outlet cover. Yes, necessity is indeed the fricking mother of invention!

Then I attached the command strips to the paint sticks and voila!

IMG_1076aThe perfect way to hang the cheese board and cover the outlet!

IMG_1077aAh, the cleverness of me! Doesn’t that look fab?


black angels

1 September 2013 by Andrea Leave a Comment

photo 9b

Perhaps it reflects the blackness of my soul, but I find something so alluring about high gloss black angels.

So in the spirit of attending to the blackness of my soul, this weekend I decided to finish curing yet another project…the black angels project.

Honestly people, this project has been curing in my garage for probably seven years. Rather than judging me and thinking what a lazy human being I must be, consider it a personal favor to you. Doesn’t it make you feel better about yourself to know that there’s someone out there far lazier than you? And besides, if I can start and finish a project after it’s cured for seven years, hell, you can do just about anything you put your mind to!

The black angels started their life as an underwhelming resin wall hanging…

photo 2a

This spot over my front door needed a little something…

photo 1a

It’s bland…very bland…

photo 1b

So I took the basic resin angel wall hanging…

photo 3a

…tossed it on a lawn bag in my garage and started spray painting with a high gloss black. It only took 2 coats, so it was quick and easy, plus it didn’t cost me one red cent, because I already had the spray paint (and you are aware that I’ve had the damn resin thing lingering around for years).

And before you know it, it was a reflection of the high glossy blackness of my soul…there…now, isn’t that better?

photo 5a

Here it is above the front door…

photo 6a

You don’t get the full effect from afar, plus the area still needs to much more work (paint on the walls, the door painted black, board and batten all around – I have big plans, people), but you get the idea.

Another close-up…

photo 10a

And the angels from another angle…

photo 9a

Gloriousness!

Thank goodness I felt like letting the high gloss blackness of my soul come out this weekend. I just love how these glorious black angels turned out!

Showing off at Funky Junk Interiors.

almost instant art

27 January 2013 by Andrea Leave a Comment

DSCN0541 cover

If you’re short on art around your place there are ways to create almost instant (and cheap) art.

I work in advertising, so we frequently get giant catalogs of different types of royalty-free images that places like ad agencies purchase. Like this one…

photo4

These catalogs frequently land in the trash or recycling so I snagged this one and found this awesomeness…

photo 1

…which I decided definitely needs to be hanging on my wall, so I cut it out of the book and framed it in a $4 floating poster frame and got this…

DSCN0541

Sorry about the glare…I have lots of windows.

Isn’t she awesome? For this kind of project an inexpensive floating poster frame is usually your best bet because a) it’s cheap, and b) the art likely won’t be standard size. This was 7 1/2″ x 9″ so a floating frame was ideal. Plus the paper very likely isn’t acid-free, so it probably won’t last forever, but then you can feel good about changing things up when you get bored, because you only spent $4!

Doesn’t she look fabulous here on the small wall between my linen closet door and my bedroom door?

DSCN0519

Accompanied by some other whimsical pieces…this folk art snake I created on a scrap of wood, using paint, buttons, and decoupaged ransom note letters cut out from a magazine…

DSCN0517

And this multi-media, silk-screened and quilted art piece by Janice Taylor…

DSCN0521

But don’t worry if you don’t have access to books of royalty-free art. If you have a graphic designer friend, ask them if they ever get them and would be willing to pass them on to you. Or buy a cheap second-hand coffee table book to cut up and frame. (And don’t feel guilty about cutting up a book! I know how these things go, and we need to get over that. Think of giving it new life that you can enjoy every day!)

Another inexpensive option is to clip magazine ads. There are some beautiful ones and again, they may not last forever, but for now they’d make great little art pieces. Here are a couple that I’ve saved over the years with the intent to frame…

DSCN0525

DSCN0526

DSCN0527

DSCN0530

Or you could even frame an interesting piece of wrapping paper like this…

DSCN0531

…or a sheet of artsy scrapbook paper…

photo

So there’s no excuse for you to not have any gorgeous art on your walls! Now go frame something!

Showing off at Funky Junk Interiors.

C39PFCJYH6S5

no cost project

15 January 2013 by Andrea 2 Comments

Who have I been kidding?

I’ve said that I haven’t been doing any projects because I’ve been, um, short on funds (ie, broke), but seriously that’s no excuse. Because it doesn’t cost anything to clean. And boy does my office/studio/loft need a good cleaning.

I should really be embarrassed to post a pic of it here, but since I have no shame (in addition to no money), here goes…

Messy office

OK, this is an old pic, so it’s not quite this bad. But bad enough.

So I decided that until I can scrape up some cashiola for my next project, I will begin the massive undertaking of cleaning my office/studio/loft space.

I started at the entrance of the loft space with Megan’s desk.

Megan’s desk is so named because it was a desk that I trash picked from my former neighbor Megan’s house when I lived in California. Now almost 7 years later, we still call it Megan’s desk. Kind of an endearing name for a desk.

Here is Megan’s desk, in all of her cleaned up glory…

Megan's desk

Isn’t she loverly? (The chair I picked up from Target a couple of years back.)

If I recall correctly, the desk was Ethan Allen that Megan dared to paint a creamy white. Also if I remember the story correctly, Megan may have had to revive her mother when she found out that she had painted classic furniture. Of course I adored Megan for that and many other reasons!

At some point, Megan was ready for said desk to move on, and she was living across the street from a trash picker at the time. The rest was history.

Until last weekend, Megan’s desk was loaded up with crap, basically a repository for things that needed to be moved, stored, donated, or thrown. So I cleared it out and here she is.

In fact, now that she’s all available again, I may have plans for her elsewhere in the house in the future. But first things first. I still need to finish cleaning the rest of this space, even if it takes all winter.

And at the rate I’m going it might. But I’ll share the embarrassing pictures every step of the way!

little things – bracelet edition

6 January 2013 by Andrea 2 Comments

This is a broken vintage bracelet…

bracelet1

This is a broken vintage bracelet used as art…

bracelet2

Pretty clever, huh?

As much as I would love to wear this bracelet, there was no fixing it, because the metal wasn’t strong enough to repair. But I still love the vibrant colors and beautiful design, so on the wall it went.

bracelet3

Works perfectly next to my print of First Kiss by Bouguereau, which I bought at Target a number of years back for $3.78. Can’t remember what I ate for breakfast today, but can remember how much I paid for something clearance 10 years ago! Go figure.

bracelet4

Yeah, it’s the little things, people…

Showing off this project at Funky Junk Interiors.

little things :: recorder edition

5 September 2012 by Andrea Leave a Comment

If you have kids or ever were a kid, I’m betting that you have an old recorder lying around. Didn’t everyone play recorder in school? I know I did, my sister did, and both of my kids did.

And I’m guessing that you also have some weird little strip of wall that is too small for just about anything decorative. Well, guess again, people!

Dig up that old recorder make it sing again!

No, you don’t have to play Lightly Row…just find an awkward spot and hang that recorder up, just like this…

It’s just a tiny little speck of wall between two door frames. Perfect for a recorder! Don’t you think?

How much did it cost? $0, since I had not one but two recorders hanging around. And if you want to get all funky and colorful, you could spend about $5 and get one of these…

Now go play Lightly Row while you’re looking for a place to hang your recorder!

how much did it cost? family room edition

28 August 2012 by Andrea Leave a Comment

Recently I freshened up our family room.

It looks great, but how much did it cost?

Let me give you the facts and figures…

  • Zebra ottoman – trash picked the ottoman, pre-owned spray paint, zebra print fabric – $12
  • Pier 1 zebra print throws – 2 x $29.99 – $59.98
  • Fab tulip decorative pillow cover from The Cottage Cupboard – $45.95 + $6 shipping – $51.95*
  • Upcycled vintage sheet turned RELAX pillow cover from Olive Handmade – $29 + $2.75 shipping – $31.75*
  • Number 5 pillow, a recycled sail pillow from Reiter8 – $48 + $9 shipping – $57*
  • 2 green & yellow candles from Pier 1 – 2 x $4.18 – $8.36
  • 1 yellow candle & 1 orange candle – 2 x $7.99 – $15.98

GRAND TOTAL – $237.02

While $237 is no small chunk of change, especially to the broke among us, it’s not such a terrible price to pay to give a complete facelift to my old, boring family room. And best of all, it looks awesome!

*I will note that I spent more on the pillow covers and number 5 pillow than I usually spend. Typically I’m more of a clearance shopper. These were not small purchases. But I decided that I wanted unique, durable accessories and that I want to begin to support artisans, crafters, and artists with my dollars when I can.


Next Page »
  • Email
  • Facebook
  • Instagram
  • Pinterest
  • Twitter

subscribe, baby!

Homage Style on Twitter
Homage Style on Facebook
Pin me! Homage Style on Pinterest

archives

WORK IN PROGRESS...

work in progress :: rose painting

FAVORITE PROJECTS...

the tornado lounge

another glorious chalkboard project

freshening up the family room

industrial chic curtains

angsty teen boy's room

almost instant art

vintage cowboy room

Copyright © 2025 · Beautiful Pro Theme on Genesis Framework · WordPress · Log in