homage style

when your home is your canvas

schedule a design consult
  • blog
  • services
    • styling & decorating
    • home staging
    • virtual home staging
  • featured
  • about
  • workshops
  • contact
  • subscribe

making it my own

20 January 2013 by Andrea Leave a Comment

After living in my current house for 6 1/2 years, I finally opened that one last box. You know, the one that lingers and may actually move from house to house without ever being opened. Well, I figured it had cured quite long enough.

It contained some family photos. In our old house we had lots of places for tchotchkes and framed pics, whereas not so much in the new house. The reason I finally opened it is because I’m working on a picture wall, a project that is currently on hold due a surprising worldwide shortage of small black frames.

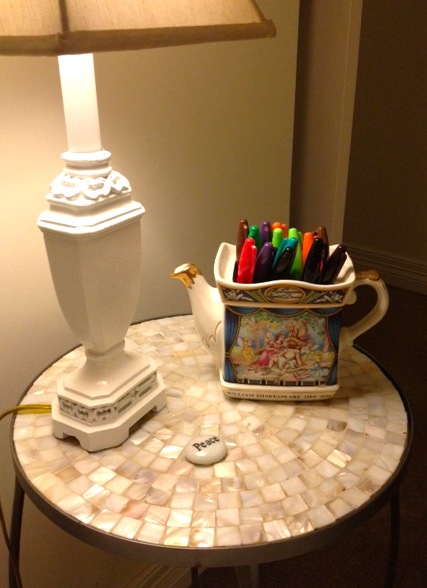
Anyway, also in the box were some other pics in frames that I decided to place in what was my ex-husband’s office and is now just an unused room that I’ve been having a bit of trouble making feel like part of my space. Guess it’s the old juju and the manly wood built-in desk and all. But it seems that the addition of the pics and their whimsical frames has finally tipped the scales toward making the room feel more inviting.

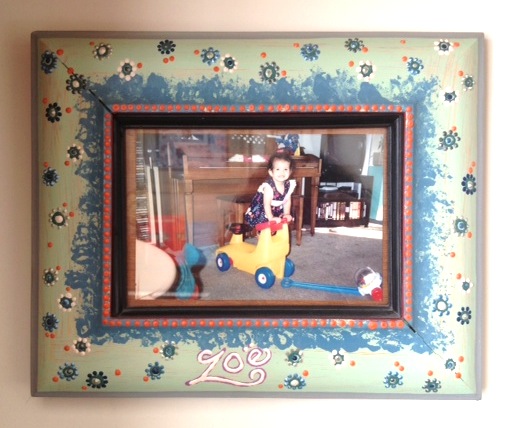
The fun blue frame was a handpainted gift from a dear artist friend when my daughter was born and it filled in this space perfectly and added a more funky, personal touch…

office 1

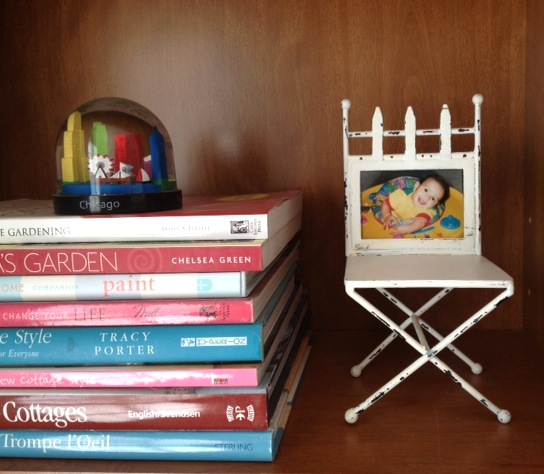
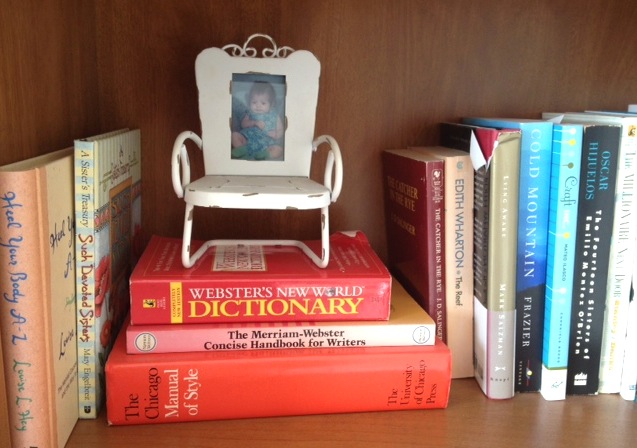
Perfect eclectic frame to capture a photo of such a spirited child…


office 2

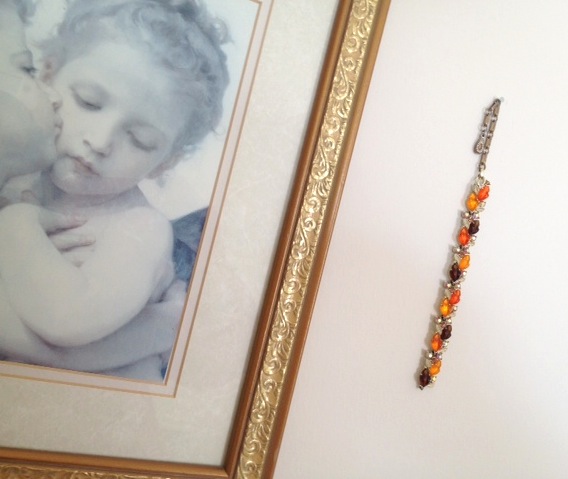
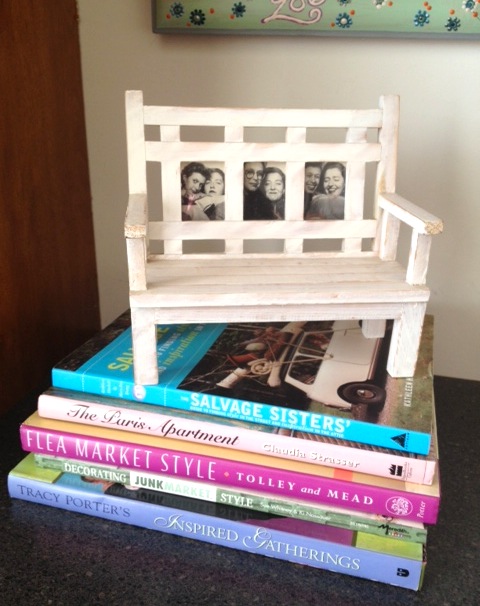
And I love these photo booth shots of my cousin Joan, a fabulous jewelry designer, and I from years ago!

office 3

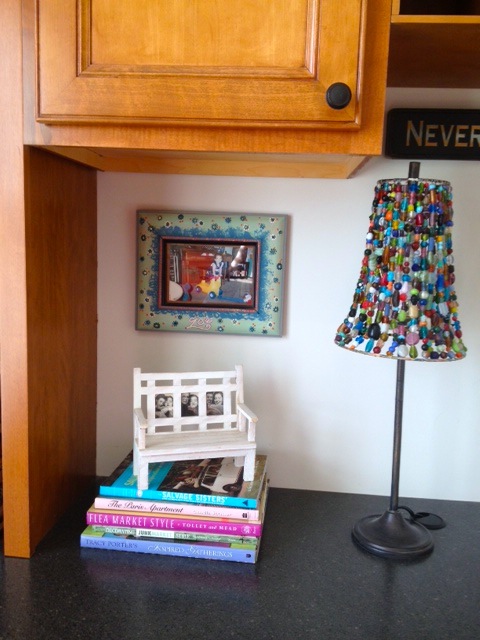
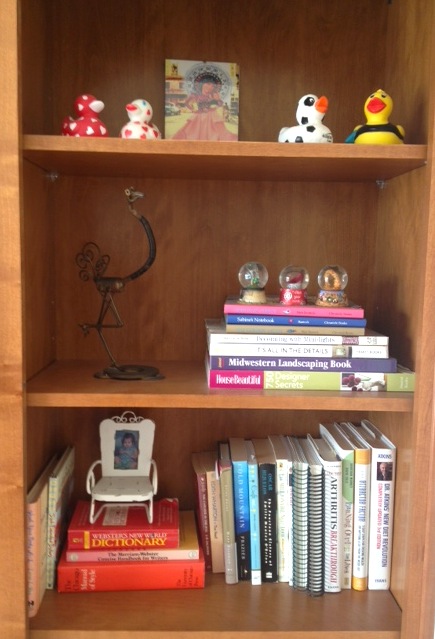
And by sprinkling the whimsical, light-colored frames throughout the wood shelves, it adds the warmth needed to pull all of the other fun elements together…

office 4

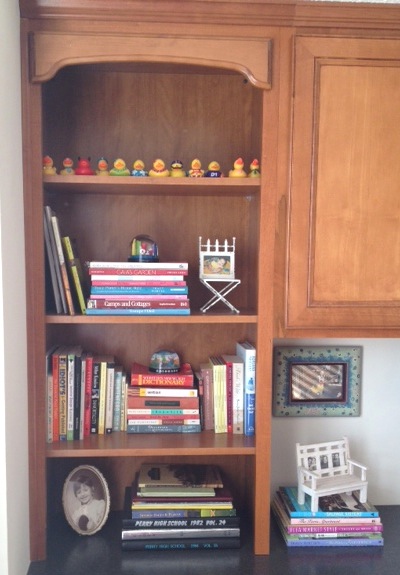
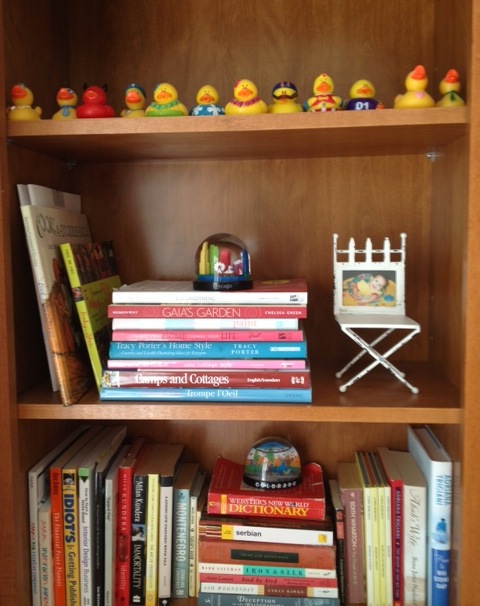
…like the snow globes and the rubber ducky collection…

office 6

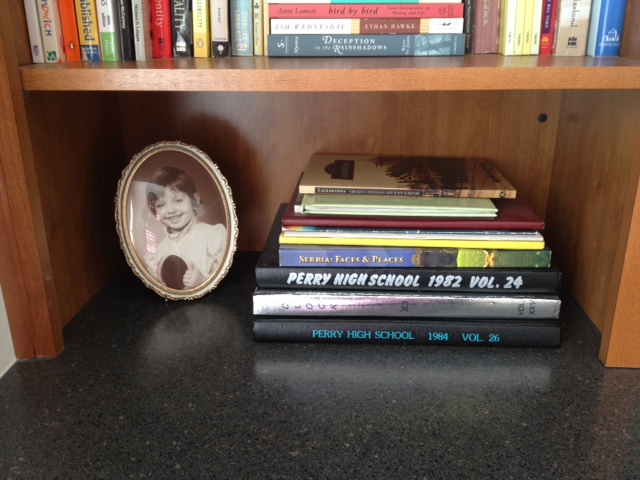
A pic of my boy when he was a baby amongst all of my favorite books…

office 7

And one of my baby girl who’s not such a baby anymore…
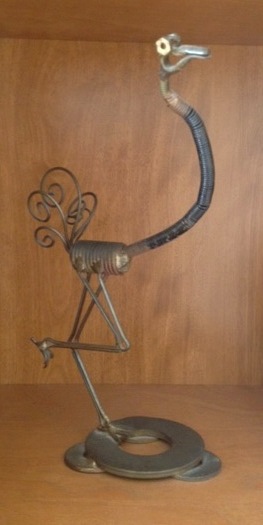
office 9

More whimsy…

office 8

An ostrich created by my late uncle who was an iron worker by trade, and clearly an artist by avocation…

office 10

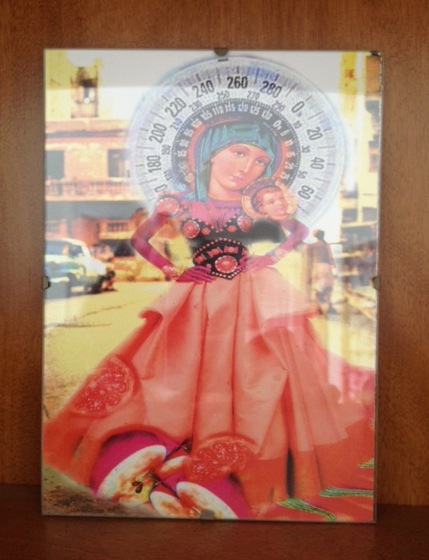
And a print by artist Janice Taylor over at Our Lady of Weight Loss…

office 11

And finally a vintage pic of me, mostly because I like the frame, but to remind me of who I was when I was a kid, a free and easy creative spirit…

office 5

Now the room is finally beginning to feel like it’s a reflection of the new me.


Showing off at Funky Junk Interiors.

tea time

15 January 2013 by Andrea Leave a Comment

Would you please pour me a cup of tea?

Tea pot 1

Oh wait. Something’s off. Looks like someone put Sharpies in the teapot.

Oh yeah. That was me. Because I love to use things for purposes other than their original intent. Like Sharpies in a funky Midsummer Night’s Dream teapot.

Clever, too, since I wasn’t serving up tea very often.

tea pot 2


It’s cute, don’t you think?


little things – bracelet edition

6 January 2013 by Andrea 2 Comments

This is a broken vintage bracelet…

bracelet1

This is a broken vintage bracelet used as art…

bracelet2

Pretty clever, huh?

As much as I would love to wear this bracelet, there was no fixing it, because the metal wasn’t strong enough to repair. But I still love the vibrant colors and beautiful design, so on the wall it went.

bracelet3

Works perfectly next to my print of First Kiss by Bouguereau, which I bought at Target a number of years back for $3.78. Can’t remember what I ate for breakfast today, but can remember how much I paid for something clearance 10 years ago! Go figure.

bracelet4

Yeah, it’s the little things, people…

Showing off this project at Funky Junk Interiors.

there’s a bird in my purse – tutorial

2 April 2011 by Andrea Leave a Comment

As you may know, I have a bird problem. So, in the event that you have a bird problem too, I thought I’d show you how to get a bird to nest in a vintage purse.

You will need the following supplies:

  • Vintage purse
  • Floral foam
  • Spanish moss
  • Floral pins (optional)
  • Decorative bird’s nest
  • Decorative bird’s eggs
  • Decorative bird
  • A couple of feathers
  • Hot glue gun

First order of business, find a vintage purse.  Check your local Goodwill, thrift store, or garage sale.

Then take some floral foam and cut it to fit inside the purse.

No need to use special tools to cut the foam.  Basic scissors will do.  And take note…cutting the foam is not a tidy job.  You will need to vacuum after this project.

Then insert the foam into the purse.

Next step is to cover the foam with the Spanish moss.

You can secure the moss with floral pins.

Next step is the nest.  A nest from a craft store may have wire prongs.  Position the nest where you want it in the purse and push the prongs through the moss and into the floral foam.  If the nest doesn’t have prongs, you can use floral pins to secure it.

When the nest is secure, hot glue several eggs in the nest.

Place your bird in the nest.  Your bird may have wires in the legs.  If so, you can use them to secure the bird in the floral foam.

However, if you’re placing your bird in the nest, the wire may be too flimsy to poke through the nest.  In that case, clip the wires and hot glue the bird in place in the nest or purse.

If your purse has a pocket, you can hot glue a couple of feathers in the pocket.  And voila!  A bird has nested in your purse!

I made this purse for my friend Claire, whose house I featured in a recent Road Trip.  Since Claire has lots of blue in her house – from sky blue to Tiffany blue – and plenty of red accents, I thought this would be a perfect gift for her (although I did ask her in advance if she was afraid of birds, since some people are, like my sister).  The good news is she loved it!

Showing off my bird problem at Funky Junk Interiors and Remodelaholic…

Funky Junk's Sat Nite Special

Remodelaholic

thanksgiving table

27 November 2010 by Andrea 4 Comments

This Thanksgiving I hosted the Thanksgiving dinner and had a total of 11 guests.  Not a huge production, but certainly more than my usual 3 person deal.

As always, I wanted to create a special tablescape, but using things that I have around the house.  Plus, this year, in addition to making it budget friendly, I wanted it to reflect the more austere times that we and many families are experiencing.  Not too sparse, but nothing extravagant either.  So, I went with a combination that I frequently rely on…shabby chic with a touch of whimsical & mod.

As promised, I used the same tablecloth as last year and the year before.  And no, I didn’t iron it…I’m not that kind of girl!  Besides, that’s part of the “shabby”!

I mixed 2 sets of dishes and tied the dinner and salad plates in fun ribbons that I’ve had since forever…

The ribbon takes care of the whimsical…

…and the mod…

The delicate blue glasses are vintage – they were my mom’s from before I was born.

The “centerpiece” is comprised of repurposed Classico pasta sauce jars, filled with a tealight and topped with ribbon, further contributing to the shabby chicness…

But best of all were the family we were blessed to have joining us at this table…

Here’s wishing all of you a warm and wonderful holiday season, filled with the love and laughter of family and friends!

easy art

21 November 2010 by Andrea 2 Comments

When I redecorated my teen daughter’s room almost 2 years ago, I placed 3 frames on one wall, because she really wanted to hang pictures of her & her friends.

Well, because after 2 years I got tired of waiting for her to add the pictures and looking at this…

…2 of the frames with the original picture that came with the frame and the 3rd frame on the floor collecting lots of dust and hair product overspray.

I finally took matters into my own hands and decided to remedy the problem, since it doesn’t look like the friend photos are happening any time soon.  So, I removed the picture frame girl photo and replaced with 3 different scrapbook papers that match the colors in her room, and that I already had on hand.

Here are the closeups…

Super cute & easy! And cheap, since I already had the paper on hand.  Plus, my daughter likes it!  Good stuff all the way around!

(If only I could show you pics of the rest of her cute room, but I’m afraid the Health Department will recognize it and condemn it!  Maybe after she goes off to college next fall…)

numbers & letters

14 November 2010 by Andrea Leave a Comment

Oh how I love numbers & letters!  So when Donna over at Funky Junk Interiors posted a link party about numbers, I was inspired to share my little obsession.

No matter the font or the size, I just love them!

Last year at the Country Living Fair in Columbus, Ohio, I found some fabulous wooden printer’s block numbers.  So I searched until I found my house numbers…

They look vintage, but I think they’re reproductions.  Either way, they’re so cute hanging all wonky next to my front door in the foyer. Follow the yellow arrow to find them next to the door…

(Someday soon I’ll paint the inside of my front door an interesting color.)

Then there’s the number 4 on my mantle…

It took some serious convincing to get my dad to believe that the number 4 had no real significance to me, but that I had it just because I liked it!

But it’s not just numbers I like, but letters too!

Like the letter “a” my sister bought for me last Christmas, since she knows about my numbers & letters thing.

I also like putting letters together to make words!  One of my favorite words…

Dream!  I like it so much I have it in more than one place…

Numbers & letters & words!  Love them all!

best. project. ever.

22 August 2010 by Andrea 1 Comment

Do you have a project that was just your favorite ever?  I’m sure most of us creative types do.

That’s the question that Donna over at Funky Junk Interiors was asking this weekend.

And even though this may not have been my best design ever, or my hippest project ever, it certainly stands out as my favorite.  And the one that helped sell my previous house.

The fish bathroom.

Yes, that’s right, the fish bathroom.  I painted the kids’ bathroom in a light sea foam green, then started painting all manner of sea creatures.

What I loved about this project were the flat, two-dimensional sea creatures, who were embellished with three-dimensional elements, like buttons for the suction cups on the legs of an octopus and false eyelashes on the mermaid.  Perfect for touching, and we all know little kids love to touch texture.

Heck, adults like to have some fishy fun, too!  When we decided to move from California to Ohio, our wonderful realtor told us to leave the fish bathroom as it was, because surely some parents with young kids would love it in our neighborhood of starter homes.  This was true, however, it was a middle-aged gentleman and his wife who bought our home, and one of the reasons was that he loved the fish bathroom!

So here goes…my favorite project ever…the fish bathroom…

There was a whale hiding behind the door…

Topped by an octopus with buttons for suction cups…

A mermaid & “real” jewels spilling out of a treasure chest…

A scary shark…

A swimming bear (inspired by a swimming bear on a pair of my then-toddler son’s pajamas)…

And two of his tub toys made into the mix as well…

And many other crazy undersea creatures, like leopard fish…

Plus big goldfish & little goldfish…

And even a sign outside the bathroom door…enter at your own risk!

Oh how I loved that project!  Best. project. ever.

In fact, I loved that entire house.  It was our home for 10 years, and a lot of life was lived there.  It was a special place, and I miss it.  Perhaps I’ll dig back through my photo archives and share more of the funky designs that lived there.

  • Email
  • Facebook
  • Instagram
  • Pinterest
  • Twitter

subscribe, baby!

Homage Style on Twitter
Homage Style on Facebook
Pin me! Homage Style on Pinterest

archives

WORK IN PROGRESS...

work in progress :: rose painting

FAVORITE PROJECTS...

the tornado lounge

another glorious chalkboard project

freshening up the family room

industrial chic curtains

angsty teen boy's room

almost instant art

vintage cowboy room

Copyright © 2025 · Beautiful Pro Theme on Genesis Framework · WordPress · Log in