homage style

when your home is your canvas

schedule a design consult
  • blog
  • services
    • styling & decorating
    • home staging
    • virtual home staging
  • featured
  • about
  • workshops
  • contact
  • subscribe

capiz!

6 June 2011 by Andrea Leave a Comment

Doesn’t it even sound fun?  Capiz!

I have been thinking about a capiz shell chandelier for my living room for a while now, but being broke and all, that hasn’t exactly made it to the top of my priorities list.

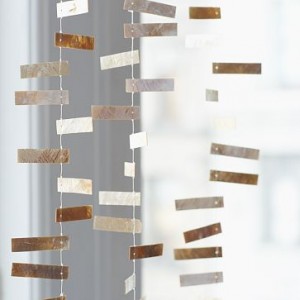
Until I saw these…

And thought, wouldn’t these look fabulous in this doorway, 3 on each side?

I wrote about this room and it’s lack of seating here.

So back to the capiz!

Wouldn’t they look fab?  They’re on sale for $14.99 per strand at West Elm.  $14.99 x 6 = no way do I have that much to spend on capiz!

($89.94 for the math types.  Not including sales tax and shipping.)

(And I really did consider not linking to them so all of my trusty readers don’t buy them up while I’m searching for spare change and the TV remote in my couch cushions.  But I’m not mean like that.  If I can’t have them, someone should!)

So I decided to use the amazing powers of my resale license to search the internets for capiz! wholesalers, because I’m certain that the entire strand cost about $0.03 wholesale.  Now that was quite an experience. I was astounded by the variety of craptastic stuff made with capiz!  Just google “wholesale capiz shells rectangular”.  In fact, let me google that for you.

While you can buy everything from a capiz! tissue box cover to a capiz! toilet seat, I could not find the rectangular shells I was looking for.  Apparently West Elm commissioned those directly from Mother Nature herself.

Well, we’ll see what happens. Maybe I’ll hit the lotto and feel OK about spending almost 100 smackeroos on sea shells.

Or I could listen to my friend Claire, who says, “Go for the luxuries in life!   The necessities take care of themselves.”  Not the soundest financial advice I’ve ever received, but it sure is the most fun!

cleaning mania

22 May 2011 by Andrea Leave a Comment

I’ve been M.I.A. lately.  Lots going on here.  Super busy at work, plus this week my daughter graduates from high school.  So there’s a party next weekend, which means that I’ve been trying to clean 5 years worth of dirt & grime in just one short weekend.

You see, I’m not the world’s most obsessive compulsively clean individual, so then I’m stuck with cleaning mania before I have an event.

Hence my blogging absence.

Every time I do this, I swear that next time I won’t let things get away from me, yet somehow, they always seem to.  Oh well.

So I’ve spent the weekend with my trusty Oreck and Magic Eraser.

Now in general I’d say that I have no business giving cleaning tips, however, if you’re a cleaning procrastinator like me, you’ll love this one.

Method Wood for Good Wipes.

These bad boys do the trick, even if said trick should have occurred at least a year ago!

They’re moist, they clean, shine, and condition wood products, plus they were less expensive than Murphy’s Oil Soap wipes.  And I like them better.

And they’re compostable.  Now in the spirit of full disclosure, I haven’t been composting them yet, but in my Martha Stewartesque fantasies, I will someday be composting.

Now that I’ve procrastinated with a blog post, I really must get back to my cleaning & grad party preparations.

touch of mod – dog bowl edition

8 May 2011 by Andrea Leave a Comment

Recently, I’ve been trying to add a touch of mod throughout the house, to give a little kick in the pants to my usual vintage pottery barn-esque style.

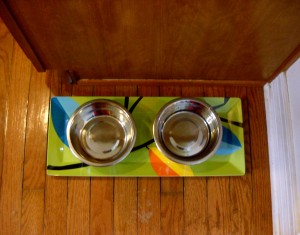
In the spirit of everything in the house can be decorative, I’ve even added a touch of mod to the dogs’ food and water bowls.

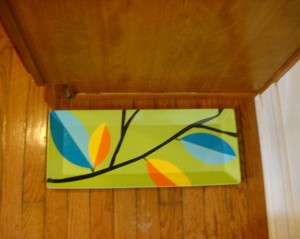
I found this fun & funky leaf pattern platter on clearance at Target and thought it would be perfect for holding the dog bowls.

Don’t mind my dirty floors.  That’s my contribution to the keeping it real department.

Here’s the platter with the dog bowls on it…

Just proving that you can add a touch of mod just about anywhere in your home!

i cheated

4 May 2011 by Andrea Leave a Comment

I cannot tell a lie.

I cheated.

What did I do?

I hired someone to paint my bathroom.

True confessions of a DIYer.

Facts are that there was a teenage hair dye explosion a while back and there’s a graduation party coming up in about 3 weeks, and I couldn’t live with the stress that someone might want to venture to the upstairs bathroom for a little privacy.

Here’s the good news…he did a fabulous job at a price that was budget-friendly…so much so that I’ll probably cheat again.

Pictures coming soon.  I’ll even keep it real and show before pics of the hair dye explosion and the gas station level of cleanliness in the bathroom.

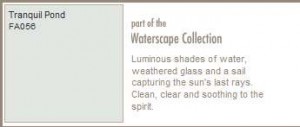
In the meantime, think spa-like.  Think Fresh Aire.  Think tranquil pond.

i didn’t win, but…

4 May 2011 by Andrea Leave a Comment

…I’m gonna pretend to be a good sport.

So I didn’t win a room makeover from Mandi’s Epic Room Makeover Giveaway over at Vintage Revivals, which means I’m on the hook for updating my living room myself, which is fine, I suppose [fake passive aggressive sigh].

There are some pretty good contenders for the prize though.  If you’d care to place a cash wager, I’m betting this one will win…

#4 Melissa Ruiz (Entry #101)
clip_image002

Giving all new meaning to the term “blank canvas”!

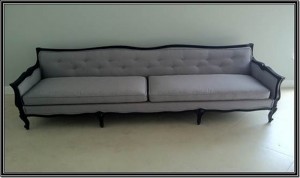
And she has some seriously fabulous furniture to work with like this couch…

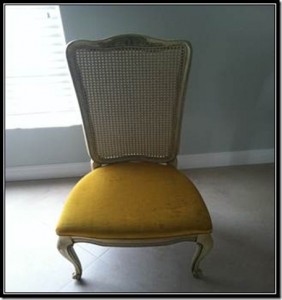
and this chair…

I’m sure Mandi can do something fabulous with this blank canvas.  Wonder if she needs an assistant?

vote for me!

2 May 2011 by Andrea Leave a Comment

Hello blog friends!

I entered my living room in a makeover contest over at Vintage Revivals & now it’s time to vote. Would you please take a minute & vote for me?

My living room is #110 – My ex-husband got custody of my living room.

Just scroll down toward the bottom of the page & click on the yellow star next to post #110.

Thanks so much!

the living room that was…

30 April 2011 by Andrea 8 Comments

The living room that was is no longer.

It used to have a comfy couch and was a quiet getaway for when the kids were getting rowdy in the family room or just watching the same episode of SpongeBob LOUD for the 47th time.

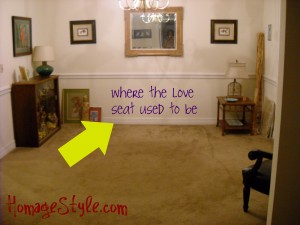
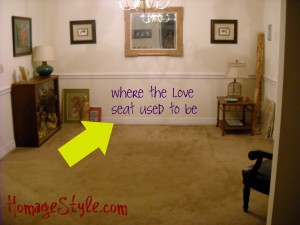
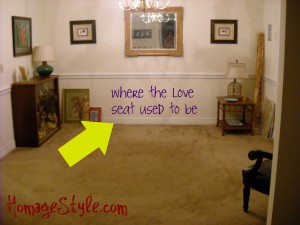
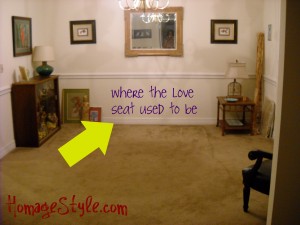
But my ex-husband got custody of the couch, so now that once peaceful hideaway looks like this…

Ok, so the couch was only a love seat, but still, this room is EMPTY!  Which is why when I heard about Mandi’s Epic Room Makeover Giveaway over at Vintage Revivals, I got super-excited!

Not like I can’t do these things myself, but this room needs so much – couch, coffee table, paint, curtains, style, and with my $0 budget, a kid going to college in the fall, and very little time after my full-time job, I figured that this project could actually get finished with a little help from Mandi!

More inspiration for why I need help with this project…

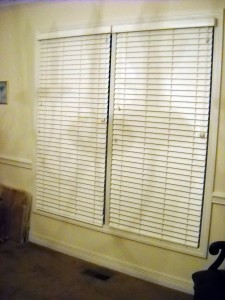
The walls are white & bland, and definitely yearning for color. White blinds make the windows look barren.  Curtains are called for…

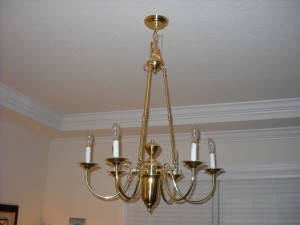
Did you notice the scary shadows that are vaguely reminiscent of an octopus?  That’s from this scary monster…

Frightening!  It is, indeed, a hideous beast! I was thinking that maybe Mandi could do something fabulous like this…

…but then I grew up and came to the realization that not even Mandi could salvage that hideous chandelier from its ultimate ugliness.  So maybe she’ll have another fabulous idea.

The originally scheduled programming for this room was as a dining room, but since I don’t “dine,” I figured that the space would be more useful as a living room.

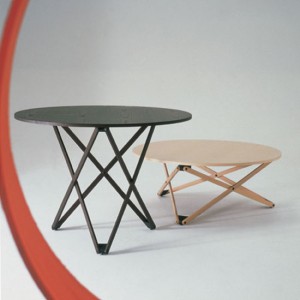
I did go through a brief period when I thought that it could be a combo dining-living room, but that would have required the purchase of this bad boy, which was slightly out of my price range.  (Budget = $0, table = $1899 + shipping.)

Since my fantasies have been dashed by the far-reaching powers of my [nonexistent] budget, I *hope* I can win this wonderful contest and have Mandi come play in my living room.  Between the two of us, imagine the damage we can do!

It’s not a total loss.  There are some things to work with that may be a wee bit inspiring for the likes of Mandi.

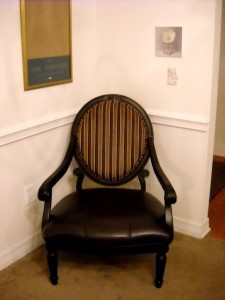
There is still a chair, although you can’t curl up on it and take a Saturday afternoon nap…

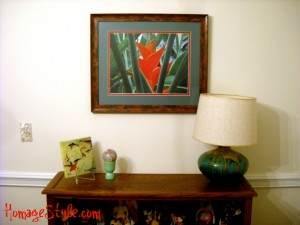
And this fabulous table that I scored at a resale shop, with my favorite lamp in the entire free world…a bird on a swing in a birdcage.  And you know I have a bird problem.  Guess I have a birdcage issue too.

Then there’s this vignette, with the bird of paradise painting that I did.  Yeah, I’m bragging!

And these odds and ends, an eclectic grouping including a Buddha statue and the needlepoint of a girl that my grandmother did for me when I was a little because she said it reminded her of me.  Yeah, eclectic.

Just imagine what Mandi could do with her awesomeness and my room!  And then we could both blog about it and it would be fantabulous!

So that being said, I’d love it if you vote for me.  And in the event that you’re not feeling sorry for me having to look at a bland room every day with a frightful chandelier that I’m afraid will somehow come alive at night and strangle me with its brass tentacles, please note that this room is the first thing that people see when they come in the front door.  This.

And if that’s not enough to convince any rational person that I need the Mandi makeover, there’s this.  Just think of how awful the custody battle was for that couch.

Yeah, I did go that far.

Thanks! You’re the best.

beach in a jar

24 April 2011 by Andrea Leave a Comment

A friend of mine bought her first place a couple of months ago, and I recently got the grand tour.

I wanted to give her a little housewarming gift, but I wanted it to be meaningful to her. She has a beachy/cottagey style, and has said that she wants her home to be peaceful and relaxing, just like she’s on vacation.  At the beach.

I thought, why not put the beach in a jar?

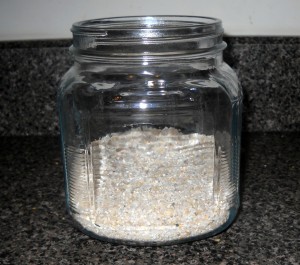
So, I purchased a glass jar with a lid, some vase filler – also known as sand – and I had a bag of seashells in my basement curing, waiting for just the right craft project.

First I filled the bottom of the jar with sand…

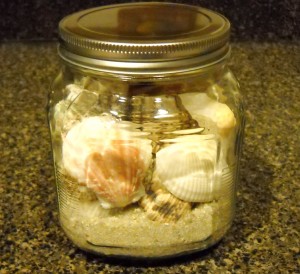
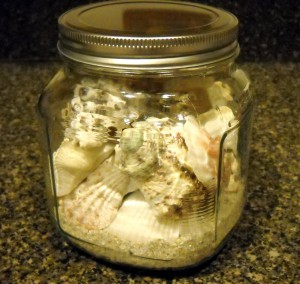
…then layered in the seashells, and voila!

A quick and easy (and inexpensive, yet meaningful) housewarming gift that will look great on a shelf.

(Hope my friend doesn’t read this post before I give her the housewarming gift!)

there’s a bird in my purse – tutorial

2 April 2011 by Andrea Leave a Comment

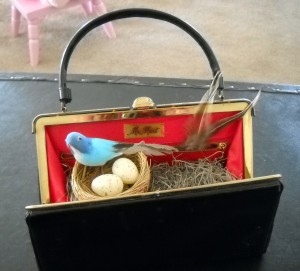
As you may know, I have a bird problem. So, in the event that you have a bird problem too, I thought I’d show you how to get a bird to nest in a vintage purse.

You will need the following supplies:

  • Vintage purse
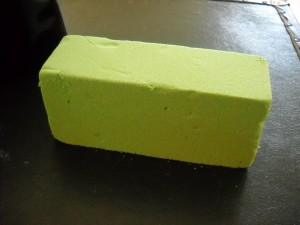
  • Floral foam
  • Spanish moss
  • Floral pins (optional)
  • Decorative bird’s nest
  • Decorative bird’s eggs
  • Decorative bird
  • A couple of feathers
  • Hot glue gun

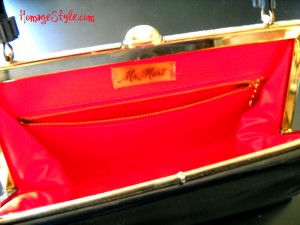
First order of business, find a vintage purse.  Check your local Goodwill, thrift store, or garage sale.

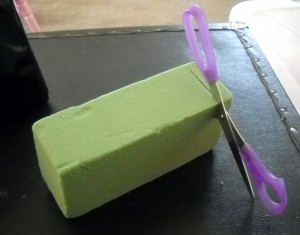
Then take some floral foam and cut it to fit inside the purse.

No need to use special tools to cut the foam.  Basic scissors will do.  And take note…cutting the foam is not a tidy job.  You will need to vacuum after this project.

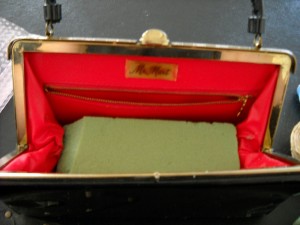
Then insert the foam into the purse.

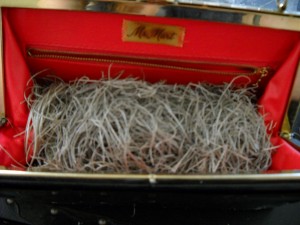
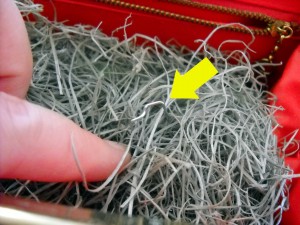
Next step is to cover the foam with the Spanish moss.

You can secure the moss with floral pins.

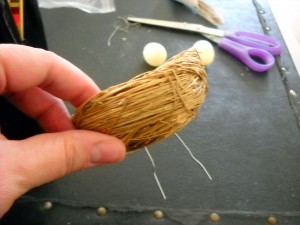
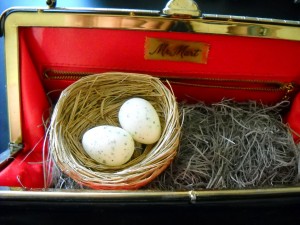
Next step is the nest.  A nest from a craft store may have wire prongs.  Position the nest where you want it in the purse and push the prongs through the moss and into the floral foam.  If the nest doesn’t have prongs, you can use floral pins to secure it.

When the nest is secure, hot glue several eggs in the nest.

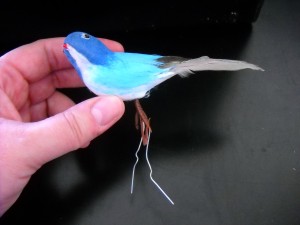
Place your bird in the nest.  Your bird may have wires in the legs.  If so, you can use them to secure the bird in the floral foam.

However, if you’re placing your bird in the nest, the wire may be too flimsy to poke through the nest.  In that case, clip the wires and hot glue the bird in place in the nest or purse.

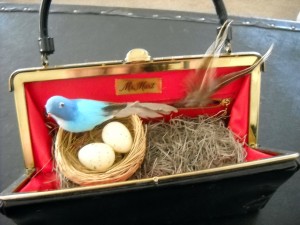
If your purse has a pocket, you can hot glue a couple of feathers in the pocket.  And voila!  A bird has nested in your purse!

I made this purse for my friend Claire, whose house I featured in a recent Road Trip.  Since Claire has lots of blue in her house – from sky blue to Tiffany blue – and plenty of red accents, I thought this would be a perfect gift for her (although I did ask her in advance if she was afraid of birds, since some people are, like my sister).  The good news is she loved it!

Showing off my bird problem at Funky Junk Interiors and Remodelaholic…

Funky Junk's Sat Nite Special

Remodelaholic

my office studio space

27 March 2011 by Andrea 6 Comments

One of my house goals is to clean up my office.  While I haven’t quite finished that project yet, I can show you some of that room, which is upstairs in a loft that overlooks our family room.  I call it the eagle’s nest, because I can sit up there and hear just about everything that’s going on in the house.  Perfect for spying on the kids.

Here’s a sneak peek of the cleaner parts of my office/art studio space.

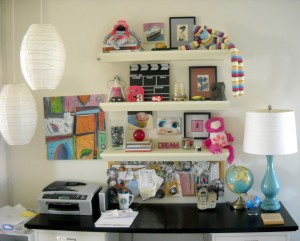
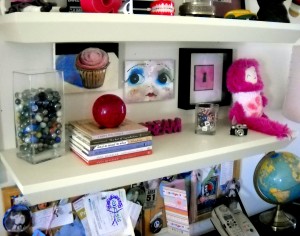
My desk and the shelves above it…

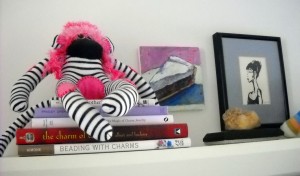
Let’s start at the top…the top shelf, that is.

The middle shelf…

And the bottom shelf…

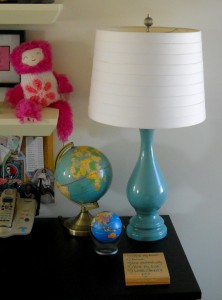
Globes and one of my favorite lamps on the desk.

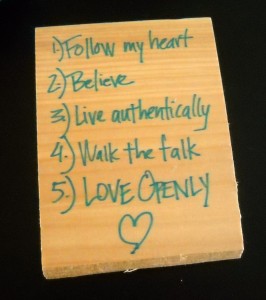
Here’s a close up of the piece of wood…it’s a piece of wood that my son broke in tae kwon do.  I wrote some of the things that are important to me on it, and it sits on my desk as a daily reminder to keep it real in my life.

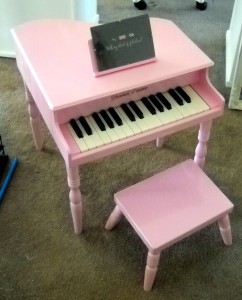
Moving on in the room…my pink piano. Oh yes I do have a pink kiddie piano!

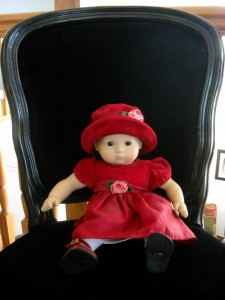
A gorgeous black velvet covered chair where my American Girl Bitty Baby doll sits.  My cat sits there a lot too.  Had to do a lot of lint rollering before this pic.

Some day I hope to have a dining room full of these fabulous chairs.

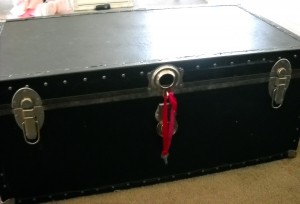
There is a couch that is not pictured here due to the aforementioned mess problem.  I use this trunk as a coffee table for the trunk and for extra storage.

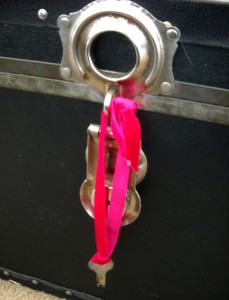
And because it would be quickly lost if I didn’t, I keep the key to the trunk on a hot pink velvet ribbon. Functional, plus it adds a great pop of color.

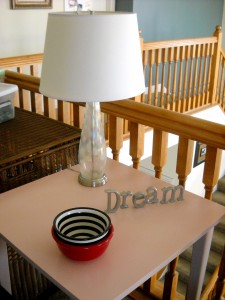
And let’s not forget my pink table.

This table, which we got from Ikea a million years ago, used to be ugly mustard yellow.  And it lived that way until finally I spray painted it pink.  Quite the improvement.

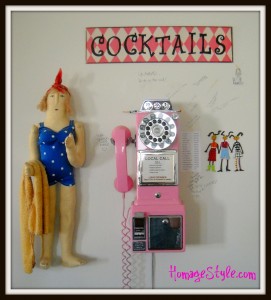
At the edge of the room is the pink phone and the writing on the wall…

That’s all for now.  Still missing from the pics are the couch, front desk (the one shown is the back desk, sort of like a credenza), and the art table.  Maybe I’ll clean up and add those pics.  Or who knows, I could let it cure for another couple of months or years, like I do with many of my projects!

Showing off my office/art studio at Whisperwood Cottage…

« Previous Page
Next Page »
  • Email
  • Facebook
  • Instagram
  • Pinterest
  • Twitter

subscribe, baby!

Homage Style on Twitter
Homage Style on Facebook
Pin me! Homage Style on Pinterest

archives

WORK IN PROGRESS...

work in progress :: rose painting

FAVORITE PROJECTS...

the tornado lounge

another glorious chalkboard project

freshening up the family room

industrial chic curtains

angsty teen boy's room

almost instant art

vintage cowboy room

Copyright © 2025 · Beautiful Pro Theme on Genesis Framework · WordPress · Log in