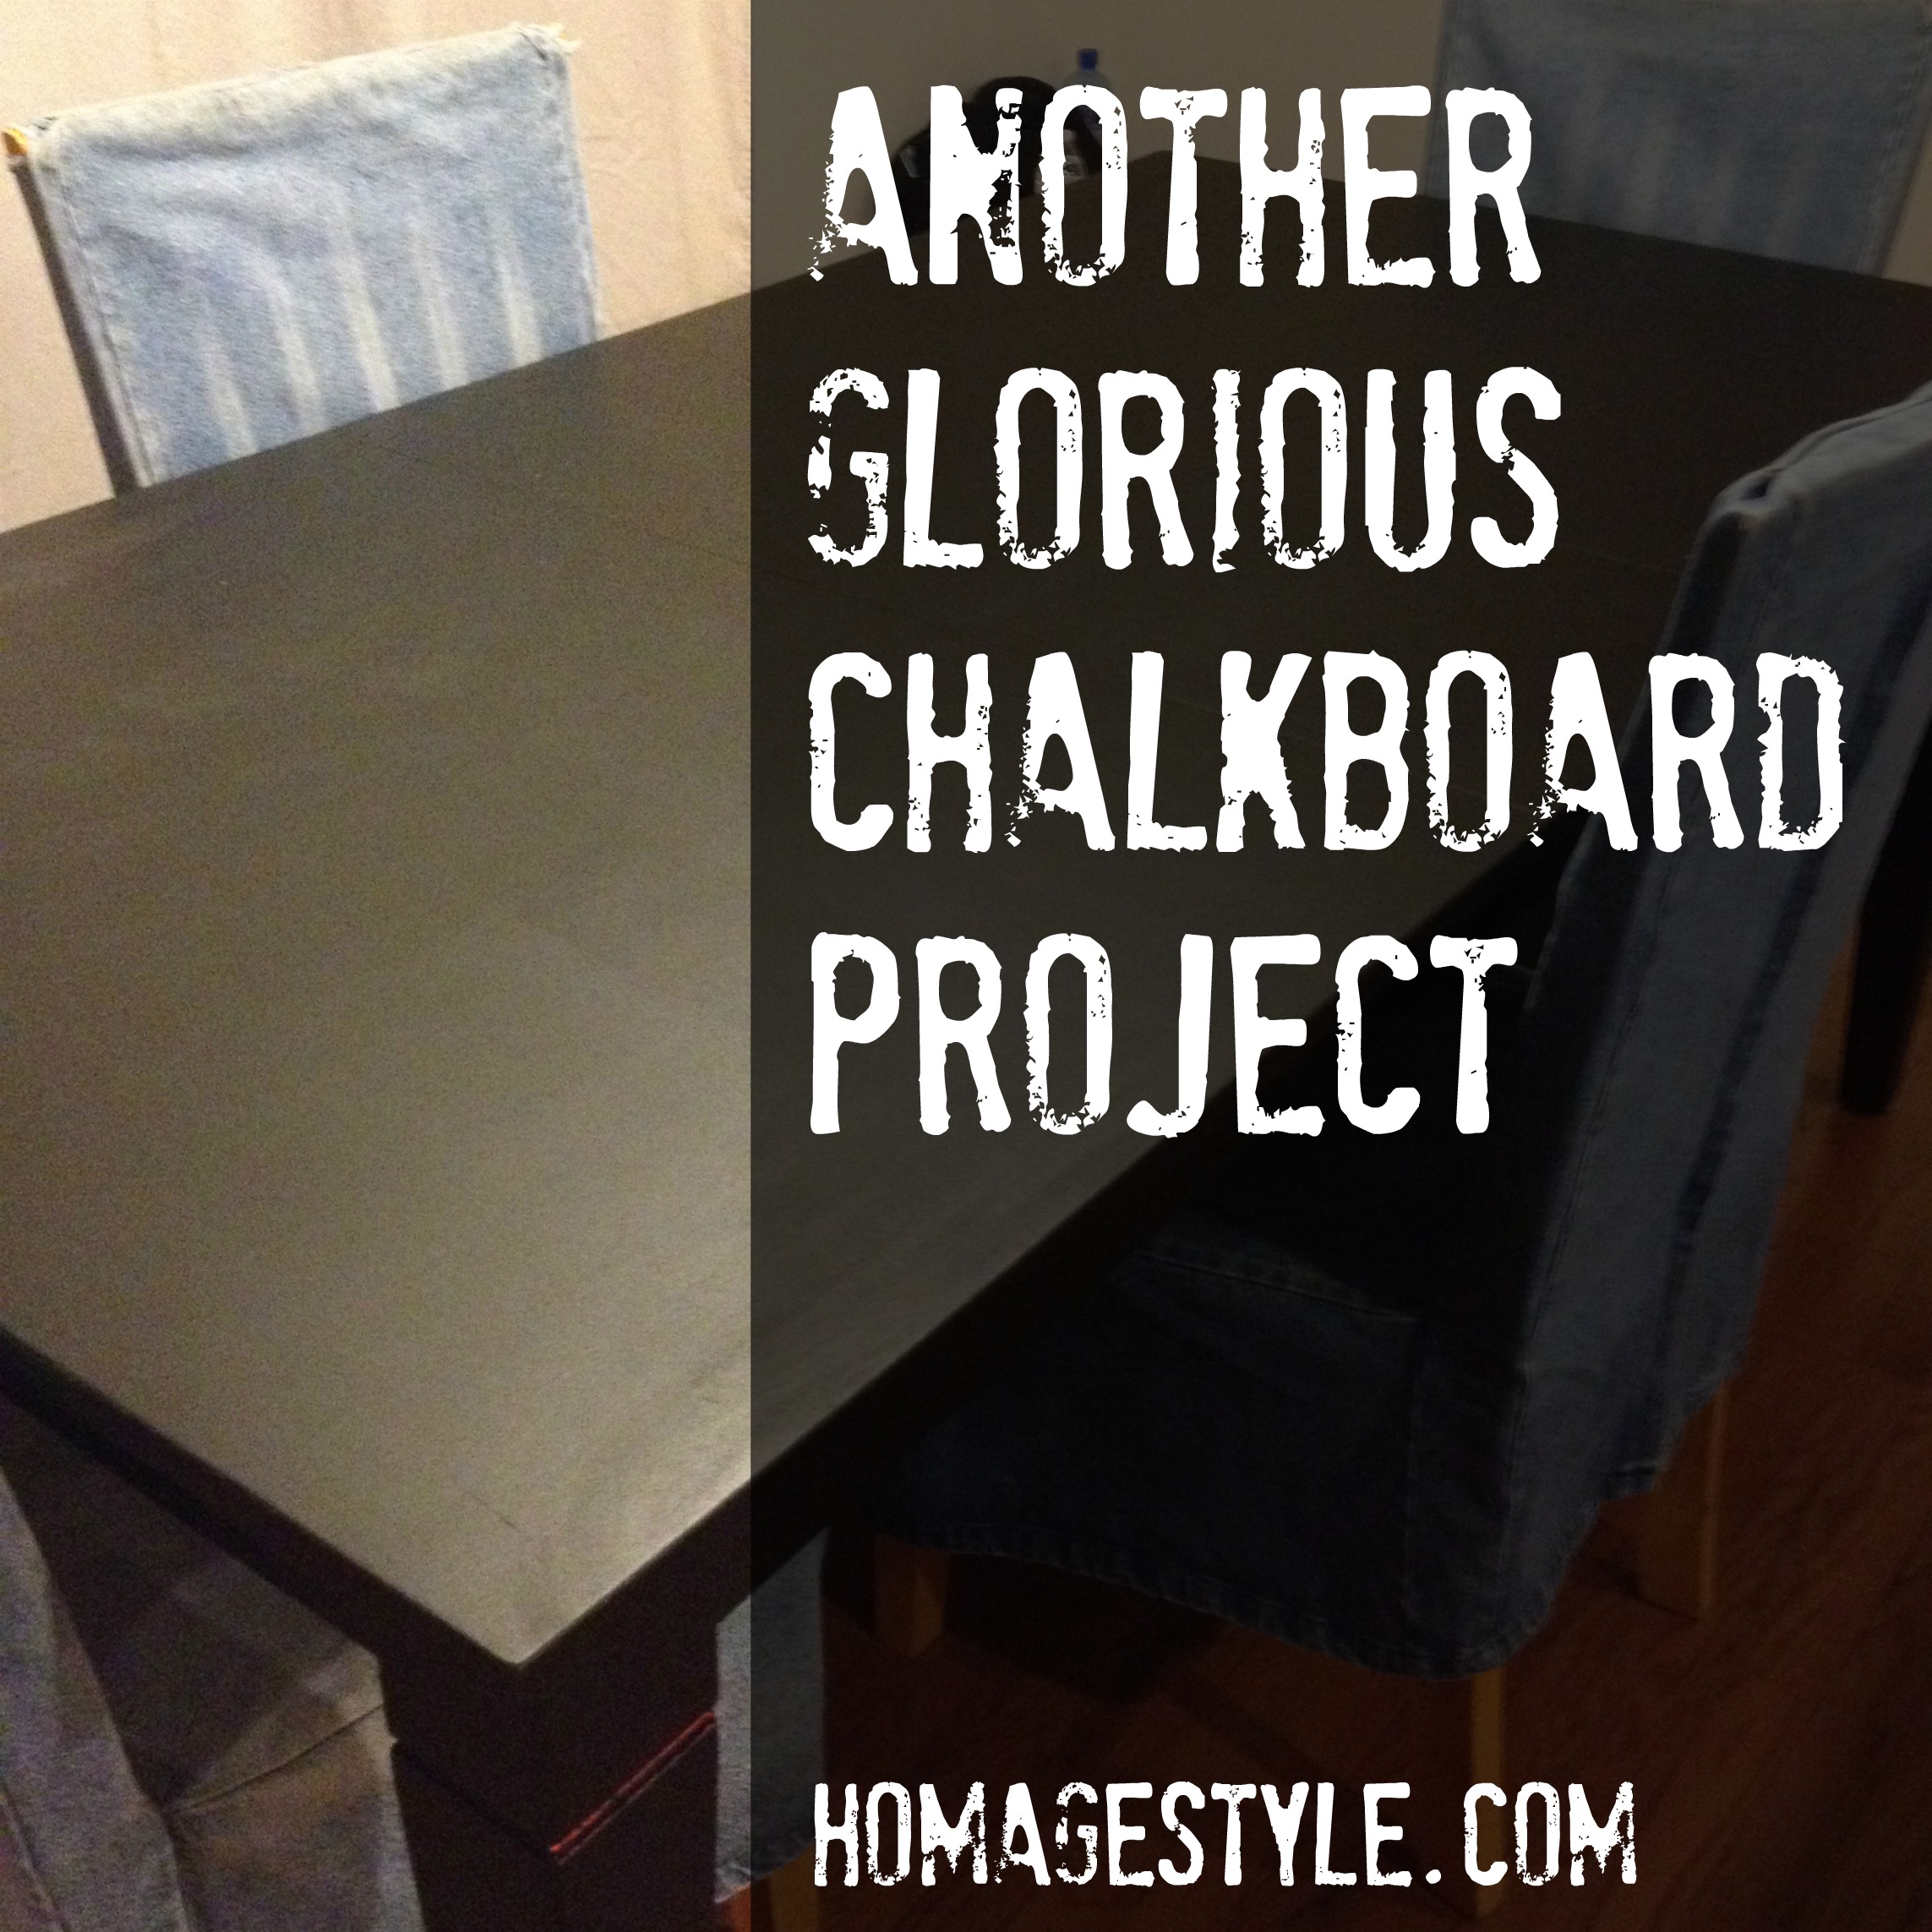
homage style

when your home is your canvas

schedule a design consult
  • blog
  • services
    • styling & decorating
    • home staging
    • virtual home staging
  • featured
  • about
  • workshops
  • contact
  • subscribe

another glorious chalkboard project

31 December 2014 by Andrea Leave a Comment

another glorious chalkboard projectRemember the 1990s?

I do, mostly because my kitchen table and chairs remind me of the 90s on a daily basis…

90s table
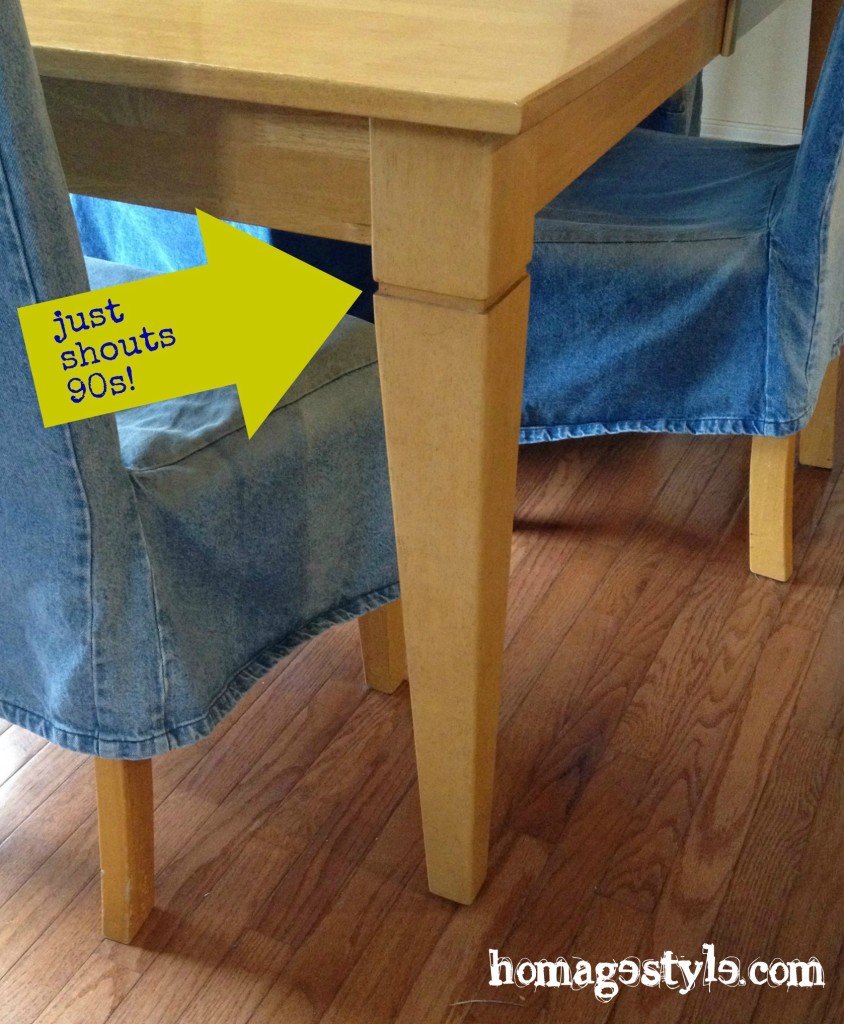
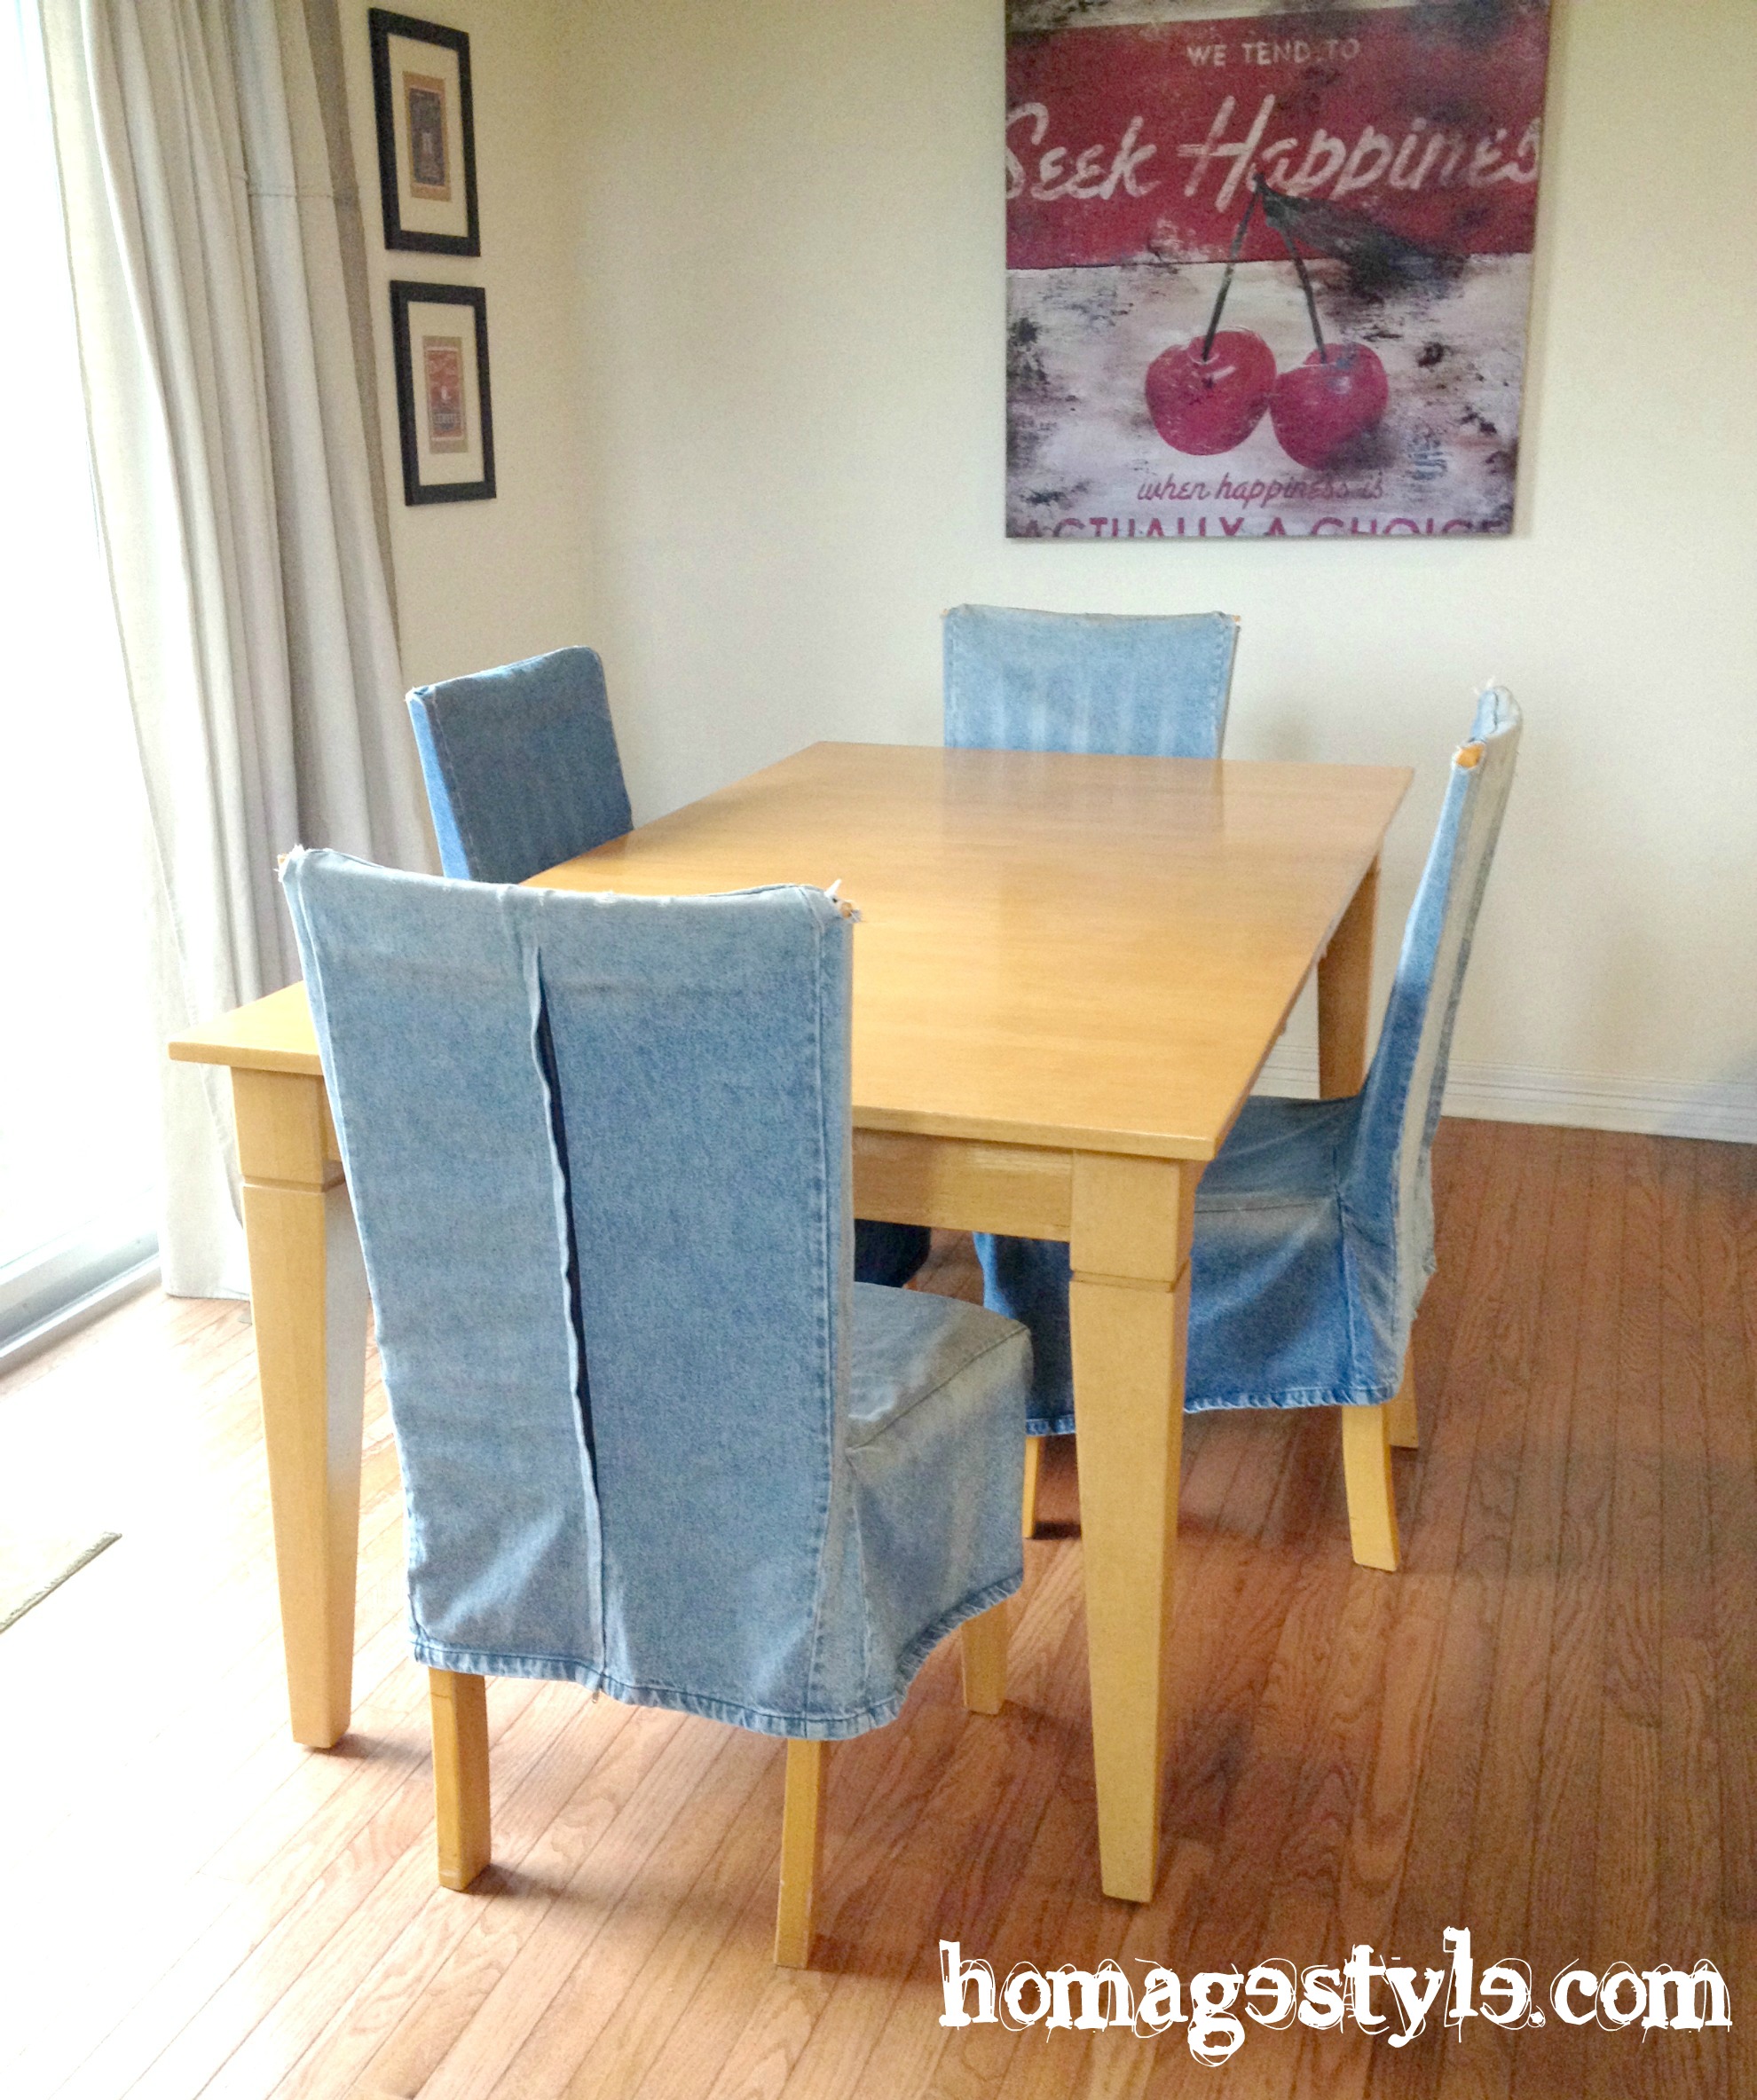
With the table legs being a full-on tribute to the 90s…

90s table closeup
But the 90s table is all I have and nowhere in my mostly non-existent budget is there a line item for a new kitchen table, so I had to get creative.

You know how I love chalkboard paint, right? It’s already kind of a theme in my kitchen, since I painted my kitchen cabinets with chalkboard paint and did a section of the wall in chalkboard too. Why stop there?

I decided to paint my kitchen table in chalkboard paint.

Of course the peanut gallery (ie, my kids) thought it was a terrible idea. And of course I could care less about their opinion on such matters because I had a vision! So I set about painting it with chalkboard paint.

I started out with the legs and underside. I used an angled brush to get into the corners, nooks, and crannies, but mostly used a small foam roller designed for painting cabinets to get the smoothest application.

After just the first coat things were looking a little scary. Like maybe my kids were right and I had made a GIANT mistake…

First coat madness

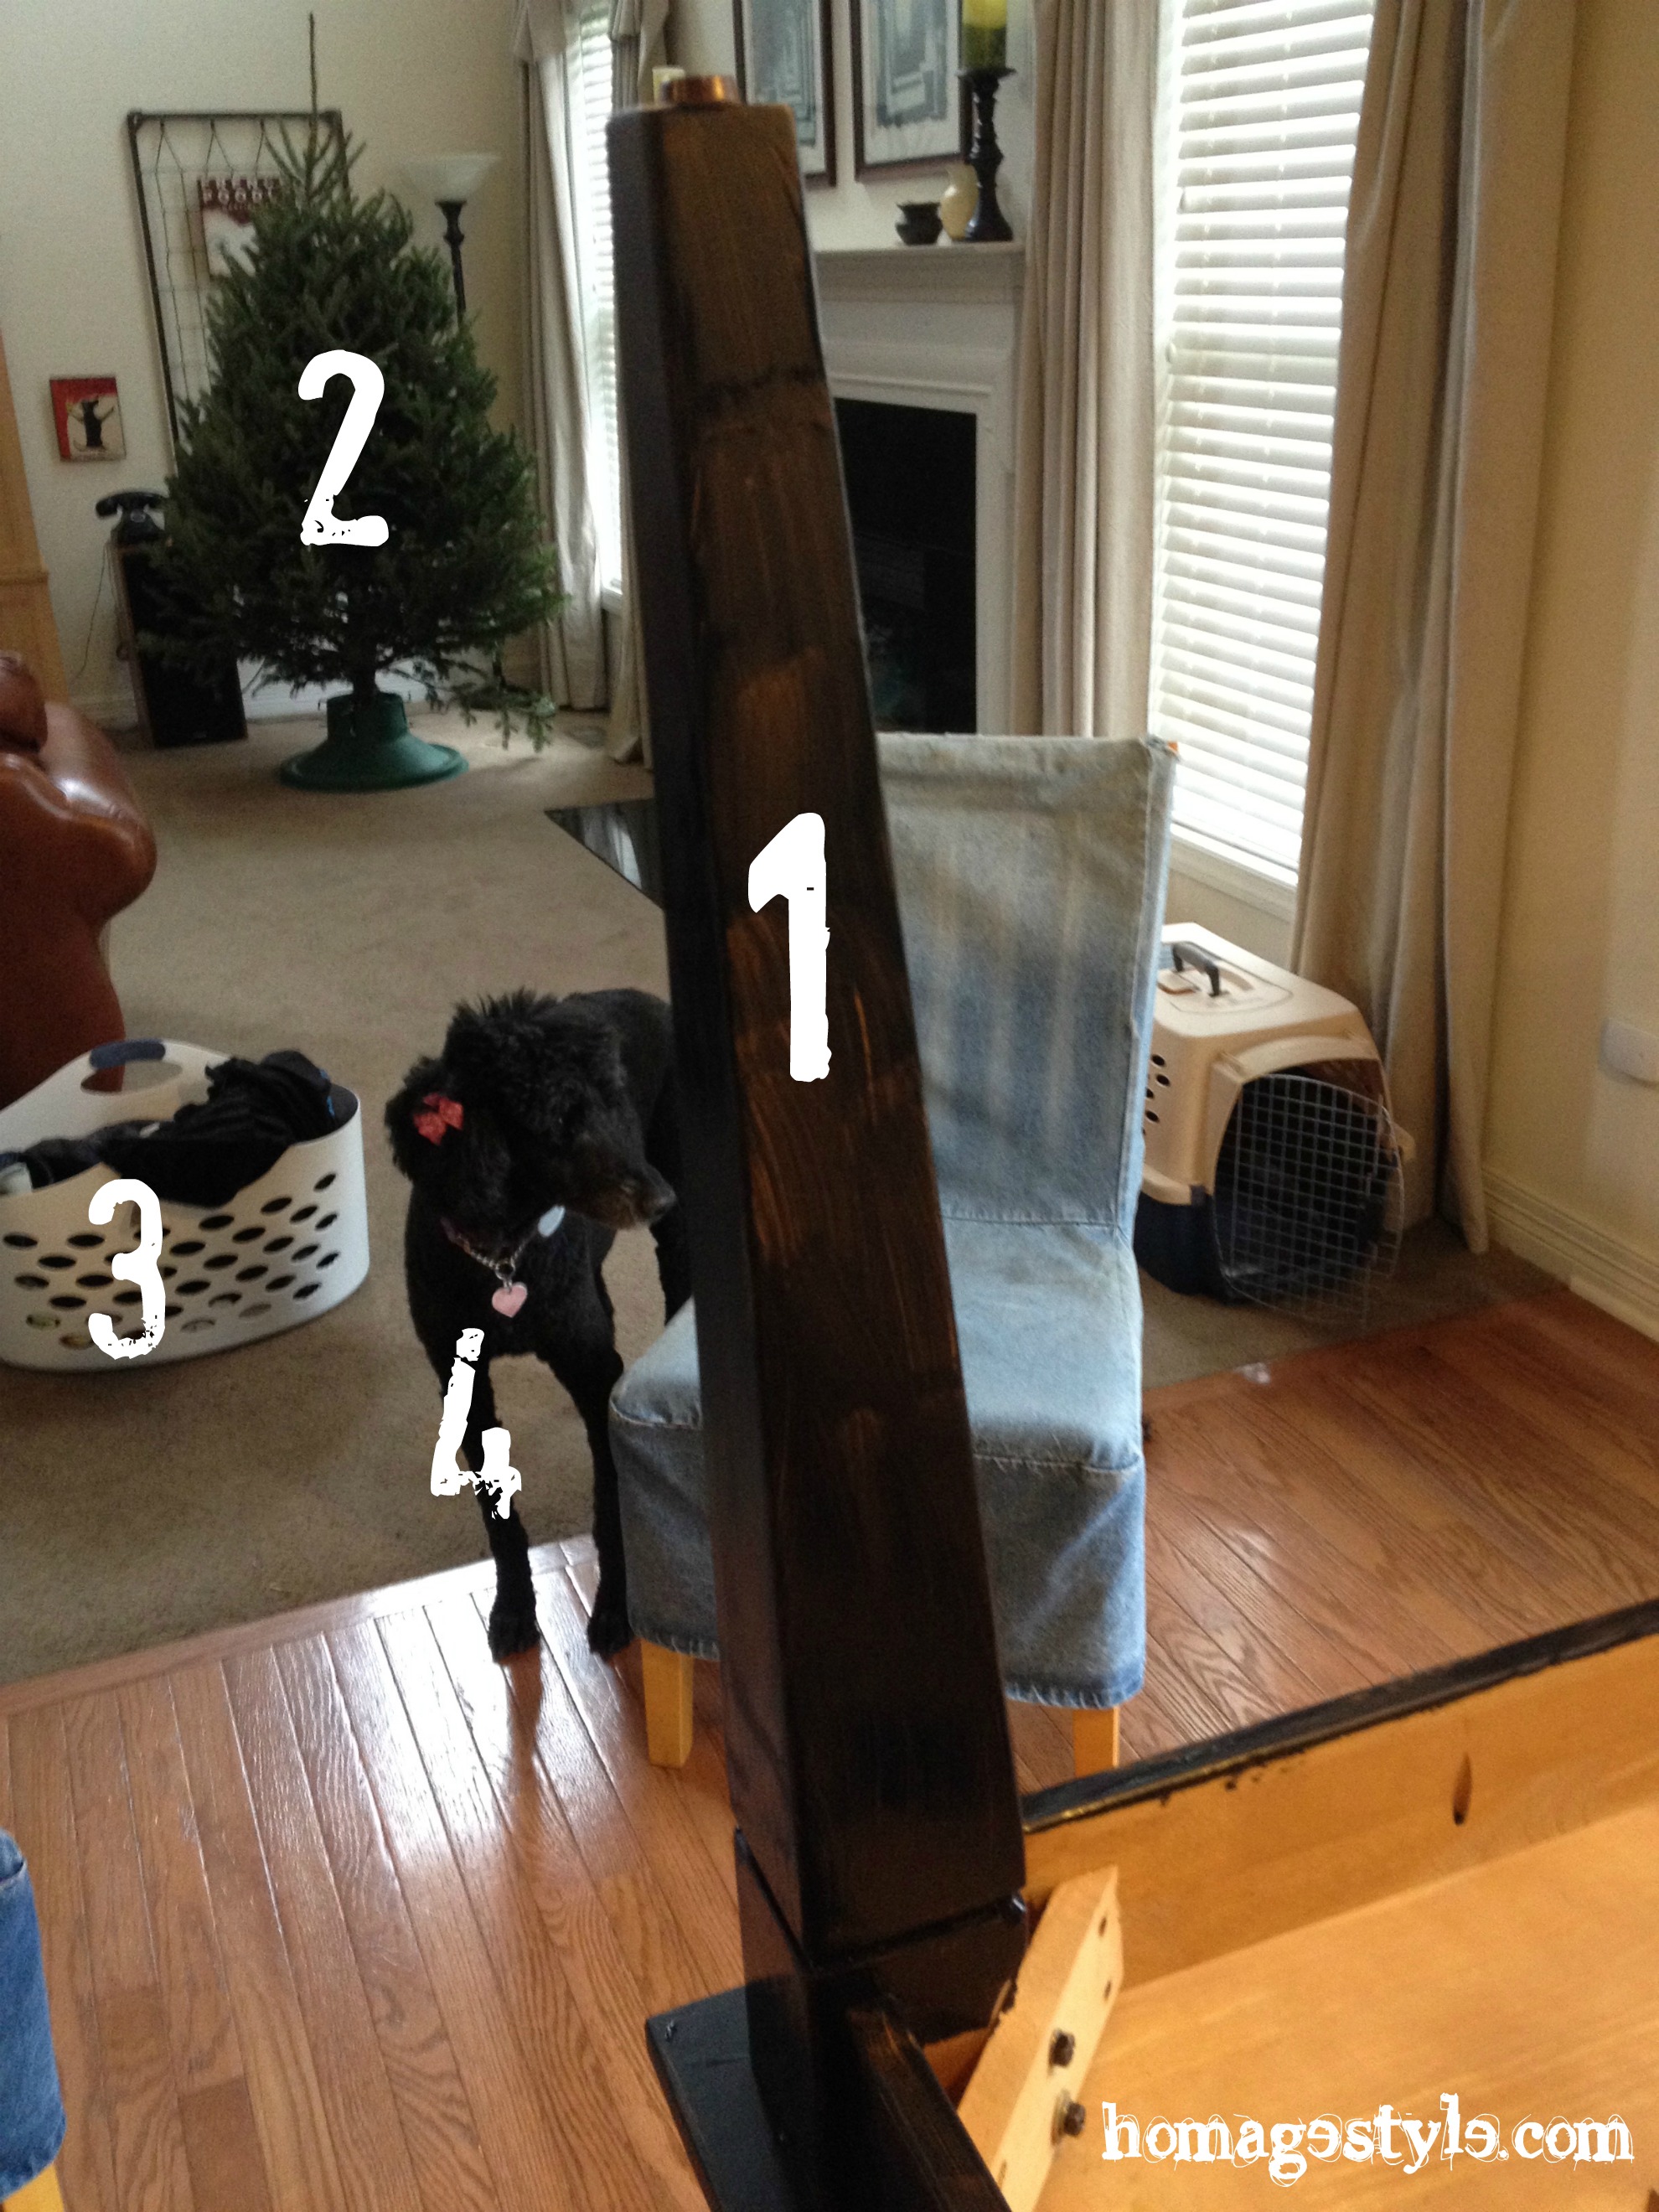
  1. Chalkboard paint not looking like it’s going to cover or stick to the surface. (No I didn’t prime or sand…this is me we’re talking about!)
  2. Christmas tree not yet decorated, despite it being 3 weekends before Christmas. Yes, in fact, I was procrastinating on my decorating by painting my kitchen table. What of it?
  3. My son’s laundry. Just keeping it real, people.
  4. Dog photobombing my picture like it’s her job. And yes, she does have bows in her hair.

With regard to #1, what could I do, other than press onward. So I did…

First coats of paint
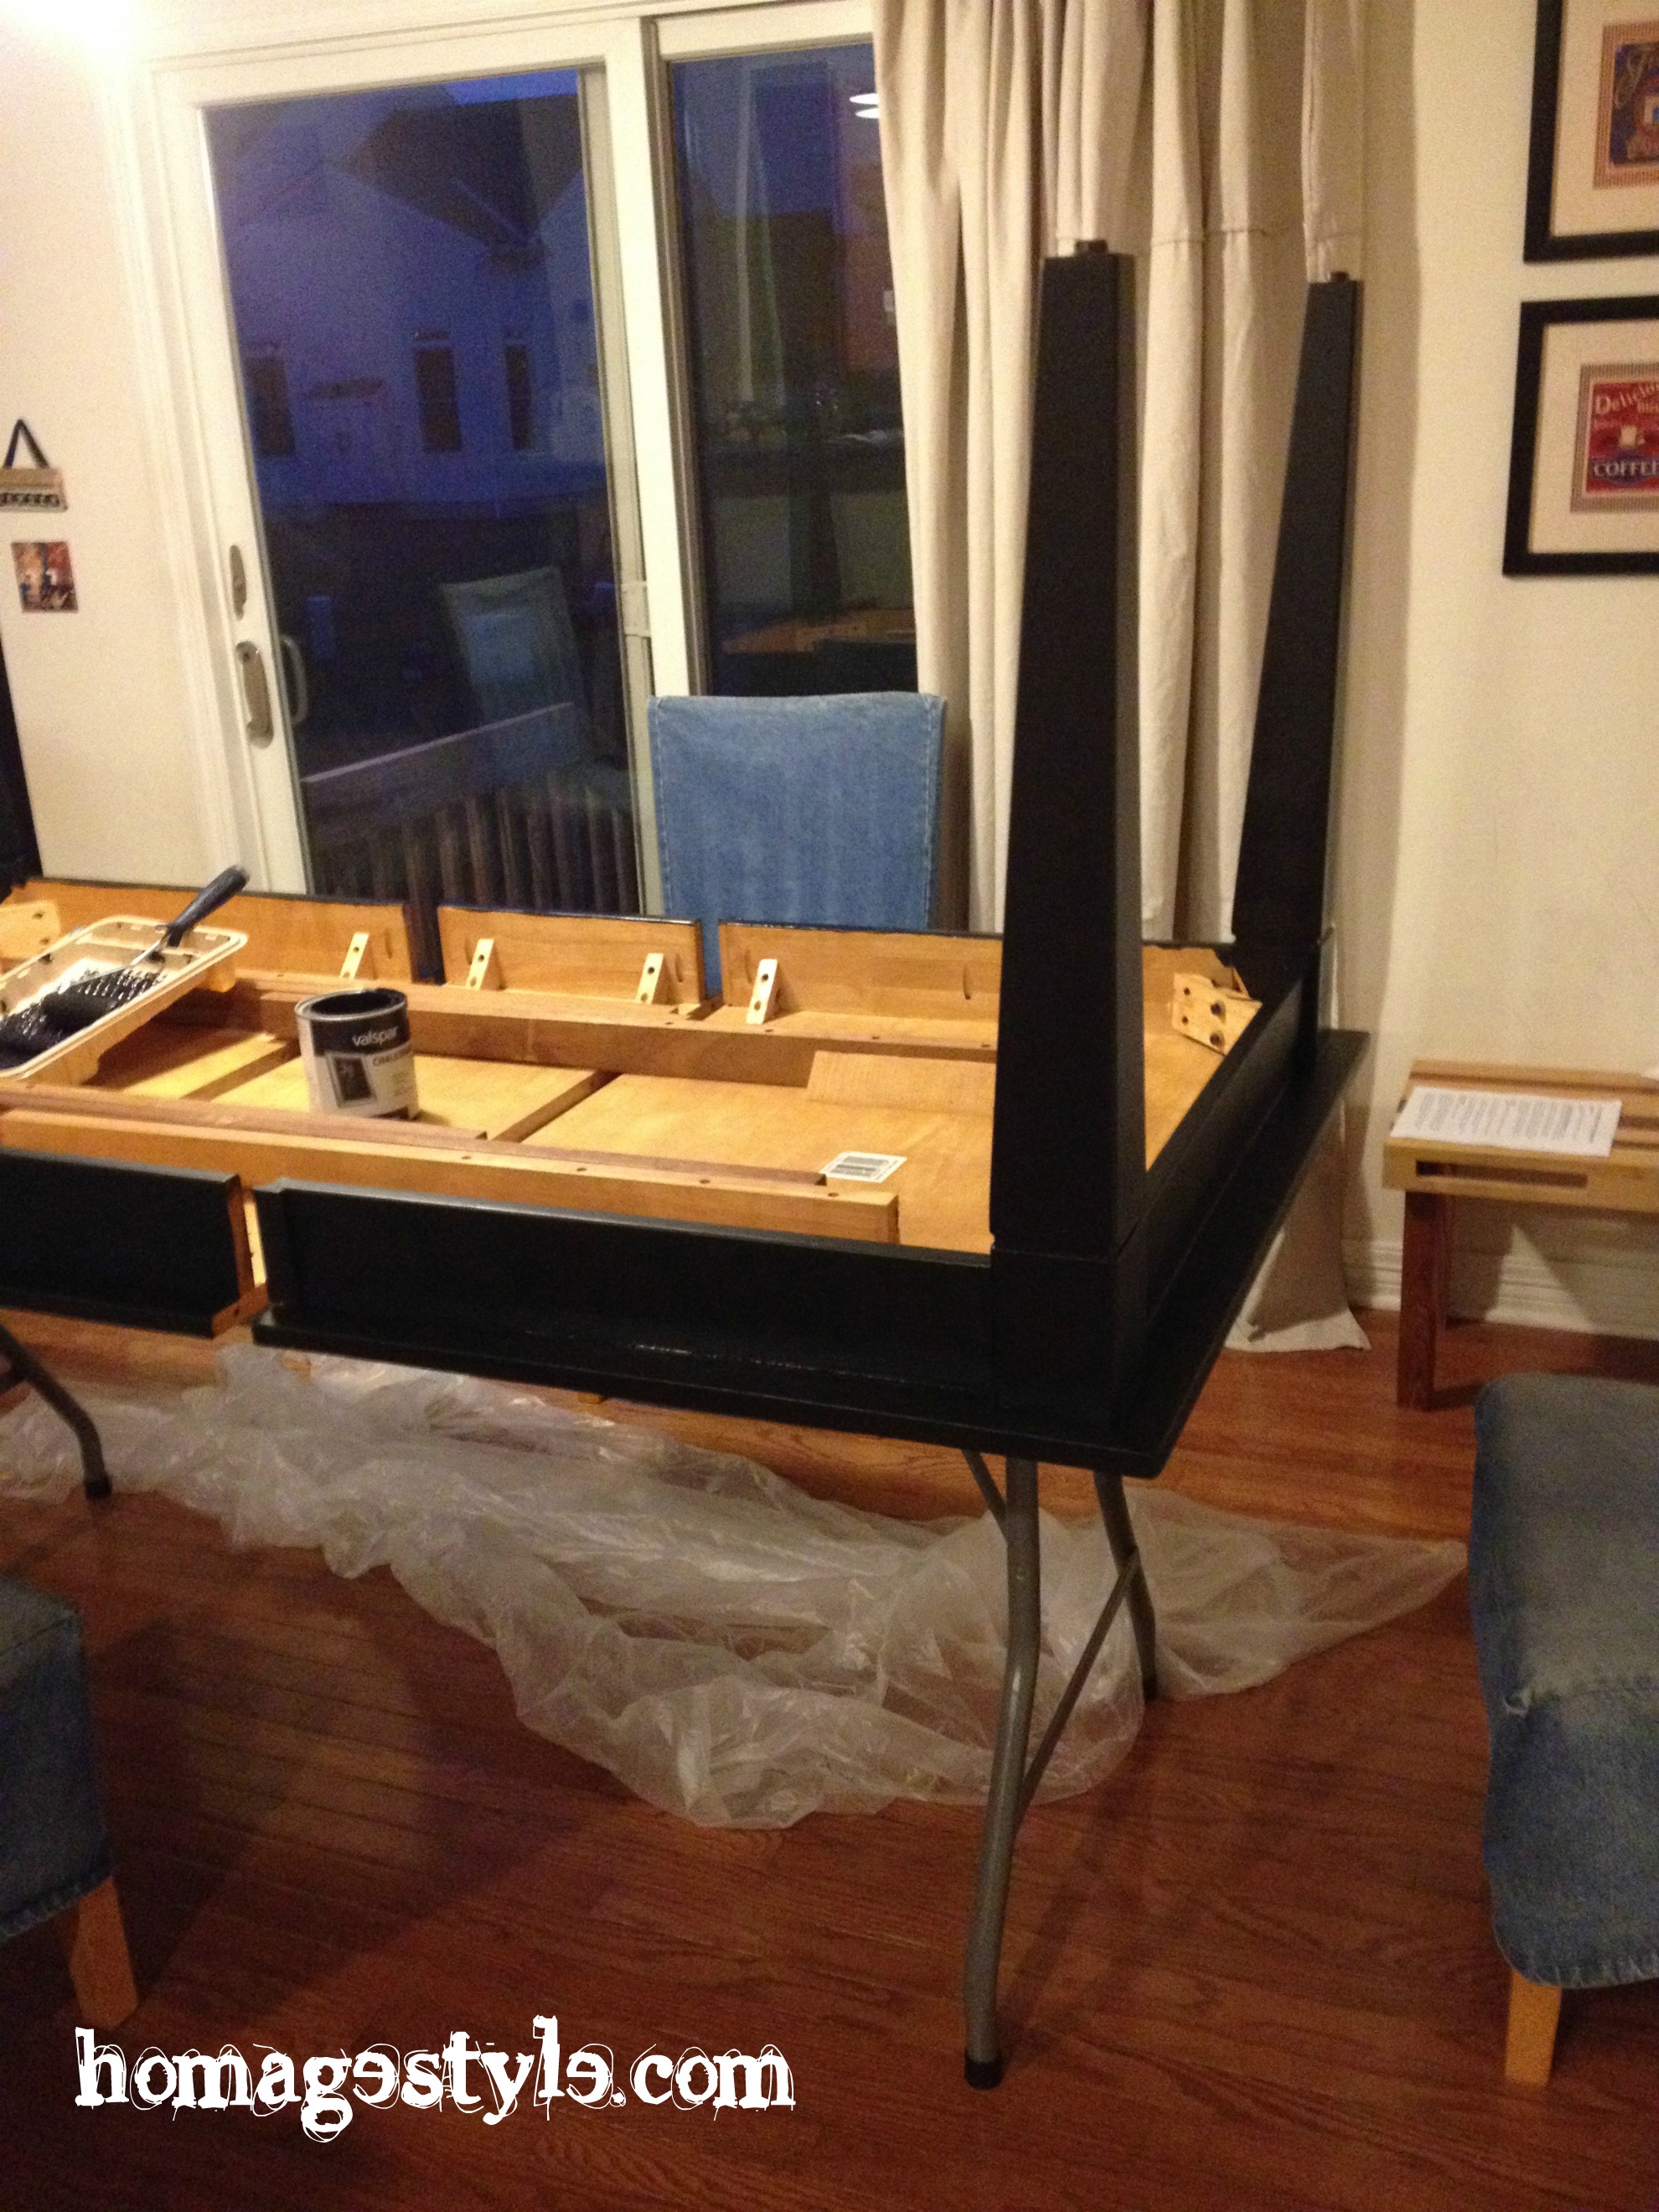
I painted 5 coats on the legs and sides of the table. Not too bad – only took a couple of hours. Then I let it dry and flipped the table over to paint the top. The top got 6 coats. Sounds like a lot of time and effort, but since it was such a small area (not a complete wall or room), the actual painting time didn’t take long. And while each coat was drying, I just went on about my business. You know, avoiding decorating for Christmas and whatnot. I started the project at 2pm and put the last coat on around 11pm.

Here it is, beginning to come together and not looking so scary…

Beginning to come together

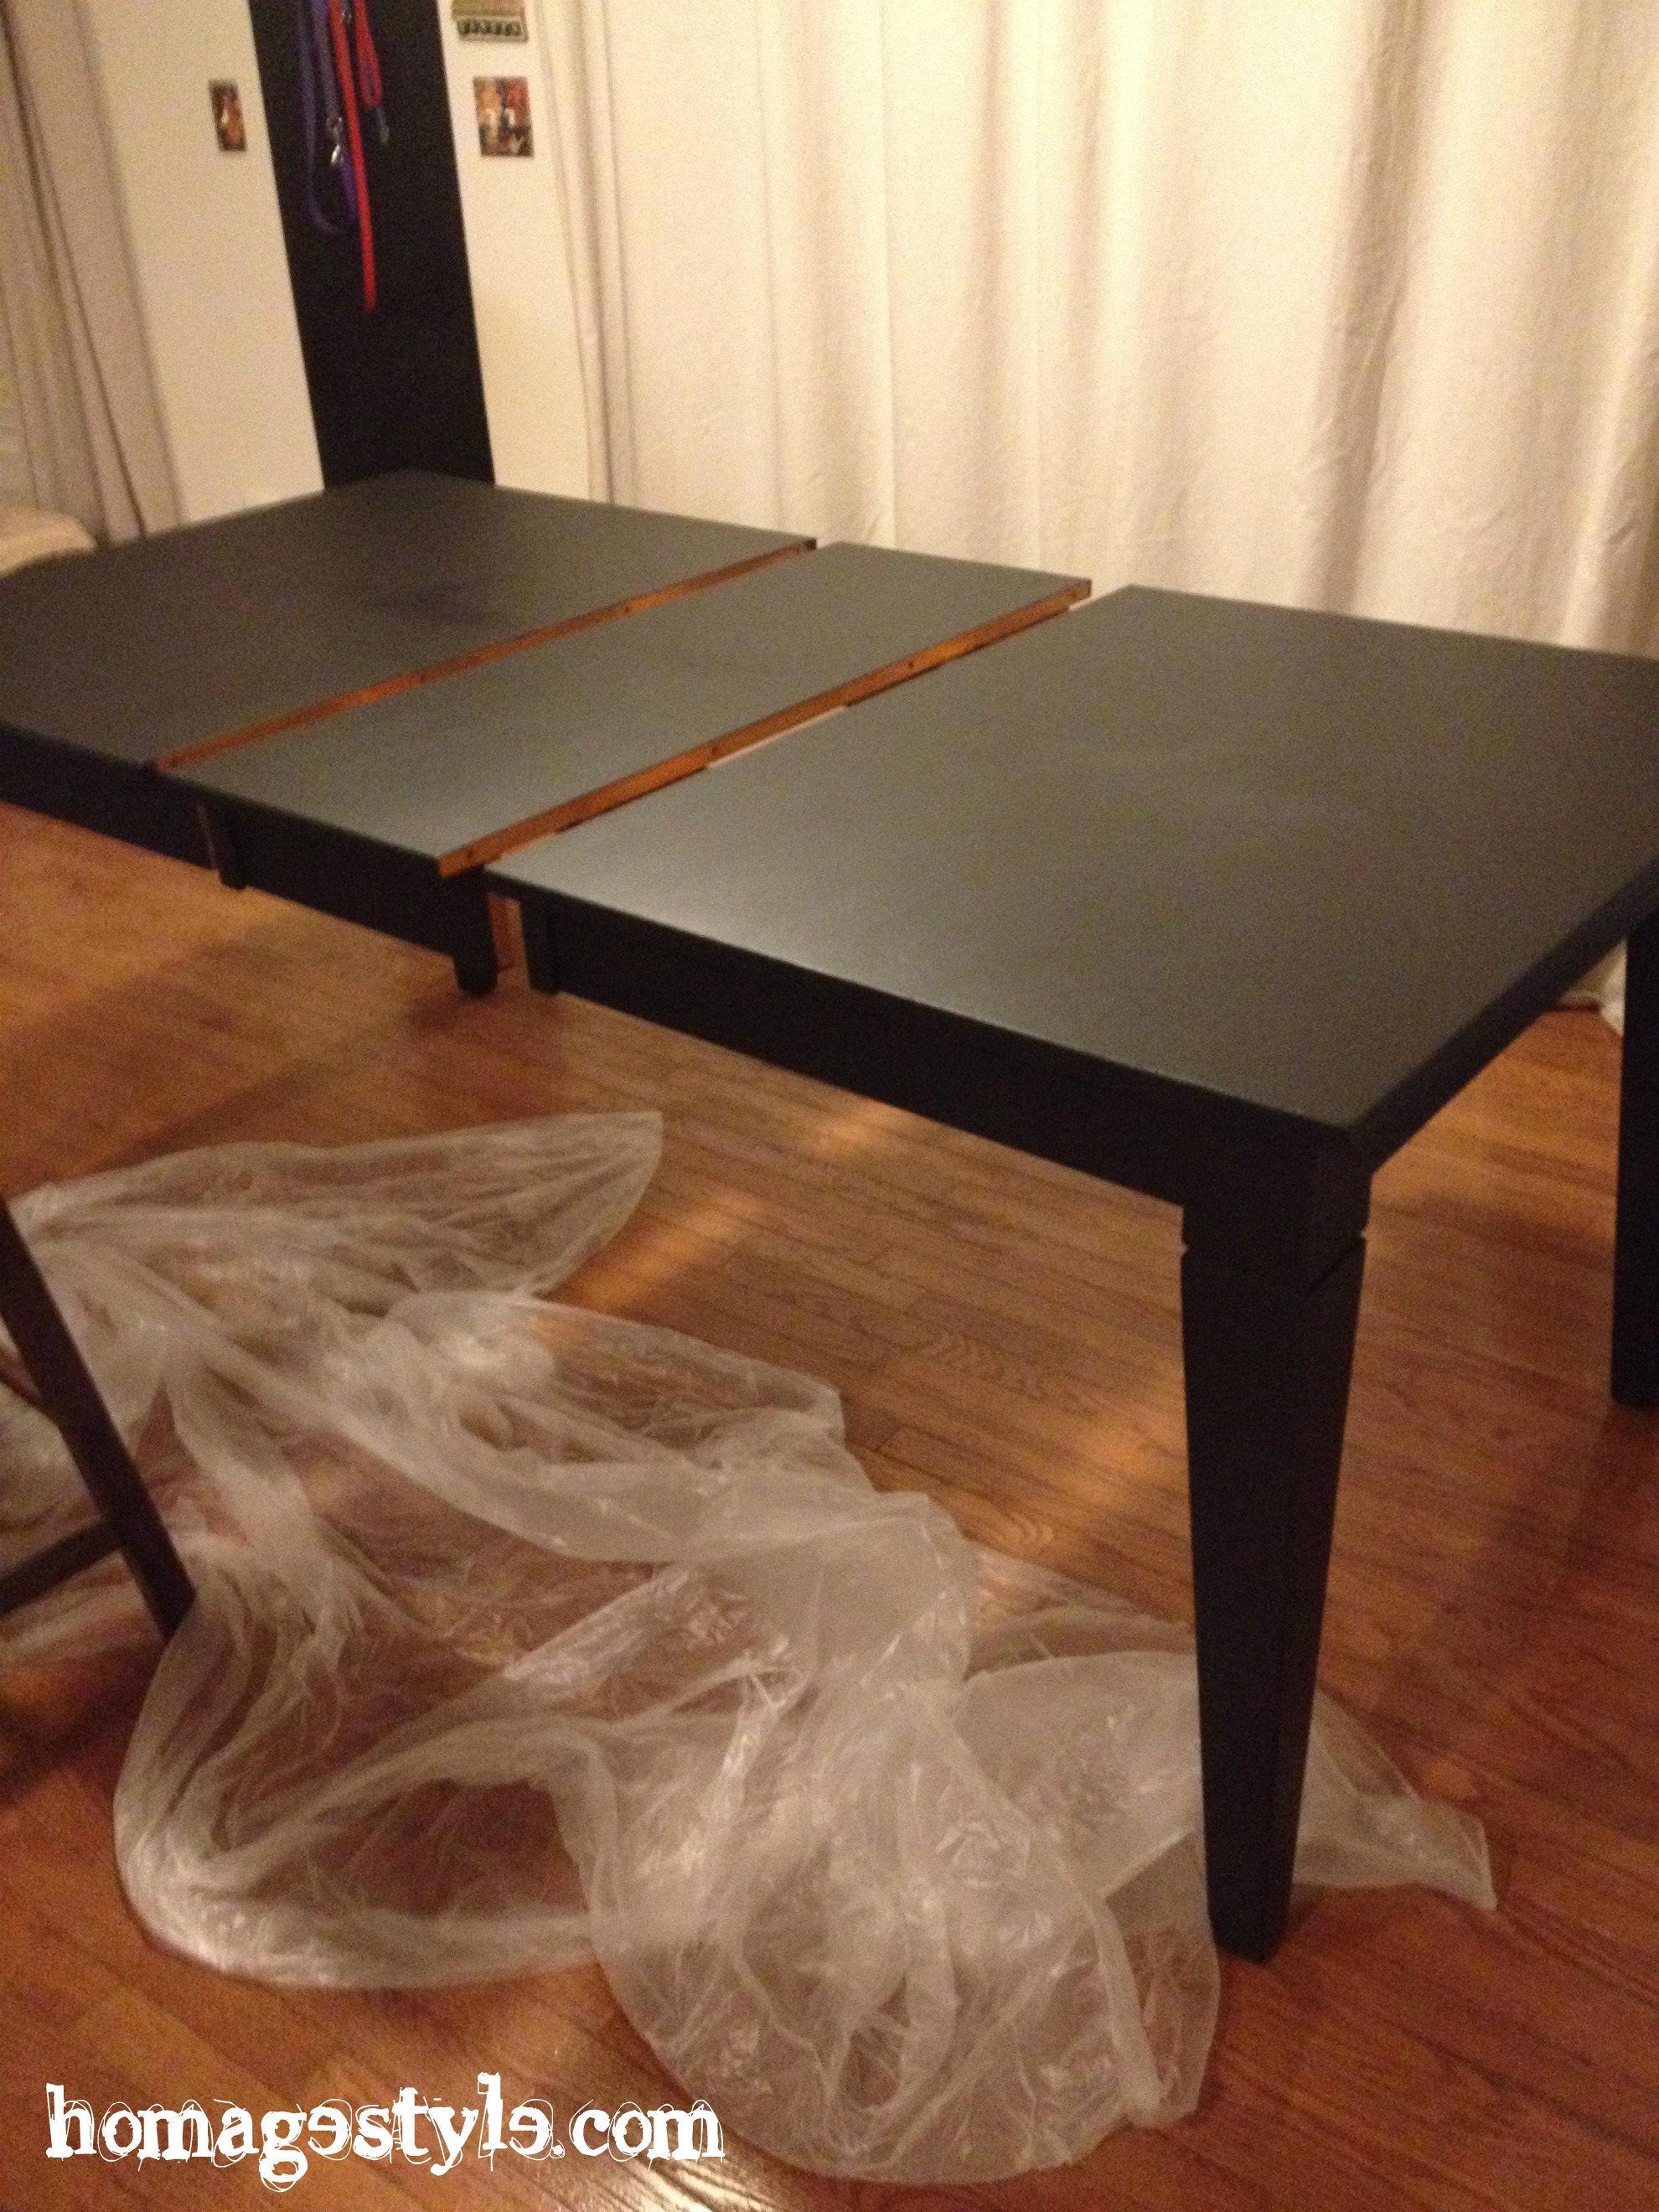
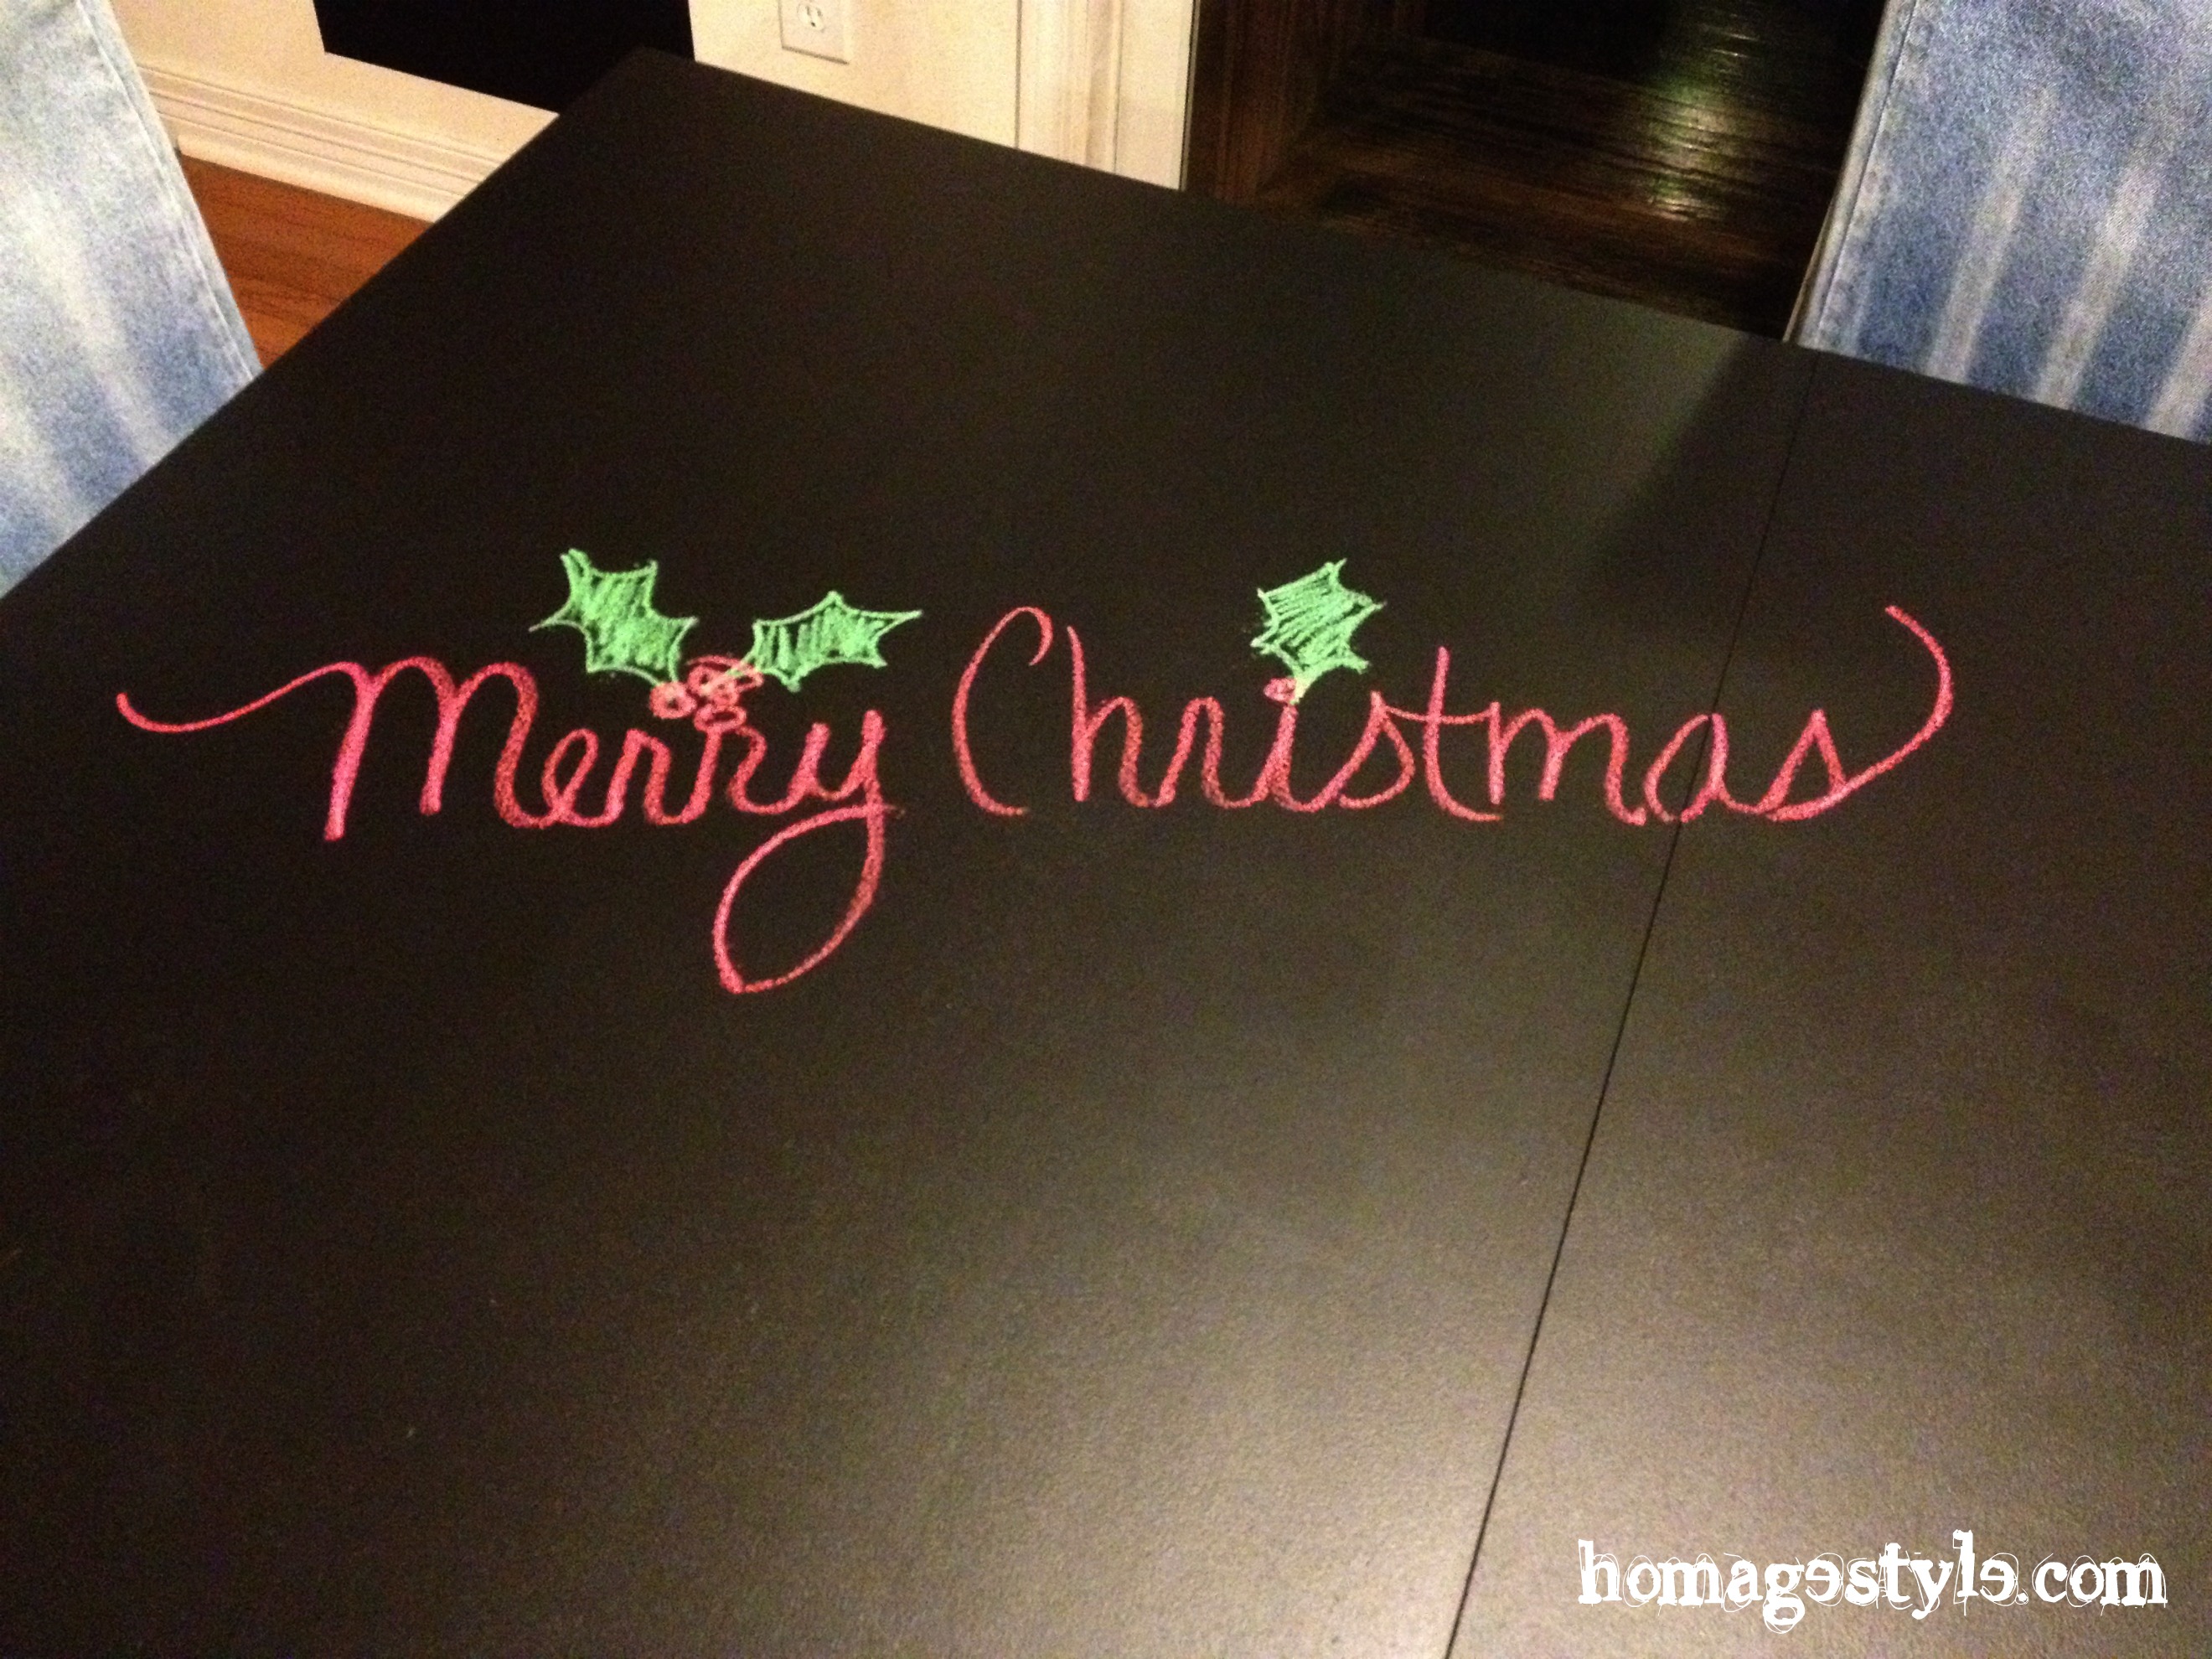
The most awesome finished product…Chalkboard table complete
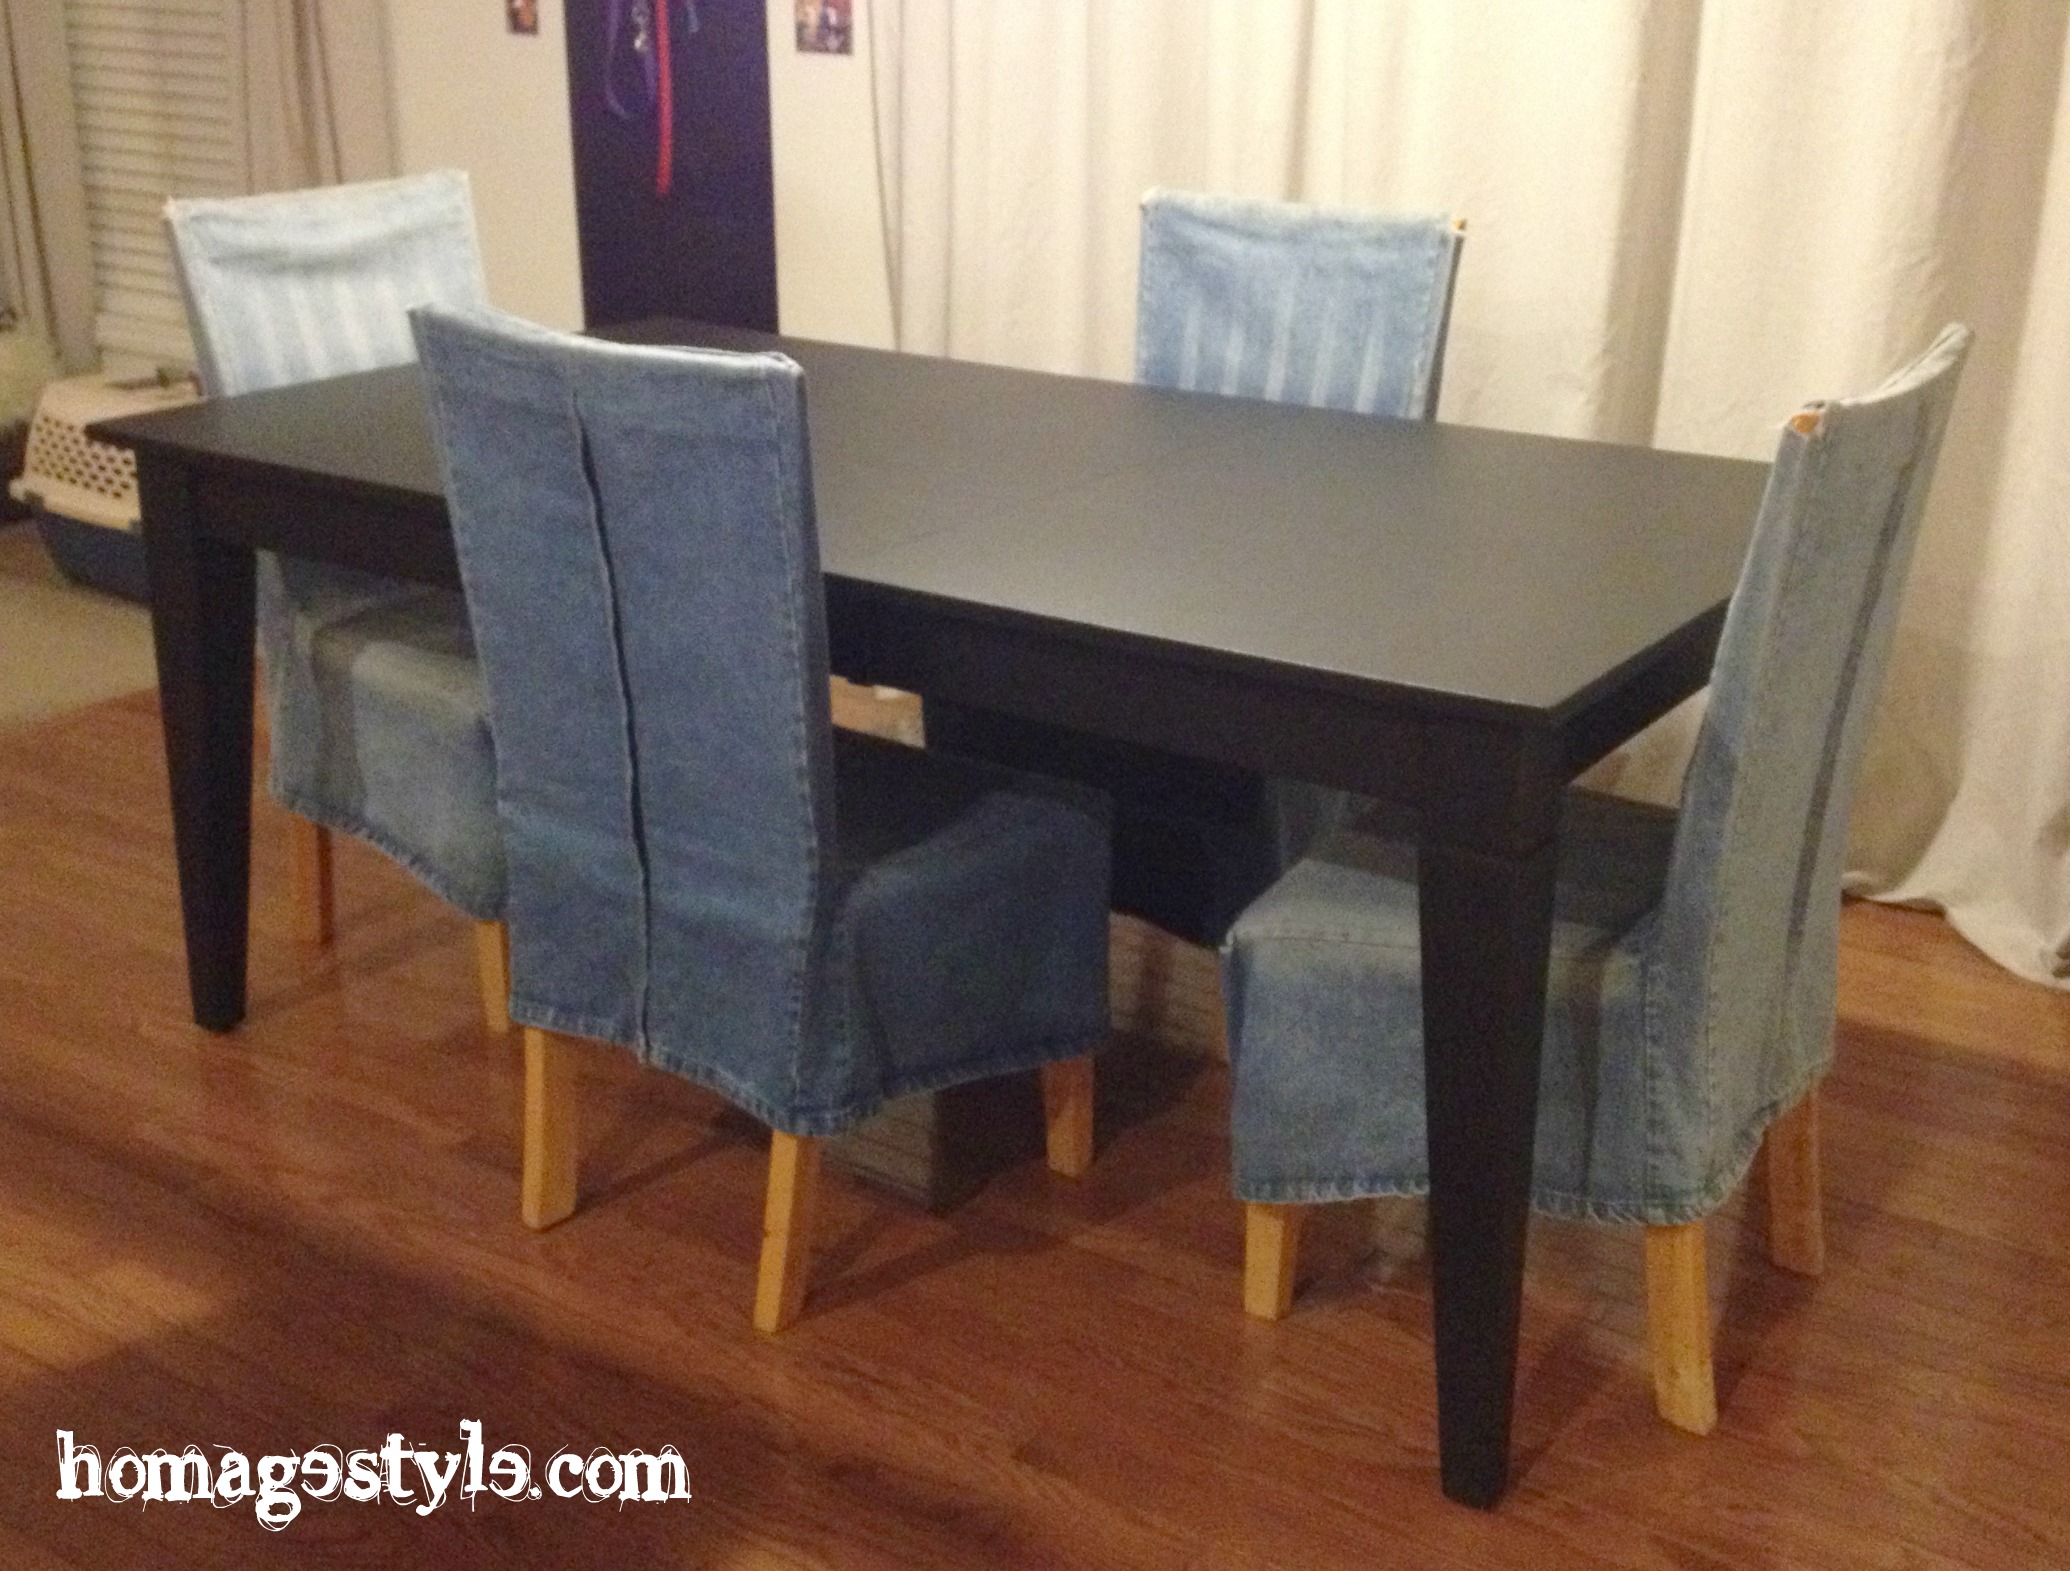
Not only does it look fabulous, but I’m thinking it looks a kind of Pottery Barn. All for the price of a can of chalkboard paint, which was about 10 bucks! Can’t beat that!

Plus the formerly 90s table legs got a new lease on life, with a line of chalk drawn in the inset…

Line of chalk
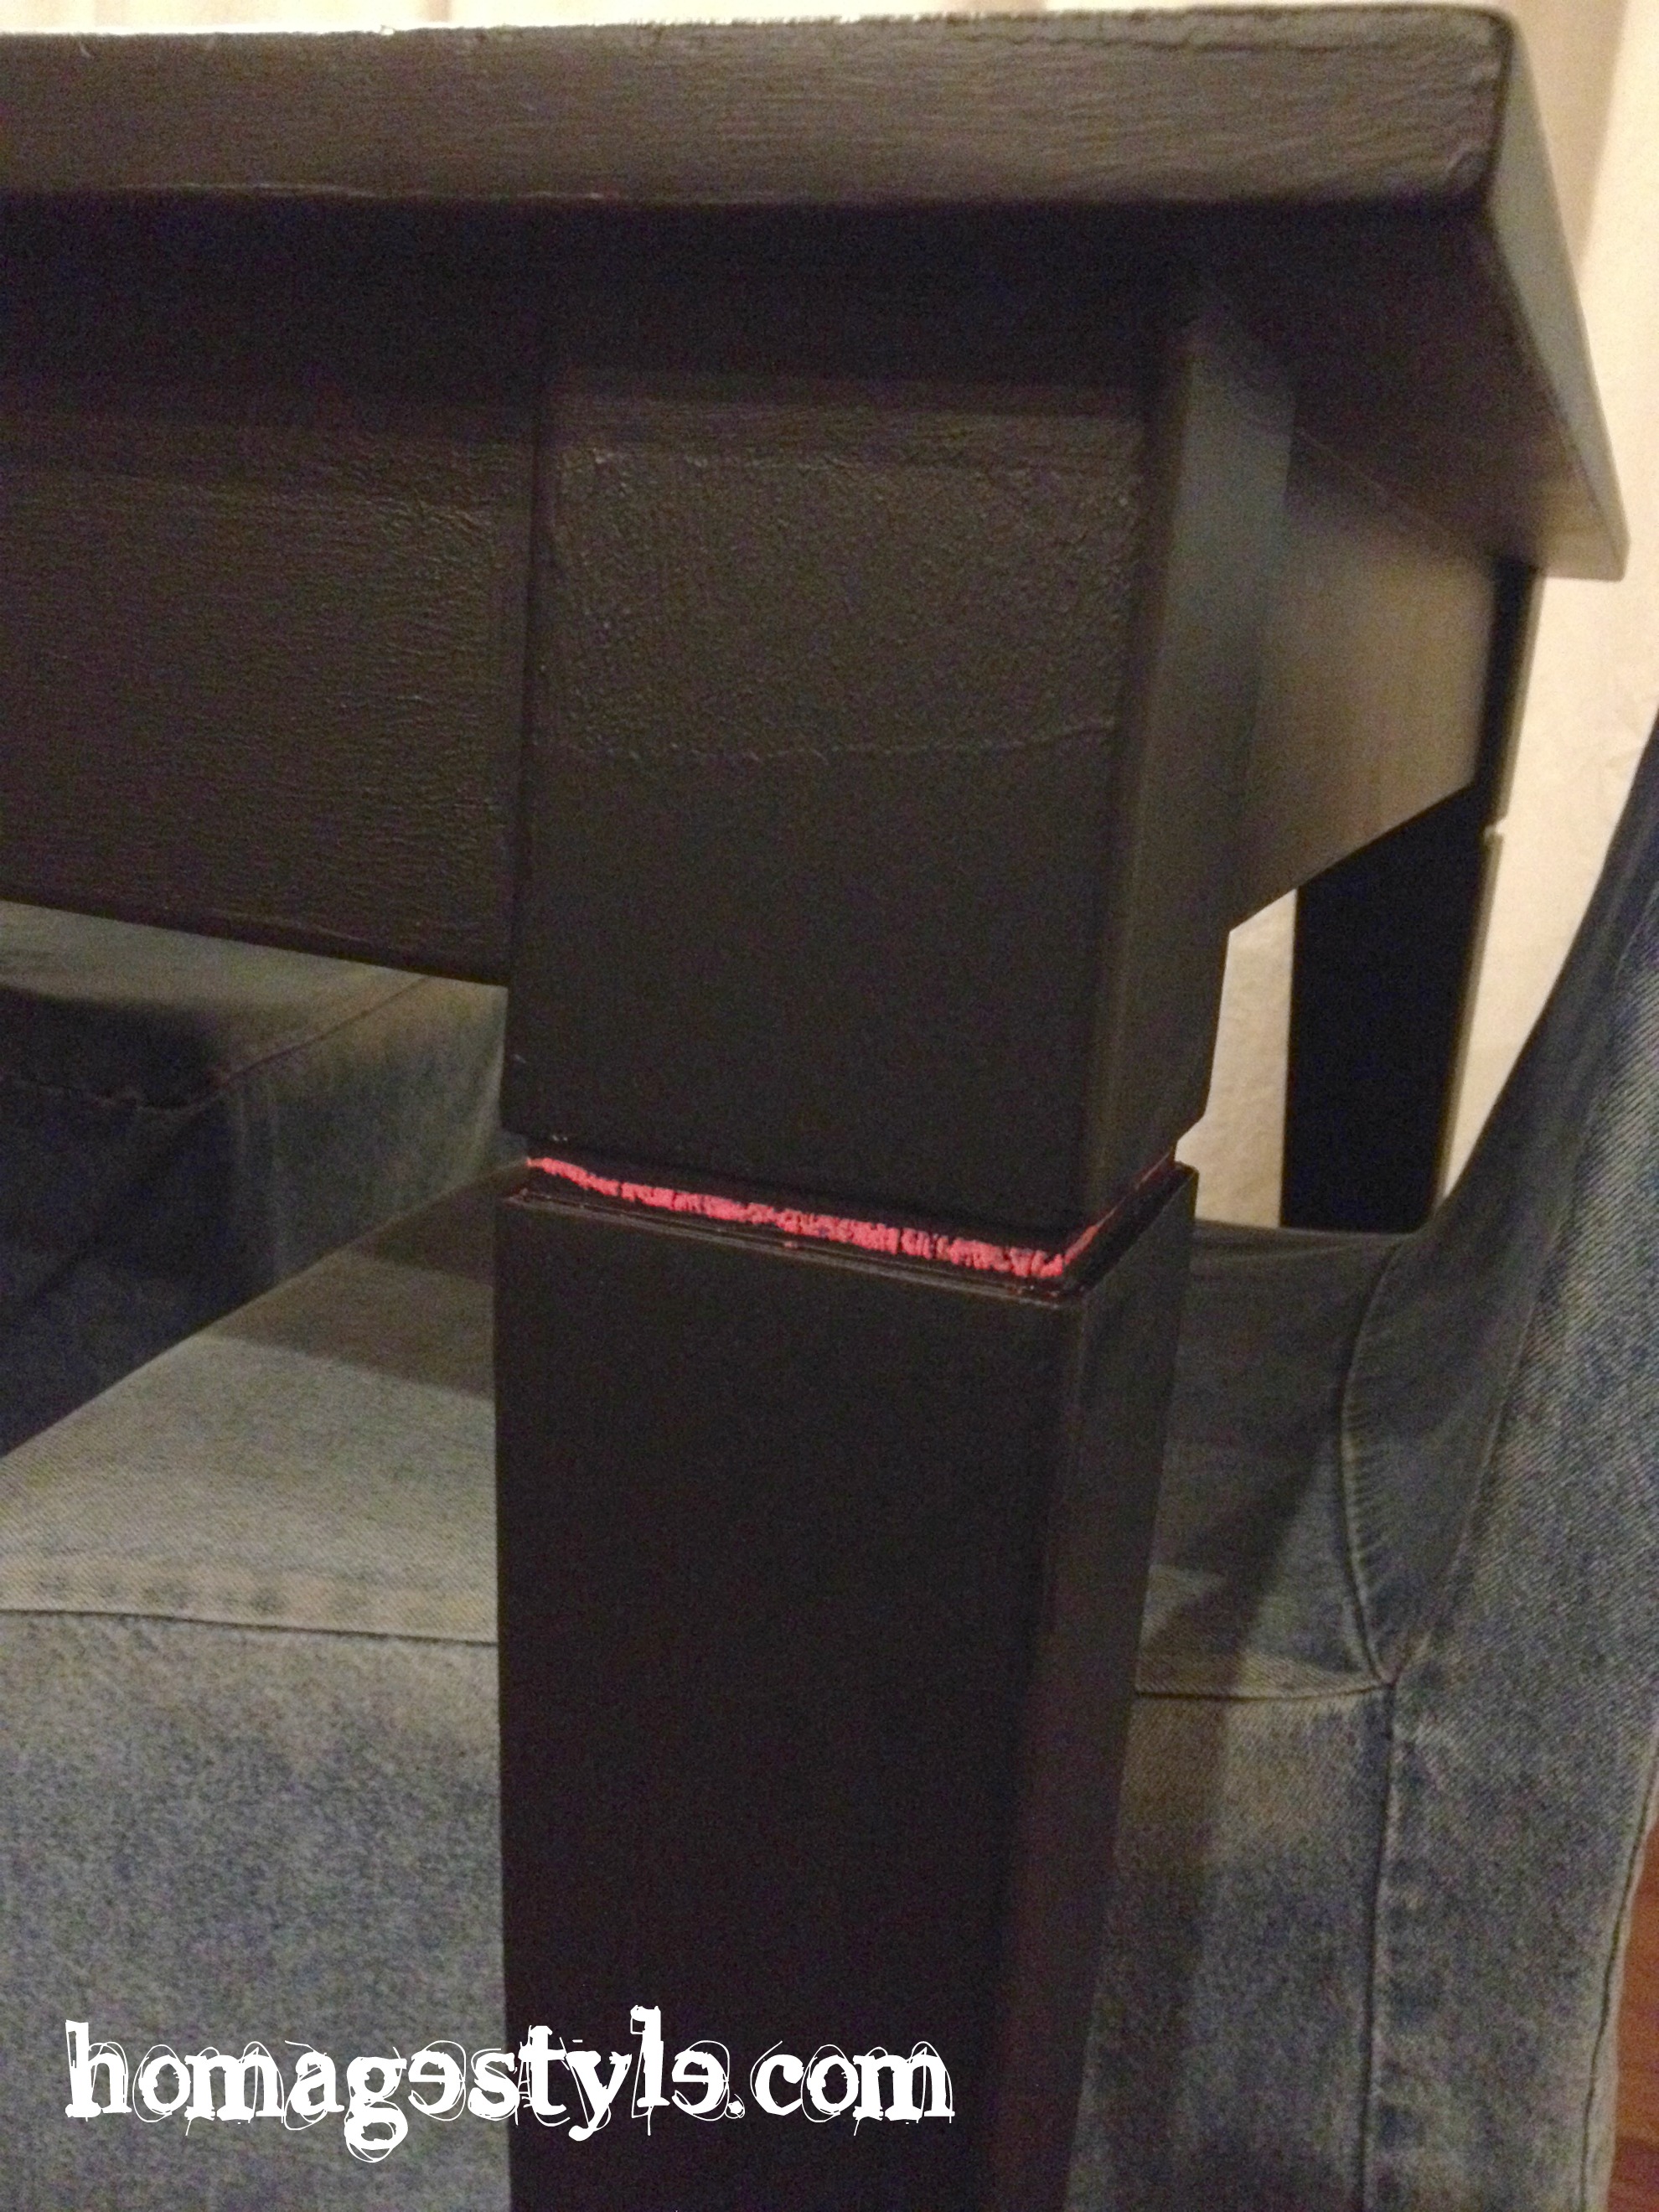
I had thought about maybe doing gold leaf in the inset, but then realized that a chalk line would be the perfect casual addition to the table! Plus I can change the colors when I feel like it or erase it completely, depending on my mood.

Here’s my first scribbling on the new table…

Merry Christmas tableNow if you think that’s the end of the story, you clearly haven’t been reading here for too long.

It was only moments before I realized that with a 14-year-old and a 21-year-old, I probably made a very grave mistake in painting anything chalkboard. Let’s just say they added some “commentary” to my otherwise glorious chalkboard project…

Merry Christmas commentarySigh. And it only got worse from there. Most of it wouldn’t even be considered PG-13, so I won’t elaborate. But I’m sure you can use your imagination. At least the table looks great.

PROJECT UPDATE

And by project update, I mean project FAIL!

So this happened…

so this happened
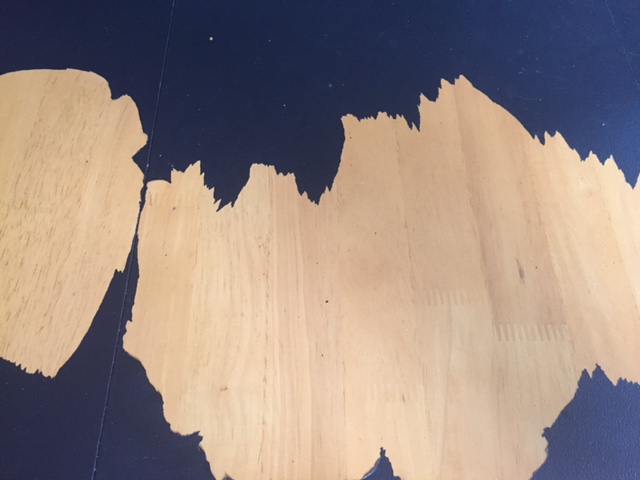
It started out with a couple of scratches in the paint, then a couple of areas that bubbled, followed by the kids and I having a paint peeling party one day at dinner.

Lesson learned: USE PRIMER!

So we continue to peel away portions. It’s far more rewarding than sanding. And I guess I will either a) leave it as it once it’s fully peeled, or b) eventually repaint, this time using a primer.

Why can’t anything ever be easy? Hahahaha! And that, my friends, is the true nature of DIY!

If you enjoyed this blog post, please share…


another chalkboard project

5 December 2007 by Andrea 2 Comments

One afternoon, I got the inspiration to paint another quick & easy chalkboard project. (To be honest, I was procrastinating about some less inspiring household projects when I had this brainstorm.)

My last chalkboard project was my kitchen pantry cabinet doors.

I decided to add a splash of blackboard next to my kitchen sliding door. This would create a visual barrier between the eating area and our family room, as well as highlight the cute beaded dog leash hanger we have, and anchor it to the floor, rather than it looking as if it’s floating in space.

Here’s the “Before” photo…


A bland, white wall crying out for color!

This project only took a couple hours from inspiration to completion, since I had all of the things I needed already on hand, including leftover chalkboard paint from my last project.

So I taped off the wall using a level to ensure it was even…


…quickly spackled & sanded a couple of spots, then gave it four coats of blackboard paint.

Voila! The finished product…


A welcome contrast to our stark, builder-white walls.

Why not give it a try at your house? Everyone needs a chalkboard!

Showing off at the Whisperwood Cottage Chalk Talk Link Party…

mother knows best

8 May 2007 by Andrea Leave a Comment

After reading my blog entry about Message Central, my mother commented, “The cabinets look really cute, but you know me, I couldn’t handle the chalkdust.”

As they say, Mother knows best!

After only one day of 2 kids drawing all day on the new chalkboards, I couldn’t handle the chalkdust either. Fortunately, my sister, who is an elementary school teacher, informed me that I could purchase dustless chalk. Hallelujah!

You can order dustless chalk online at Discount School Supply for mere pennies. It comes in white & vivid colors. A worthwhile investment to accompany any chalkboard!


Proper accessories are always important, even for a chalkboard!

message central mission accomplished

5 May 2007 by Andrea 7 Comments

I finally gave up on trying to find the perfect blackboard tiles & decided to paint our pantry cabinets with magnetic paint, followed by chalkboard paint, hoping with each stroke of the roller that we don’t sell the house before I do an extreme kitchen makeover (i.e., a major kitchen remodel to make the kitchen actually work sensibly!)

Let me walk you through the process of creating Message Central on our pantry doors.

First, I taped off the area around the inset…


Then I wisely laid down a drop cloth. Since it was such a small job, I actually considered not using a drop cloth, but fortunately I didn’t go with that line of thought, because here’s how the drop cloth looked after some painting…


Yikes! That would not have been good for the hardwood floor!

Finally the prep work was complete and I broke open the magnetic paint. Actually, it was a magnetic primer, black & very thick, since it actually has iron filings in the paint.

Perhaps I have pica, but when I stirred the magnetic primer, I wanted to taste it so badly! It looked so thick & delicious, like brownie mix!

I resisted the temptation to taste the paint, and proceeded to use it as intended.

The magnetic primer was not the easiest paint to work with. The directions indicated that it is normal for the paint to have a watery layer at the surface, which it did, and that didn’t make life easy.

Magnetic primer has a texture, because of the iron filings, so it’s essential to roller it on very evenly.

I used three coats of magnetic paint, as indicated by the manufacturer. Each “coat” actually consisted of going over the area twice, then letting that layer dry for 30 minutes. It took about 30 minutes to complete one coat on all of the doors, so the project moved along rather quickly, taking only about two hours from prep to completion of the magnetic primer layer.

Here’s how the doors looked after the magnetic primer was completed…


As you can see even in the photo, the magnetic primer has lots of texture.

The primer needs to dry for 4 hours prior to painting, but because I got a late start, I waited overnight.

The next morning, I started with the chalkboard paint. This paint was easier to use than the magnetic, but still not a walk in the park, since the roller marks were very obvious.

The chalkboard paint took 4 carefully applied coats, again with each coat consisting of two thin applications, being very mindful of the roller marks.

Because of the small area being covered, this part of the project was also very quick, about 3 hours, including a leisurely coffee break and clean-up time.

Here’s the final product, looking terrific!


I really love how it turned out – it gives our brand new kitchen a vintage schoolhouse charm! And the kids can hardly wait to start using chalk on it, but it should “cure” for 24 hours, and then be “conditioned” by rubbing the side of a piece of chalk over the entire surface, then wiping with a barely damp sponge. Make it easy on yourself & use a chunky piece of sidewalk chalk to make the conditioning move along faster.

Because of the magnetic primer, the chalkboard has more texture than I would have preferred – it has almost a vinyl appeal. But, I really need the magnetic aspect, allowing me to post this & that paper on Message Central, so I’ll make do with the texture.

I’m not much of a long project type, and this one was quick, easy, and rewarding! I’m ready to start magnetizing & chalkboarding more surfaces throughout the house!

How about you? How did you use magnetic & chalkboard paint? Send your project photos & story to me at andrea@homagestyle.com. Maybe we’ll post your project here!

Showing off at the Whisperwood Cottage Chalk Talk Link Party…

desperately seeking message central

2 May 2007 by Andrea Leave a Comment

As you may know, I’m desperately seeking chalkboard materials to create Message Central in my kitchen.

The reason that I am desperately seeking a chalkboard product, is that I am trying not to end up painting my cabinets with chalkboard paint. Even though I’m more adventuresome than most with decor, I’m still a little skittish about a permanent change to the kitchen cabinetry.

It just so happens that the kitchen cabinets are the perfect location to create Message Central in our home.

So imagine my joy when I saw these new Modular Chalkboard Tiles from Pottery Barn.


They really are terrific, although they didn’t work for my purposes. The very thing that makes them great – that they’re very sturdy & heavy – is why they didn’t work for me. I need something lightweight to attach to my cabinet doors. But they would work well in a kid’s playroom, or if you were creating your Message Central on a blank wall, rather than on cabinets.

Ultimately, I may end up keeping them for another room, but as for Message Central, I may need to accept that to create message central, I need to paint the cabinets!

  • Email
  • Facebook
  • Instagram
  • Pinterest
  • Twitter

subscribe, baby!

Homage Style on Twitter
Homage Style on Facebook
Pin me! Homage Style on Pinterest

archives

WORK IN PROGRESS...

work in progress :: rose painting

FAVORITE PROJECTS...

the tornado lounge

another glorious chalkboard project

freshening up the family room

industrial chic curtains

angsty teen boy's room

almost instant art

vintage cowboy room

Copyright © 2025 · Beautiful Pro Theme on Genesis Framework · WordPress · Log in