homage style

when your home is your canvas

schedule a design consult
  • blog
  • services
    • styling & decorating
    • home staging
    • virtual home staging
  • featured
  • about
  • workshops
  • contact
  • subscribe

house goals – 2012 edition

2 January 2012 by Andrea 3 Comments

Now that we’ve rung in the new year, it’s time to set some goals for 2012…house goals!

Last year was the first time I set house goals, although I was probably a bit too ambitious with my 2011 goals!

Not to be outdone by myself, I’ve set equally if not more ambitious house goals for 2012, and hopefully I’ll complete a few more than last year.

Here are my 2012 house goals, in no particular order…

  1. Create a striped painting for an empty wall in the family room
  2. Finish dining/living room walls with bamboo wall treatment
  3. Mod up the family room by completing new pillow covers
  4. Continue the drop cloth revolution by making drop cloth curtains for kitchen sliding door
  5. Sew dog pillow beds
  6. Add board & batten to front door entry hall
  7. Paint master bathroom
  8. Paint master bedroom
  9. Create family photo wall
  10. Build Ikea hack cat box cabinet

And last year’s projects still to be completed…

  1. Repaint the stairway wall
  2. Clean up my office
  3. Scour my teenage daughter’s room
  4. Get that damn satellite dish off the roof
  5. Buy a dishwasher
  6. Tile the kitchen back splash
  7. Paint the kitchen
  8. For the love of all things holy, DECLUTTER!

As you can see, it’s an expansive list.  And seeing how much I didn’t complete last year, I’ll have to work twice as hard to get through my list this year, so wish me well!

Here’s a little more detail around the projects…

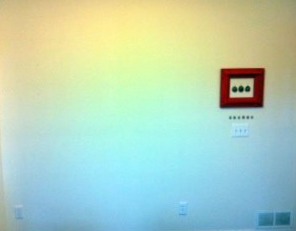
1. Create a striped painting for an empty wall in the family room

Here’s the empty wall…

Here’s the inspiration from Jen’s house over at Wanting What I Have…

You can see a tour of her house at The Handmade Home. Jen’s home and style is A-MA-ZING!

Been thinking of making a striped art piece for a while now, and now it’s time to get moving!

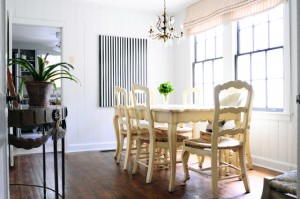
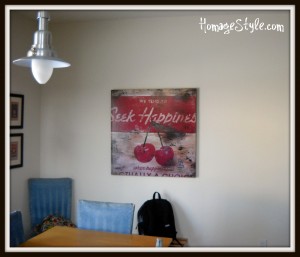
2. Finish dining/living room walls with bamboo wall treatment

I literally dreamed this one up.  Had a dream that I was doing this wall treatment, so when I woke up, I thought, what the heck!

Here’s the space…

You can even see the bamboo in the corner.

The rest is top secret until do the project!

3. Mod up the family room by completing new pillow covers

I started to add a touch of mod around the house, especially in the family room, in 2011.

I also purchased fabric to sew new pillow covers that will add more of a touch of mod to the family room.  Need to get sewing to finish up that project.

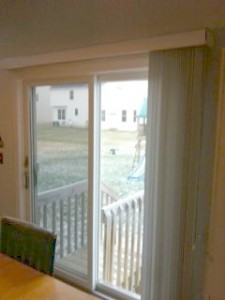
4. Continue the drop cloth revolution by making drop cloth curtains for kitchen sliding door

Currently we have white plastic vertical blinds.

Need I say more?

5. Sew dog pillow beds

Will this make the little dog stop climbing on the furniture? I sure hope so!

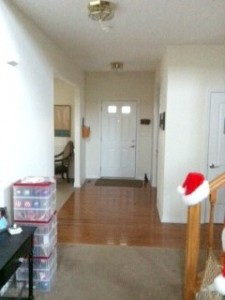
6. Add board & batten to front door entry hall

A seriously ambitious project, but now that I’ve got it in my head, I’m dying to do it! I think it will give an otherwise boring area a bit of character and visual interest. (Please ignore all of the Christmas undecorating whatnot. As you may have guessed, that’s not part of the design. That’s just keeping it real.)

7. Paint master bathroom

Or perhaps I should say hire someone to paint my master bathroom.  I’ve had the color picked out for about 5 years, so I’m thinking that this project has cured long enough!

8. Paint master bedroom

Ditto on hiring someone to paint the master bedroom. With vaulted ceilings, this is not a room I will be painting on my own.

Currently shopping in the gray department.

9. Create family photo wall

I’ve been percolating on this idea for a while now too. Planning to combine family pics with a collection of something vintage…more to come on that later.

10. Build Ikea hack cat box cabinet

Now that I’ve discovered Ikea hackers, I feel that I must build a super-secret cat box cabinet.

And then, there are the projects still lingering from last year’s house goals…

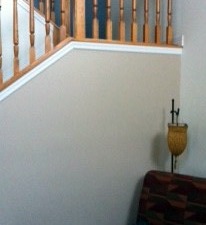
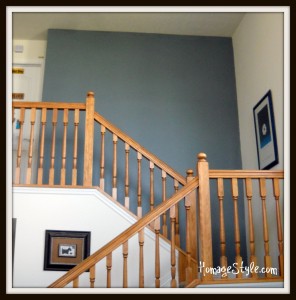
11. Repaint the stairway wall

The stairwell wall has already been painted, but it still needs another coat.

Apparently it’s taken me a while.

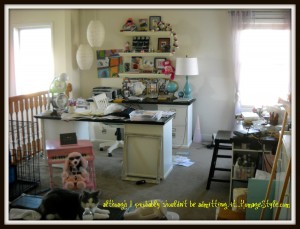
12. Clean up my office

This seems as if it should be a simple enough project, but it’s my combination office, craft room, and general lounging area.  And it’s been neglected for quite some time.  Lots of filing and decisions to be made about what stays and what goes.

13. Scour my teenage daughter’s room

While I’ve already started this project, there’s still plenty to be done before it can be considered safe to be inhabited by non-teenage humans.

14. Get that damn satellite dish off the roof

It’s still there. Waiting.

Need to find a reasonable roofer.

15. Buy a dishwasher

Although my house is only 5 1/2 years old, the dishwasher is no longer working.  I’ve already spent a small fortune to get the problem diagnosed, but it’s still not fixed.  It could be fixed, but the dishwasher repair guy told me that it’s a design flaw, and would likely be broken again within a year.  So I opted to not fix it and put the money toward a new dishwasher.  In the meantime, I’m using a $2.99 solution…a dishpan, and frankly, not doing such a great job of keeping up with the dishes.

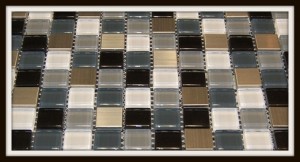
16. Tile the kitchen back splash

Still planning to tile the back splash with those cool & funky little glass tiles.

Hopefully it will happen this year!

17. Paint the kitchen

Definitely need to add some color. Enough said.

18. For the love of all things holy, DECLUTTER!

There’s probably not a whole lot more that needs to be said about this issue.  This is an ongoing project for me, and this year I need to hit it extra hard. I’ve been leaning more toward minimizing than maximizing, and I am going to continue to follow that trend, little by little, throughout the year.

Those are my house goals 2012 edition…what are your 2012 house goals? Do tell!

house goals 2011 wrap up

30 December 2011 by Andrea Leave a Comment

Over at Nesting Place, the Nester came up with a brilliant idea – house goals!

So for 2011, I decided to participate in the house goals project.  My 2011 house goals were ambitious…perhaps too ambitious!

Given that I work full time and procrastinate, I didn’t get as far as I’d hoped.

So were are my 2011 house goals & their current status…

  1. Repaint the stairway wall – incomplete
  2. Paint the kids’ bathroom- COMPLETE!
  3. Add curtains to the master bathroom – COMPLETE!
  4. Clean up my office – IN PROGRESS
  5. Scour my teenage daughter’s room after she goes off to college – IN PROGRESS
  6. Add drop cloth curtains to the family room windows – COMPLETE!
  7. Get that damn satellite dish off the roof – incomplete due to lack of funds
  8. Buy a dishwasher – incomplete due to lack of funds
  9. Tile the kitchen back splash – incomplete due to lack of funds
  10. Paint at least 1 kitchen wall – incomplete
  11. For the love of all things holy, DECLUTTER! – IN PROGRESS

Some of these goals are definitely going to hit the 2012 list, so you’ll see them again, and hopefully this year they’ll get finished!

For some reason, I never got around to doing a big reveal on #2, painting the kids’ bathroom, which is complete and looks lovely.  Perhaps I’ll try to share some pics here soon.

My 2012 house goals are going to be just as ambitious, so stay tuned…I’ll be posting them in the next day or two, and you’ll be able to place some cash wagers with your friends to see if you think I’ll follow through on any/all of them!

spinning a yarn

28 December 2011 by Andrea Leave a Comment

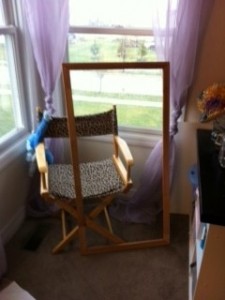
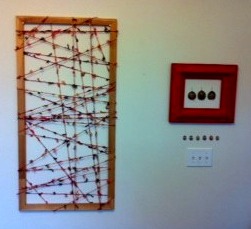
In the office of my home there is a large and boring wall that’s been crying out for help for some time now.

It really needs some paint, but that’s not happening this week. I already started to give the wall a bit of flair with this fabulous frame…

…but there’s still a lot of wall left.

So I decided to spin a yarn.  Or at least use a skein of yarn to create a wall hanging.  Here’s the yarn…

It’s some seriously gorgeous yarn, and I wish that I could knit a throw with it, but I don’t have enough and it seems that they’re not making it any more. So a wall hanging it is.

This was a really quick & easy project. I used embroidery stretcher bars that I already had at home. They are pretty inexpensive – a couple of bucks each at your local craft store.

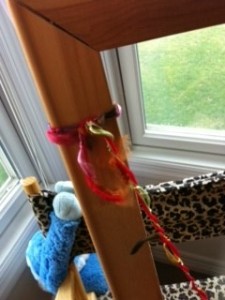
I tied the yarn around the stretcher bar…

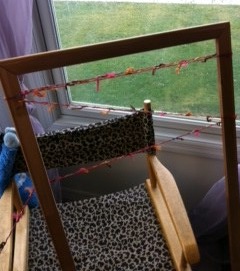
…and started wrapping the yarn haphazardly around the stretcher bars…

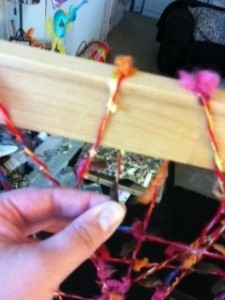
…and when I was just about out of yarn, I knotted the end of the yarn around the stretcher bar…

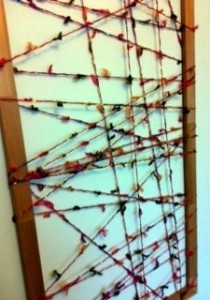
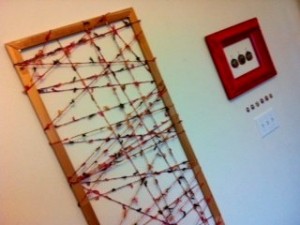
And that’s all it took to create this…

I love it!  Adds some color, texture, and visual interest to an otherwise boring wall!
And cheap to boot!  While this project was free to me, since I had everything sitting around at home, if you had to go out to buy the pieces and parts, you could probably make this for between $10-$15.  Not bad! Perfect for decorating on a tight budget.
This project even won the seal of approval from my 11-year-old son, who said it’s “really cool!” Can’t beat that!

simple & inexpensive art work

20 December 2011 by Andrea Leave a Comment

This year a friend and I agreed that while we would exchange Christmas presents, since we’re both expense-ridden single moms, we would pick or make presents from something we already have at our houses.  Terrific idea!

I’ve been thinking about a couple of different ideas, and if you’ve learned anything about me by reading this blog, you’ve come to realize that I’m a professional procrastinator.  So it wasn’t until tonight – the night before I’m delivering my gift – that I finalized my plan.

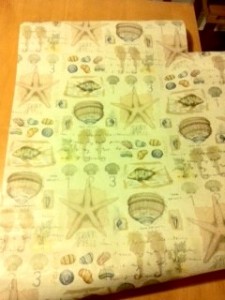
For several years now, I’ve been hanging on to this fabulous fish-themed paper.

In fact, it moved from California to Ohio with me, curing, waiting for just the right moment and project. I got it for free, from a fabulous shop called Tuvalu, in Ladera Ranch, California, where they used it to wrap fragile purchases. I can’t recall what I purchased, but I loved the paper and asked if I could purchase some, but they gave me a pretty good length of it for free.

My friend and I both work as editors in our day jobs, and we both love anything with numbers or letters or handwriting.  Plus we both love anything nautical or fish-themed. And anything with a hint of antique. This paper has all of that and then some.

It’s just gorgeous paper, but not over-the-top, hit-you-over-the-head theme-y.

Quite perfect, in fact.

So, for her Christmas gift I decided to wrap a canvas with the paper so she can have some new artwork for her new home.

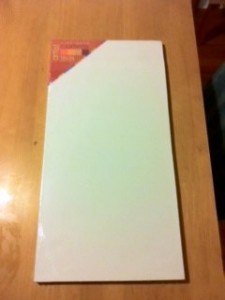
I used a 12 x 24″ canvas that I already had at home.

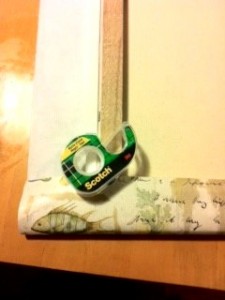
I used the high-tech technique of gift wrapping the canvas and taping with Scotch tape.

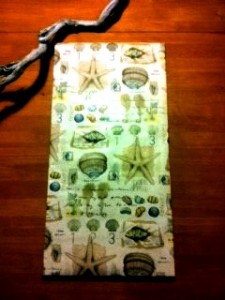
Resulting in a perfect wall hanging!

I have to admit that I did have a moment of Grinchliness, because I loved this wall hanging so much I thought about keeping it for myself. But then I got over my momentary selfishness and decided that it’s the perfect gift for a dear friend! Hope she likes it!

take it out on your home

23 October 2011 by Andrea Leave a Comment

Feeling frustrated? Life got you down? Things just going wrong? Take it out on your home.

No, I don’t mean that you should punch a hole in the wall or run around tossing breakables to the floor.

Instead, after you’ve tried your usual coping methods – mine is napping my troubles away – if you still feel like crap, don’t throw yourself out the window, throw yourself into a project in your home!

It doesn’t have to be a major project. Any old project will do. And if money is what’s causing your angst, no need to spend more…just start cleaning. Decluttering is free and most people have cleaning supplies hanging around.

Throw yourself into a project and something interesting may happen. You may just get into “the zone” and forget about your problems…at least temporarily, and every little bit helps.

coming soon…

20 October 2011 by Andrea Leave a Comment

Coming soon to a trash-picked ottoman near you…

20111020-220623.jpg

making the chandelier – behind the madness

16 October 2011 by Andrea Leave a Comment

Let me tell you how I got to this wonderful chandelier transformation…

It started out like this…

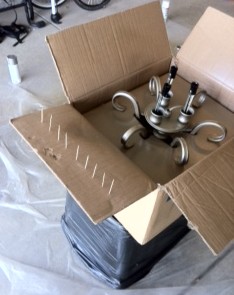
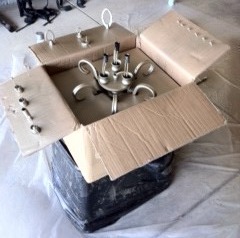
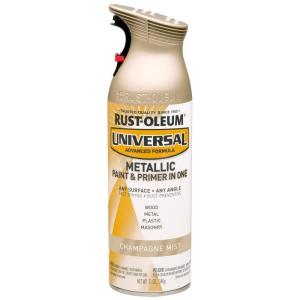
I bought 2 cans of Rustoleum’s Universal Metallic Paint & Primer in One in Champagne Mist from Home Depot and took to the garage and used the box the the chandelier came in as my painting stand.  Additionally, I covered a plastic bin in a lawn bag and placed the chandelier box on that, so I wouldn’t have to be bending over and straining my back. Since there were a lot of little parts and pieces that needed to be painted too, I poked a bunch of toothpicks into the flaps of the box and placed the pieces and parts on them.

Feeling a bit like Vlad the Impaler with all of the toothpicks

So I just kept the chandelier in the box and started spraying it. I decided that since this really needed to look terrific, I should probably be a little more patient than usual, so I sprayed in thin, even coats, and actually waited until the coats dried before applying the next coat.  I was definitely impressed with my own ability to delay gratification.  I’m not usually too good at that.

Once the this part was sprayed well and dry, I turn the chandelier upside down in the box and sprayed the other side. Lather, rinse, repeat.

In the meantime, I was also spraying the other parts, since the chandelier arrived unassembled.

Midway through this project, one of the cans of spray paint stopped working, even though it was only half empty.  I took it back to Home Depot and they exchanged it with no questions asked.  Now that’s customer service!

Ultimately the hardest part of this project was hanging the chandelier. What I didn’t know is that it’s a two-person job.  Or at least it was for me. Fortunately, my sister had planned to come over and I drafted her into service. And, as always, it took a lot longer than I thought it would. Most of my projects work this way. From start to finish, which included turning off the power (NEVER skip this step) and taking down the old chandelier, plus assembling the new chandelier, it took 3 hours.

What was difficult was holding the very heavy chandelier up while connecting the wires and screwing it into the electrical box.  My sister and I combined have the arm strength of a gerbil, so both of us holding our arms over our heads was bad enough…lifting a heavy chandelier with me balancing on a 6-foot ladder and my sister standing on a folding chair was damn near impossible. We’re just not that athletically inclined.  (I don’t recommend using a folding chair, and encouraged my sister not to use it as well, but apparently she likes to live on the edge.) And who knew that standing on a ladder would induce leg cramps.  What a mess!

But finally, we finished the task, turned the power back on, and voila! It worked!

One important thing I learned from this whole debacle is that I will probably need to hire someone to hang the chandelier that I have for my bedroom, which has a vaulted ceiling, and the light fixture I have planned for the two-story ceiling in my family room!

So what about the cost? I bought the chandelier for $35.96, and the spray paint was $7.98 each. So including tax, the total cost of the chandelier was $55.43. Not too bad if you ask me for all of this chandliering goodness!

chandelier transformation

16 October 2011 by Andrea 5 Comments

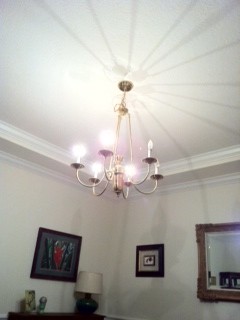
Finally, I’m bidding good riddance to the old brass octopus in my dining/living room and saying hello to my brand new chandelier!

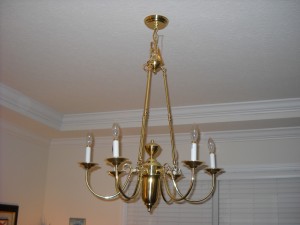
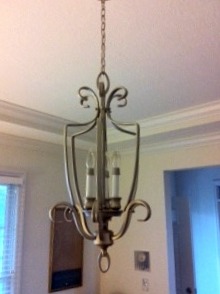
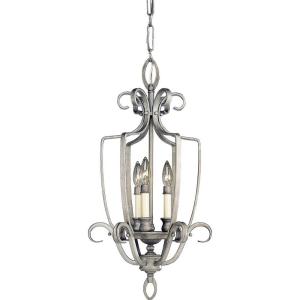
Let’s start with a little chandelier retrospective. I started with this…

Bought this…

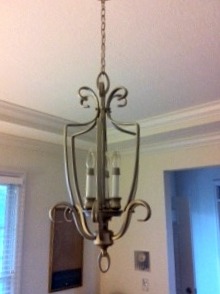
Spray painted to turn into this…

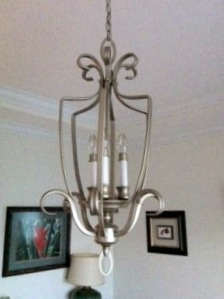
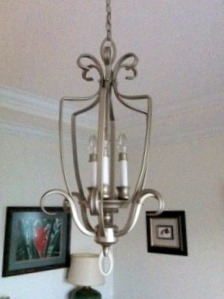
Rather than keeping the brushed nickel finish, I chose to spray paint with Rustoleum’s Universal Metallic Paint & Primer in One in Champagne Mist…

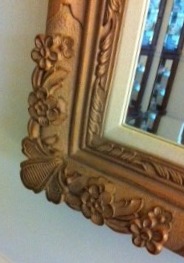
The reason I went with the Champagne over the brushed nickel was so that the chandelier would be more in line with the other warmer tones in the room, such as the beautiful carved mirror…

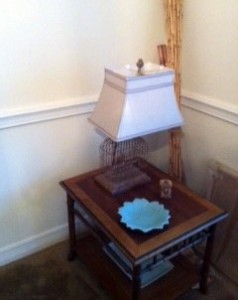
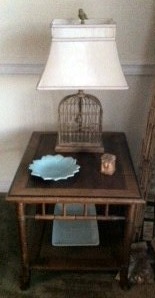
And the side table with birdcage lamp…

I love this lamp, and there is actually a little bird on a swing that works…

In fact, it was this lamp that inspired me to get the chandelier in the first place.  Initially, I thought that I would get a drum shade pendant fixture for this room, but realized that would cut the room in half.  The room really needed a fixture that you could see through, so the view into the room doesn’t stop at the light fixture. When I saw this one, it fit the bill.

The chandelier also reminded me of a the shape of a birdcage, but without being too literal.  I didn’t want the room to become a birdcage-themed room. More of an homage to the birdcage. I think it’s perfect!

I love my new chandelier!

Showing off on Funky Junk Interiors and Remodelaholic link parties.

dropcloth = restoration linen

10 October 2011 by Andrea Leave a Comment

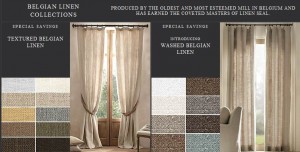
This weekend I was perusing the The Restoration Hardware 2011 Source Book yet again (think back to the days of reading the Sears catalog toy section over and over and over…this is the adult version, courtesy of Restoration Hardware), when I happened upon their Belgian Linen Drapery Collection (page 514 in the Source Book).

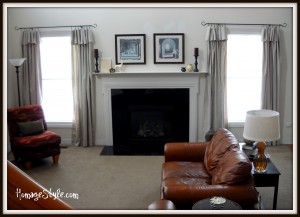
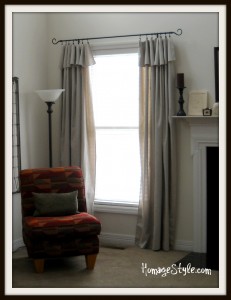
I couldn’t help thinking how much my drop cloth curtains look like the Belgian Linens…

Even the textures look similar.  Here’s the drop cloth up close and personal…

And the Belgian Linen texture…

Looks pretty similar to me, and at $10 per panel, the price sure is right! What do you think?

Let the drop cloth revolution continue!

say goodbye to…

8 October 2011 by Andrea 1 Comment

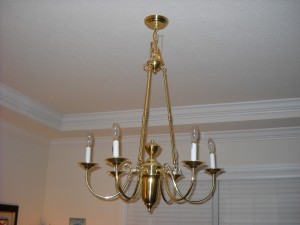
…the old brass octopus…

Notice the burned out bulbs that I never replaced because this thing is so hideous.

…and say hello to my brand new chandelier!

Sort of…

Sigh. Assembly required.

I suppose it’s for the best, since I plan to spray paint it. But still. What a let down! I wanted to open the box and voila! Oh well. Spray painting pics coming soon!

« Previous Page
Next Page »
  • Email
  • Facebook
  • Instagram
  • Pinterest
  • Twitter

subscribe, baby!

Homage Style on Twitter
Homage Style on Facebook
Pin me! Homage Style on Pinterest

archives

WORK IN PROGRESS...

work in progress :: rose painting

FAVORITE PROJECTS...

the tornado lounge

another glorious chalkboard project

freshening up the family room

industrial chic curtains

angsty teen boy's room

almost instant art

vintage cowboy room

Copyright © 2025 · Beautiful Pro Theme on Genesis Framework · WordPress · Log in