homage style

when your home is your canvas

schedule a design consult
  • blog
  • services
    • styling & decorating
    • home staging
    • virtual home staging
  • featured
  • about
  • workshops
  • contact
  • subscribe

the tornado lounge

1 July 2015 by Andrea Leave a Comment

tornado lounge cover Living in central Ohio, there is an occasional tornado. And more frequently than actual tornadoes are tornado warnings.

Things get all conflabbergested when there’s a tornado warning (for those of you not living in the Midwest, this means that a funnel cloud has occurred or is imminent based on radar) – the tornado sirens go on and the TV meteorologists get all serious, trying not to look as excited as they are about the impending weather phenomenon, and people are advised to take shelter.

Where? In your basement if you have one.

Well we have one. It’s unfinished and inglorious. Not exactly a place where people are dying to spend time.

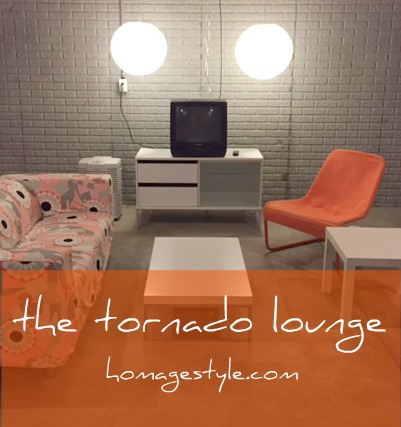
But since we do head down there at least on several occasions each spring and summer for the inevitable tornado warning, I wanted to put together a little something that I call the Tornado Lounge. A mod little place where we can cool our heels while the weather does its thing.

Introducing the Tornado Lounge…

tornado lounge
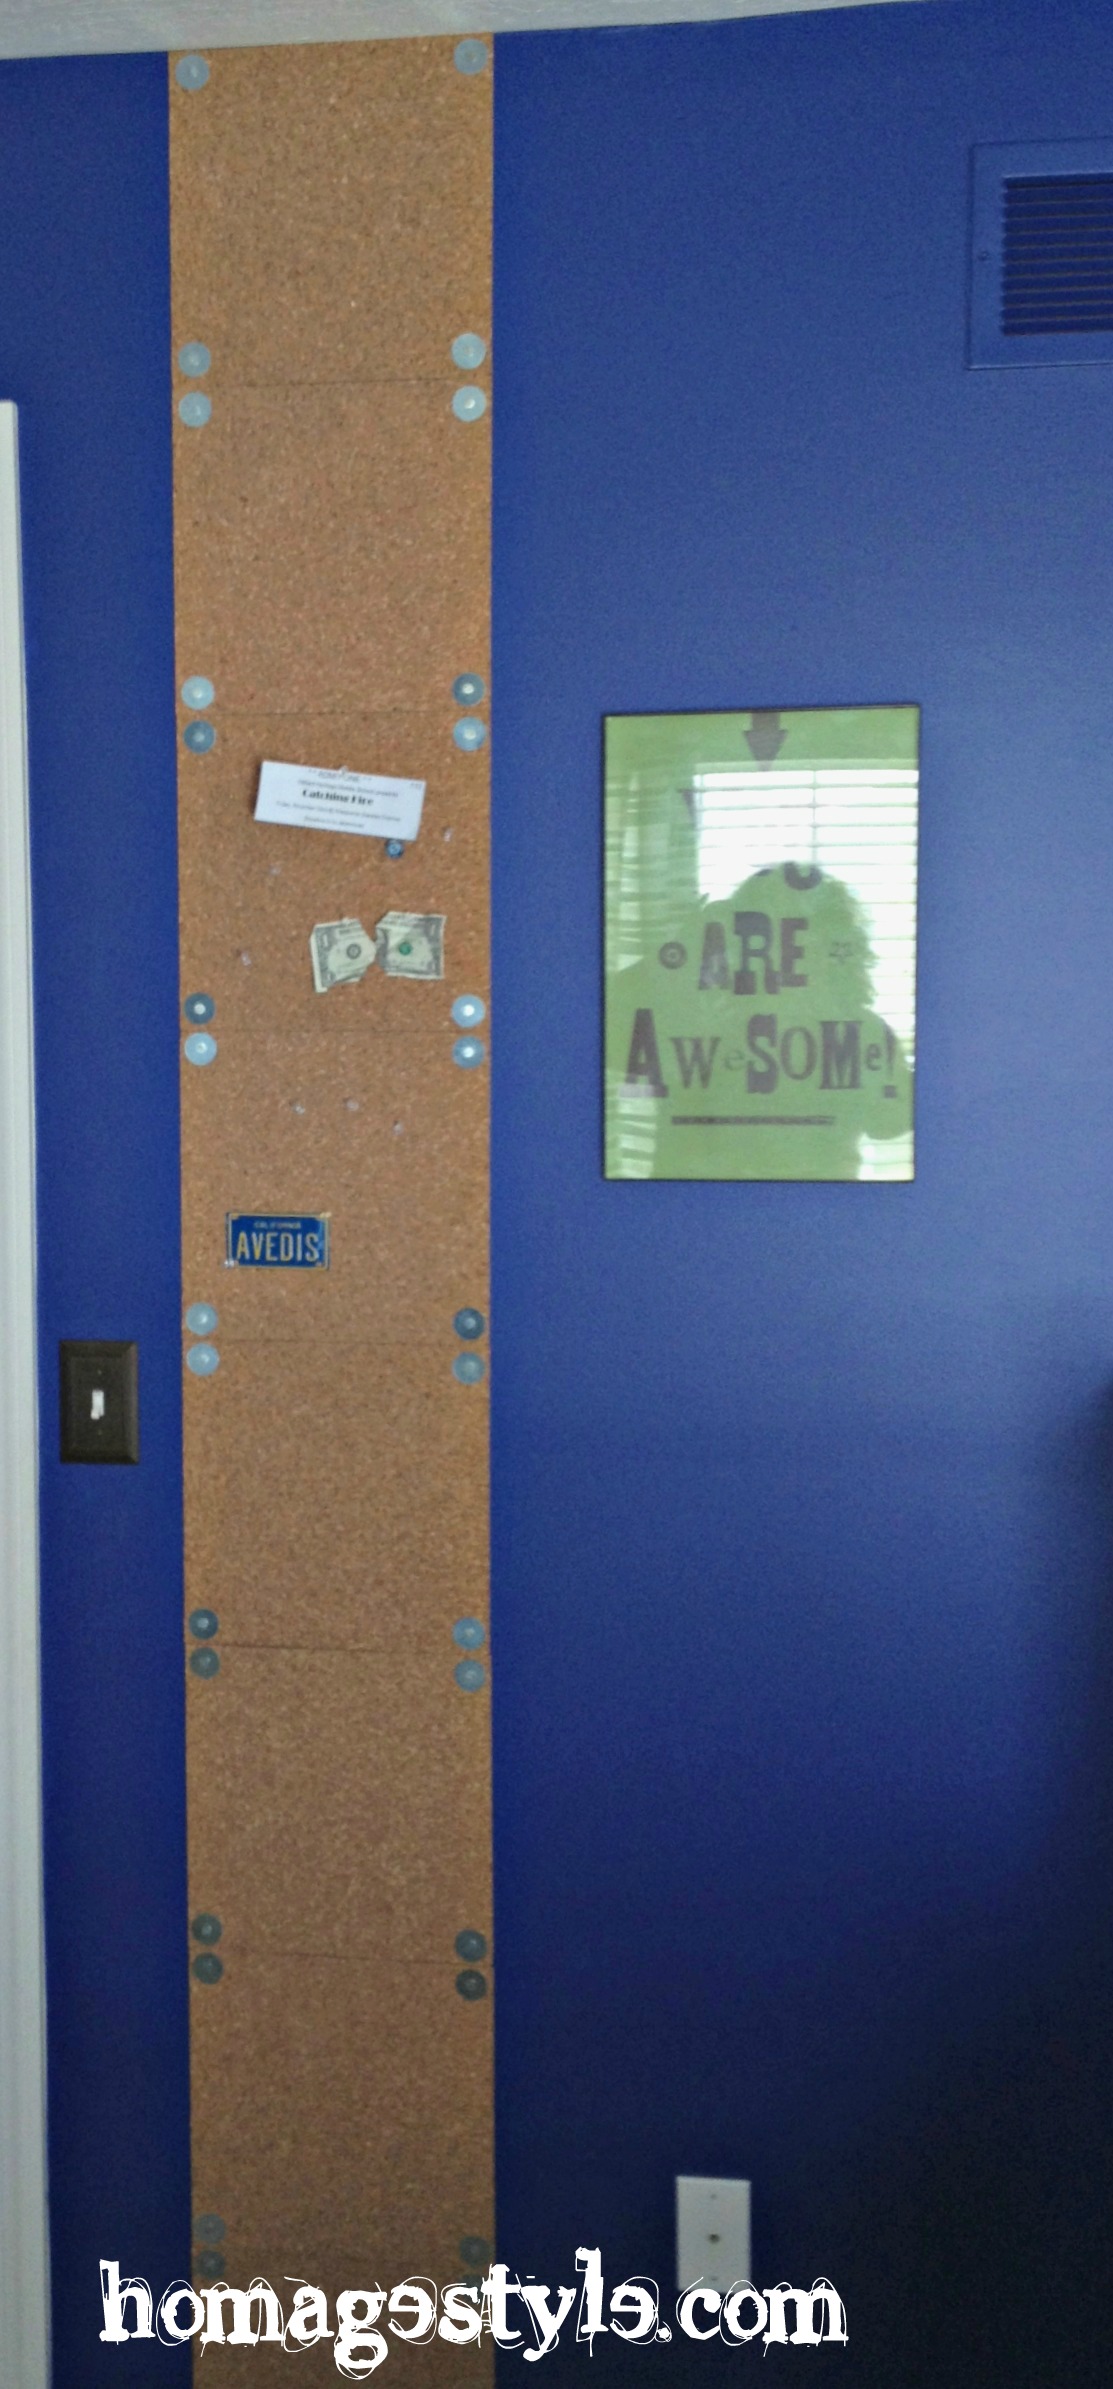
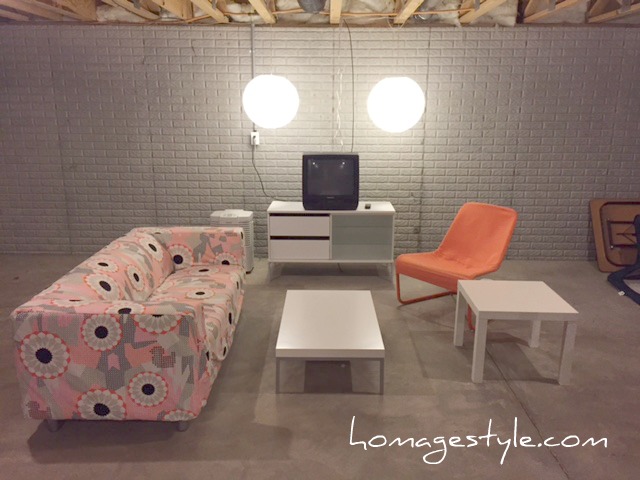
It’s got a lofty, industrial mod feel with the exposed rafters and the concrete floor and walls. Perfect for the occasional hangout in the basement. (And don’t mind the folding table off to the right of the pic…it *is* my basement after all.)

Just about everything is from Ikea – couch, coffee table, side table, TV stand, and orange chair. The orange chair is actually from Ikea by way of my local town’s Facebook buy/sell housewares page, where I picked it up lightly used for a mere $15! If you’re not already a member of your local Facebook buy/sell, I suggest you check it out.

The coffee table and TV stand are older products from Ikea and no longer available. Ditto for the couch cover. Needless to say, several aspects of this project spent some important curing time. I mean, why should this project be different than any other of my projects? It wasn’t until I asked my gentleman caller for help putting together the TV stand that I was finally able to finish this project.

tornado lounge closeup
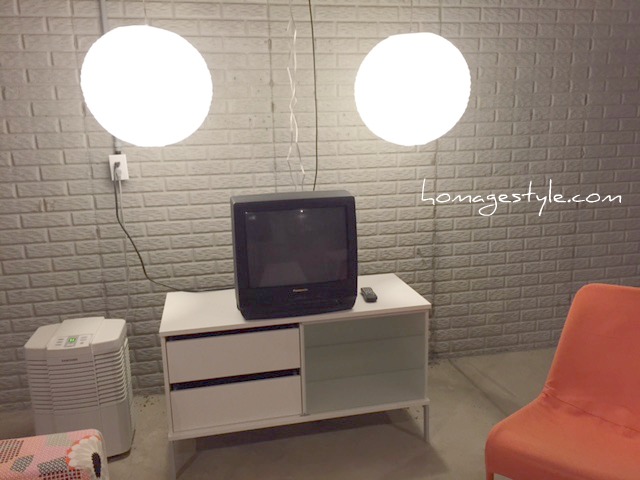
The paper lanterns and light kits are from World Market. And the dehumidifier is, well, a necessity.

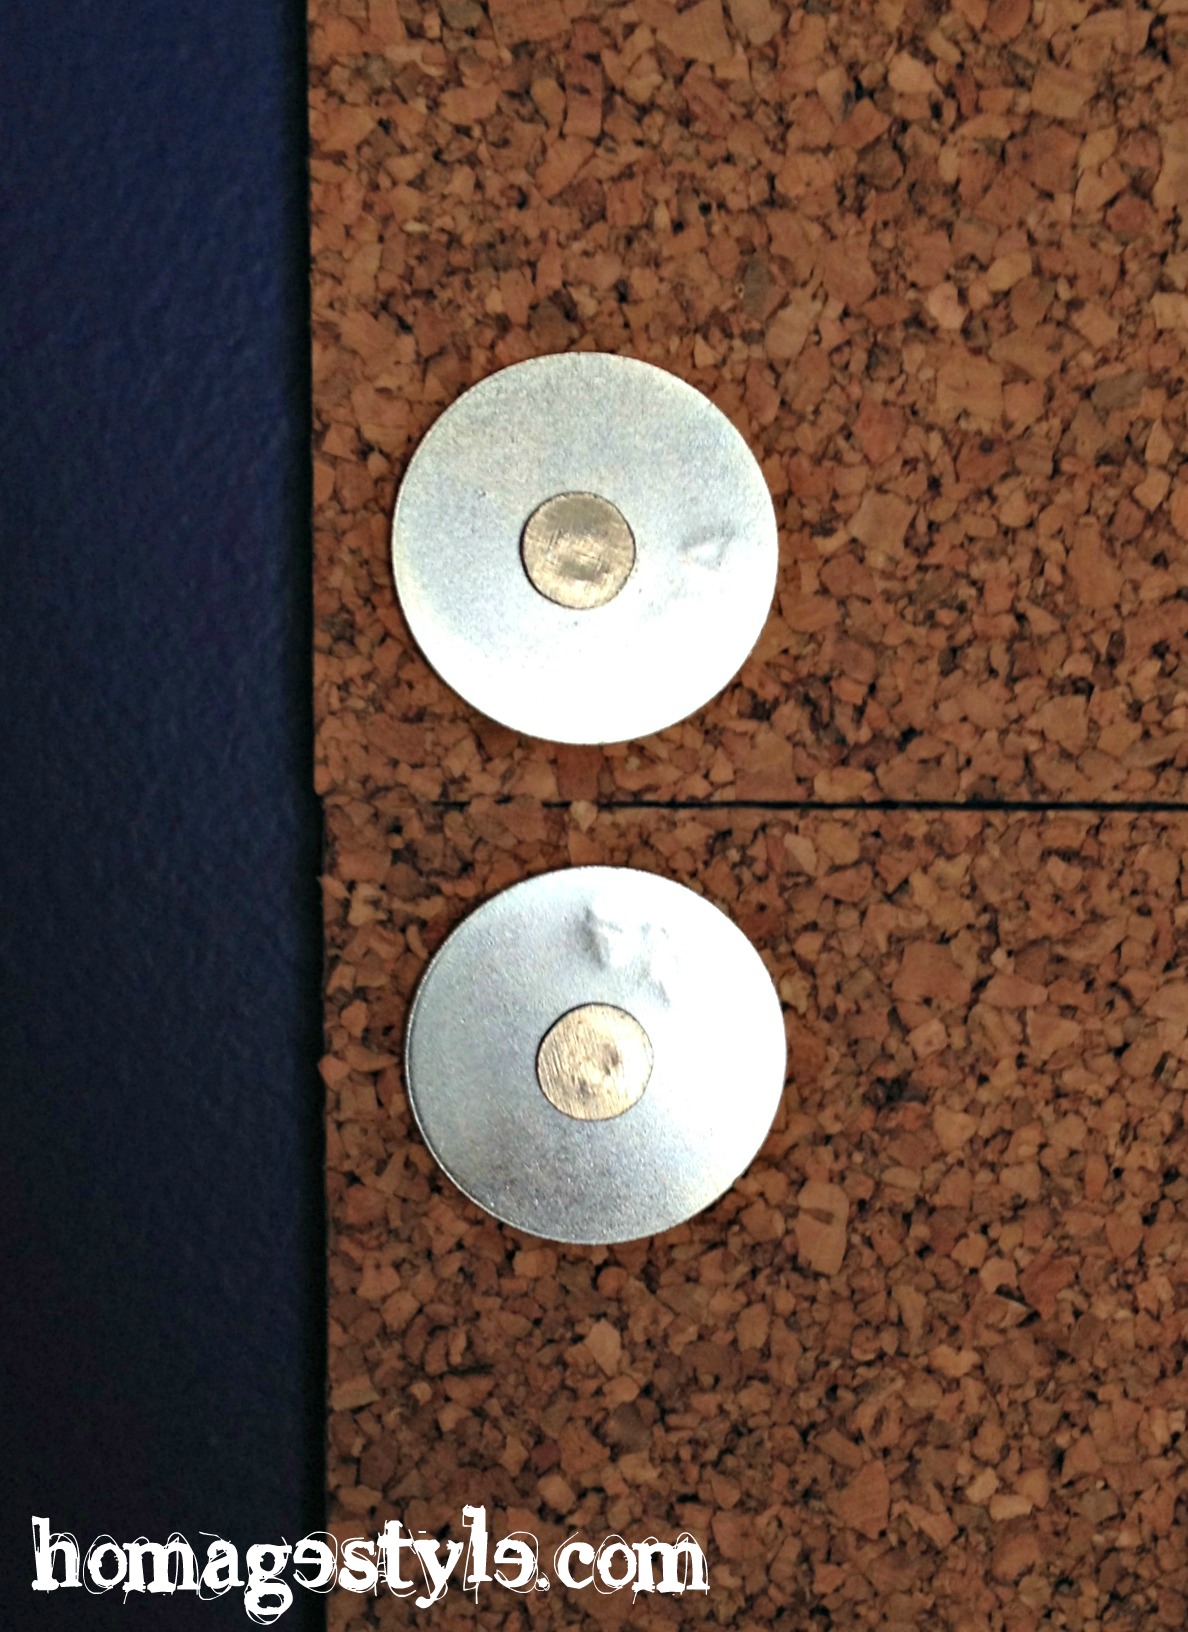
I figured that the hanging cable wire and lamp kit wires were no big deal in this setting and just add to the industrial feel of the space.

tornado lounge paper lanternNow let me give you fair warning in the event that you’ve never hung a paper lantern before…you need to get rid of your need for perfection, because these damn things will not hang perfectly straight. Trust me. I tried. And tried. And tried again. So get comfortable with imperfection folks.

Not too bad for a Tornado Lounge!

Now off you go to design your own Tornado Lounge…don’t get caught without one in bad weather!


organic mod kitchen update

7 September 2014 by Andrea Leave a Comment

A while back I did a little kitchen update but didn’t get around to sharing it here. So it in the spirit of better late than never, I introduce you to my organic mod kitchen update.

My house is kind of traditional, especially considering the kitchen cabinets. I always like to let the house speak to me, rather than forcing a certain style of decor. But I decided to move out of my “funky chicken” phase and into my new phase in which I combine modern, more organic elements with the more traditional style of the house.

But enough yammering on about it…here are the pics!

Let’s start with the simple things…my new napkin holder…

IMG_0433aYes, indeed, you are correct. It is a rock.

Part of what I was going for was bringing in some organic elements – things from nature. What says nature more than a rock? That’s right. Nothing. So a rock it is. Plus it has some sentimental value. It’s a rock that my son found in our yard when he was little and he gave it to me as a gift. Now it has a purpose in our home. And the price was right. Free.

Next I swapped out a chicken lamp – you know, part of the funky chicken phase – to a cool, glass lamp.

Here’s the chicken…

IMG_0428aKind of traditional. A look I’m moving away from.

The new glass lamp…

IMG_0436aIt’s a gorgeous green glass. I have it on a timer, so I never have to mess with it.

To the left of the lamp is the phone and answering machine, along with some funky chicken art covering the phone jack.

IMG_1069bI swapped out the chickart for an amazing art piece of my own making, designed by framing a dish towel. Oh, but not just any dish towel…

IMG_1084bThis amazing dish towel says:

you drink too much. you cuss too much. you have questionable morals. you’re everything i ever wanted in a friend.

The moment I saw this dish towel, I bought one for myself and my best friend! Because it just says it all.

Of course, framing a dish towel is not as simple as one might think. I imagined (in my mind where all projects work perfectly) that I would just lay the towel in this awesome wood and metal frame from Target and that I’d just fold the rest of the towel and tuck it inside the back of the frame. All 24 inches of fabric. Um yeah, that didn’t work out. So I had to cut down the towel and tape it down on the cardboard insert. Me telling this story now makes it sound as if it took about 5 minutes. Trust me…it didn’t. Probably took an hour to get the whole thing worked out to picture hanging perfection. But the time spent was worth it, because it is fun and awesome!

IMG_1083bAnd then there’s my pink fruit tray. Talk about adding a touch of mod! Got this as part of a food gift basket a couple of years ago.

IMG_0434aPlease excuse the fact that there’s hardly any fruit there. Let’s just pretend that we ate it.

Well, if you thought that those were the only incidents of funky chickens in my pre-makeover kitchen, you’d be mistaken. There was also this tray, which was covering an electrical outlet…

IMG_1063aI found this amazing cheese cutting board, also from Target, that I decided I wanted to hang on the wall because it just shouted organic mod to me.IMG_1073aThe wood grain called my name, lulled me into a trance, and made me pick it up and carry it to the cash register.

This is a perfect example of decorating with things that you love and that are beautiful and using them in ways other than they were originally intended. And also a way to decorate on the cheap. I can’t recall the exact price, but I’m thinking it was in the $12.99-$14.99 range.

It was flat on the back as well as the front, so I figured I would hang it with Command picture hanging strips. The chicken tray was hung this way as well. In fact, I had attached it to the outlet cover and thought I would do the same with the cheese board. But the cheese board was heavier than the tray and therefore wasn’t as stable. Plus the tray back was set in, so there was an allowance for the outlet cover, whereas there wasn’t with the cheese board, making it stick out too far, as well as being wobbly. Then this happened…

IMG_1068aYeah, so the outlet cover broke right off the wall. Guess the solid wood cheese board was too heavy for this approach. Fortunately, I have a stash of outlet covers in the basement and then I came up with this brilliant idea…

IMG_1075aI nailed paint stirring sticks to the wall, which were just about flush with the outlet cover. Yes, necessity is indeed the fricking mother of invention!

Then I attached the command strips to the paint sticks and voila!

IMG_1076aThe perfect way to hang the cheese board and cover the outlet!

IMG_1077aAh, the cleverness of me! Doesn’t that look fab?


all points bulletin [board]

17 March 2014 by Andrea Leave a Comment

IMG_1161bOne of the great features of my son’s angsty teen boy bedroom update was the floor to ceiling bulletin board. Remember?

bulletin board 1Cool, huh?

Yeah.

So this happened…

IMG_1159aNot cool.

All points of the bulletin board fell off the wall. Every. single. cork. tile.

The double-sided tape that came with the tiles came was seriously irrelevant.

Now to be honest with you – and you know I always am – I vaguely recall reading somewhere on the internets that some blogger had experienced a similar problem. But as is often the case, I don’t believe that such things can happen to me. Until they do.

But by that point, I had forgotten where I read about the irrelevant double-sided tape and cork tile dilemma, so I had to come up with a solution of my own.

So of course I let the problem cure for a bit to allow me to come up with the most creative option.

Problem solved! With these…

IMG_1160aSome sort of washers and galvanized roofing nails…

IMG_1165aAs always, it was an entertaining Men are From Mars, Women are From Venus conversation with the guy helping me at Home Depot, when I tried to explain my creative inspiration and that I needed silver-colored nails with a big head and large washers with a small hole so that the nail head couldn’t fit through. Complete with hand gestures that could have been mistaken for a mild form of sexual harassment.

After looking at me like I just offered him a hit on my crack pipe, he led me to something I didn’t need in the nail department and something else I didn’t need in the washer section, at which point I pretended that was exactly what I needed so that he would move along, then I ferreted out what I really needed on my own.

But I digress…back to the project…

Starting at the ceiling, I placed the tile back on the irrelevant double-sided tape – I left it up as a guide, plus it acts as a spacer between the tile and the wall, so that hopefully the push pins don’t puncture the drywall.

Then I eyeballed the placement (because that’s what I do – why measure when you can eyeball?) and tapped the nail through the washer. Lather, rinse, repeat, and voila! Project salvaged and with an industrial chic flair!

IMG_1163aLooks better than it did before! (And if you look carefully, you can see a reflection of my girlish figure in the poster to the right of the bulletin board.)

IMG_1161aSuccess! And super stylish to boot!

Here’s a close-up…

IMG_1162aA super-fun save for what could have been a massive project fail!

choosing an accent color

26 August 2012 by Andrea Leave a Comment

Recently I freshened up my family room by adding some simple accessories and not spending scads of money. My new accent colors are orange, yellow, and a vibrant green.

I chose those colors by taking a look at some of the accessories I already had in the room (that I knew I’d be keeping) and picking out some of the more vibrant colors, like the orange and yellow in this lamp shade (which has a great story behind it)…

The spicy pumpkin orange and greens in this chair…

The golden lamp…

The yellow in this vintage advertising art…

And the vibrant yellow lemon zest in the poodle’s martini…(and what poodle doesn’t deserve – hell, even demand – a martini?)…

All pieces that I already had in my family room that either I love (the art and the striped lampshade) or that need to stay because the lotto fairies didn’t leave me a winning ticket (the 90s chairs). Bottom line…I built an entirely new look based on what I already had with just a couple of colors that are now here…

and here…

Plus, just to keep everyone on their toes with a little design surprise, I didn’t just stick to orange, yellow, and green, but also added in a little zebra and black and white…

…because doesn’t black and white zebra match just about anything? Just shake your head yes and agree with me and no one will get hurt!

See it all pulled together in the family room here.

freshening up the family room

19 August 2012 by Andrea 4 Comments

Recently I did a little refresh on our family room. It used to be all green on leather…

BORING. So I decided to add a touch of mod to the family room. And I created this AWESOME zebra ottoman…

While the ottoman looks AWESOME and is shouting STYLE, the chair is now screaming 90s! And the couches are saying in a monotone voice, dull, dull, dull.

Nothing is really looking very stylish or pulled together. But the chairs and couches aren’t going anywhere anytime soon, so I need to work with what I have. (And apparently neither is the dog, who is not dead, despite how it looks.)

So for a small investment, I added some accessories to change up the look from drab to fab!

I started by adding these faux fur zebra print throws from Pier 1 Imports…

See how the throws make everything look tied together and the ottoman doesn’t stand out like a sore thumb anymore? But the throws aren’t an exact match to the ottoman fabric, so things aren’t looking too matchy-matchy. (And I promise you, the dog is alive and well.)

But something is still missing…throw pillows!

No more boring colors! Some bold oranges and greens on this fab pillow cover from The Cottage Cupboard on Etsy. And a terrific upcycled vintage sheet turned pillow cover from Olive Handmade on Etsy…

Handstamped with RELAX…love it!

Suddenly I’m not thinking 90s when I see the red chair. Same goes for this one…

…after adding the Number 5 pillow, a recycled sail pillow from Reiter8 on Etsy, the red geometric chairs get dialed back to neutral status.

The black and white of the Number 5 pillow ties in with the black and white of the ottoman, making it all work.

A couple more touches of color…

Green candles and other tchotchkes on the mantle…

A new spot for an old Buddha statue that I found in the basement…

A little vignette on a giant old-school stereo speaker…yeah, I still have those.

More pops of color (but please ignore the not-so-fab entertainment center…it’s on the to-be-replaced-when-I-win-the-lotto list)…

The whole shebang (with the not-dead dog still on the couch concerning animal lovers everywhere)…

A definite improvement, don’t you think?

Showing off at Funky Junk Interiors.

*No animals were harmed in the writing of this blog post.

design vacation :: project break :: shabby chic meets mod lamps

23 February 2012 by Andrea 1 Comment

I’m on vacation this week, and spending some time cleaning and freshening up a couple of rooms.  I’ve been hacking away at my master bedroom, slowly but surely.

The look that I’m going for in my master bedroom is shabby chic meets mod. I’ve already got the shabby chic going on, and a couple of mod elements, but felt that these lamps were a little too ornate for the look I’m after…

The one on the right can be seen here in these keeping it real pics from the master bedroom…

Sorry, no before pic of the other lamp.

I decided to spray paint both lamps a glossy white.  Simple enough.  I figured it should be a quick and easy sprucing up. Maybe an hour max. Of course even thinking that was the kiss of death that guaranteed I’d have some sort of problem! Guess I forgot the basic physics formula of any DIY project…project time and difficulty is inversely proportionate to the number of times DIYer says or thinks it will be a quick and easy slam dunk!

Here are they lamps after the first coat or so…

I happened to notice that the lamp on the left was having a little bit of an adhesion issue…

The paint just wasn’t sticking on the neck of the lamp.  What the heck? So I continued spraying. I would conquer this lamp with cheap spray paint.

No improvement. Maybe it was the cheap spray paint.  Maybe it was because I didn’t wait long enough between coats. Or maybe there was some sort of texture or oil base or who knows what.  The other lamp, however, was shaping up quite nicely.

I had a can of Krylon Fusion for Plastic in white, so I decided to give that a try, since it’s supposed to stick to just about anything.  That began to work.

After I got the neck of the lamp fixed up with the Krylon, I sprayed the entire lamp with a couple more coats of glossy white. Finally, success!

Here’s the lamp that didn’t give me too much trouble, on a terrific inlaid shell table that I scored a couple years back at the end of summer for $20…

And here’s the problem child, that turned out great in the end…

Perhaps you’re wondering, why white? It’s all going toward my evil plan of eventually painting the walls a rich gray.  Just imagine how beautifully the furniture and accessories will pop against a deep gray backdrop.  Can’t wait to get to the painting phase of the journey.

A fun, eclectic collection of goodies that makes my shabby chic meets mod dream come alive.

And don’t forget to enter the Spring Cleaning Giveaway for a chance to win this adorable sterling silver charm bracelet!

Click here for contest entry details.

Showing off at these link parties…

Remodelaholic

design vacation – keeping it real in the master bedroom

20 February 2012 by Andrea 5 Comments

Sounds kind of scandalous!  But when you see this, you’ll realize how completely scandalous it really is…

Messy-licious! And there’s more…

Nothing like watching an episode of Hoarders to jump start the spring cleaning bug.

And that, my friends, is my bedroom.  Let’s just say it’s gotten out of hand. So I started with a big cleanup. Which took a surprisingly long time. I’m sure that had nothing to do with treating myself to occasional trips to Pinterest.

While it’s not quite ready for the full reveal, here’s a little something…

Nothing wrong with this vignette, but I’ve been trying to add a touch of mod around the house, so I want to mix it up a bit.

I found a terrific iridescent vase at Target, and it looks pretty good…

…but it could use a little more height.  Something along these lines…

These are pieces of wood that my son broke when he was in tae kwon do. But the raw wood looks too, well, raw, so I painted it with a gray craft paint, not worrying about priming or if the woodgrain showed through the paint.  Call it character and texture.

There, that’s better. The painted wood adds height and texture.  Plus the wood pieces have special meaning to me, and now I’m using them instead of having them stuck in a cabinet.  My son even wrote his name on one pieces, making it extra special.

Plus it looks great, don’t you think?

Don’t forget to enter the Spring Cleaning Giveaway!

Showing off at these link parties…

Remodelaholic

capiz!

6 June 2011 by Andrea Leave a Comment

Doesn’t it even sound fun?  Capiz!

I have been thinking about a capiz shell chandelier for my living room for a while now, but being broke and all, that hasn’t exactly made it to the top of my priorities list.

Until I saw these…

And thought, wouldn’t these look fabulous in this doorway, 3 on each side?

I wrote about this room and it’s lack of seating here.

So back to the capiz!

Wouldn’t they look fab?  They’re on sale for $14.99 per strand at West Elm.  $14.99 x 6 = no way do I have that much to spend on capiz!

($89.94 for the math types.  Not including sales tax and shipping.)

(And I really did consider not linking to them so all of my trusty readers don’t buy them up while I’m searching for spare change and the TV remote in my couch cushions.  But I’m not mean like that.  If I can’t have them, someone should!)

So I decided to use the amazing powers of my resale license to search the internets for capiz! wholesalers, because I’m certain that the entire strand cost about $0.03 wholesale.  Now that was quite an experience. I was astounded by the variety of craptastic stuff made with capiz!  Just google “wholesale capiz shells rectangular”.  In fact, let me google that for you.

While you can buy everything from a capiz! tissue box cover to a capiz! toilet seat, I could not find the rectangular shells I was looking for.  Apparently West Elm commissioned those directly from Mother Nature herself.

Well, we’ll see what happens. Maybe I’ll hit the lotto and feel OK about spending almost 100 smackeroos on sea shells.

Or I could listen to my friend Claire, who says, “Go for the luxuries in life!   The necessities take care of themselves.”  Not the soundest financial advice I’ve ever received, but it sure is the most fun!

touch of mod – dog bowl edition

8 May 2011 by Andrea Leave a Comment

Recently, I’ve been trying to add a touch of mod throughout the house, to give a little kick in the pants to my usual vintage pottery barn-esque style.

In the spirit of everything in the house can be decorative, I’ve even added a touch of mod to the dogs’ food and water bowls.

I found this fun & funky leaf pattern platter on clearance at Target and thought it would be perfect for holding the dog bowls.

Don’t mind my dirty floors.  That’s my contribution to the keeping it real department.

Here’s the platter with the dog bowls on it…

Just proving that you can add a touch of mod just about anywhere in your home!

knife-wielding decorator

15 March 2011 by Andrea 4 Comments

Slowly but surely, I’ve been trying to add pops of color and a touch of mod to our family room.

Today, I happened to wander into Pier 1 Imports on my lunch hour.  Always dangerous.  Fortunately I got out of there with only minor expenditures!

I found 2 of these fun candles with battery-powered mini lights.

Plus, see that red clearance sticker?  Only $4.18 each!  Can’t beat the price!  And they’ll definitely add some color here…

Plus, since they’re battery operated, I won’t burn down the house!  What could be wrong with that?

Nothing.  Except they’re way too tall.  See?

Way out of proportion.  Bummer.

No worries.  Have knife, will decorate!

Even though they’re battery powered, the candles are still wax.  So I figured that if I took a sharp knife to them, I could cut them down to a better size.

Well, it didn’t cut quite as perfectly as I had hoped, but I carefully cut through the other half of the candle, then trimmed it to perfection with a paring knife.

OK, now this looks better…

More proportionate, and the colors are even bolder without as much white at the top.

Looks nice “lit”…

A colorful improvement!

Check back soon for more family room updates!

Showing off this project at the link party at Funky Junk Interiors.

Next Page »
  • Email
  • Facebook
  • Instagram
  • Pinterest
  • Twitter

subscribe, baby!

Homage Style on Twitter
Homage Style on Facebook
Pin me! Homage Style on Pinterest

archives

WORK IN PROGRESS...

work in progress :: rose painting

FAVORITE PROJECTS...

the tornado lounge

another glorious chalkboard project

freshening up the family room

industrial chic curtains

angsty teen boy's room

almost instant art

vintage cowboy room

Copyright © 2026 · Beautiful Pro Theme on Genesis Framework · WordPress · Log in