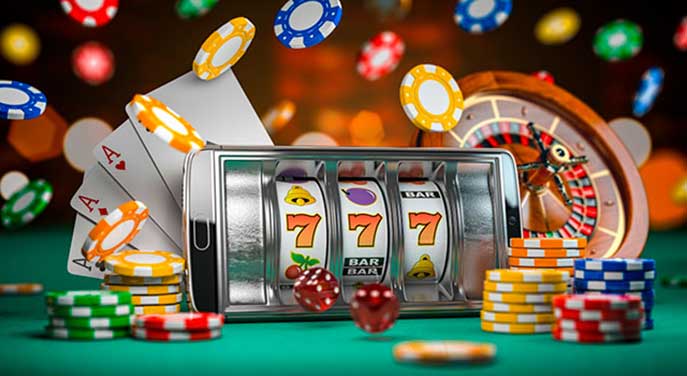
homage style

when your home is your canvas

schedule a design consult
  • blog
  • services
    • styling & decorating
    • home staging
    • virtual home staging
  • featured
  • about
  • workshops
  • contact
  • subscribe

bachelor bathroom

8 March 2016 by Andrea Leave a Comment

Bachelor BathroomRecently a client purchased a new-build condo and reached out for my design help. The client, being a bachelor, wanted his place to have a very sleek, bachelor pad vibe, which I helped him accomplish, starting with his master bath.

The space has a shower and the option for a tub, but if you didn’t select the tub option, and my client didn’t, it left a large empty space, dying to be filled…

Bathroom BeforeThat space cried out for a large-scale art piece! But did I mention that my client was on a tight budget? Ah yes, the B word…

So I took matters into my own hands and painted a 36″ x 42″ geometric piece, speaking to the clean, mod vibe he was looking for.

PaintingFrom afar, all you can see is the geometry of it. But up closer, you can see the layers of color and texture, as well as a message…

Follow your heartAnd on the side of the painting, a secret part of the message, only for those who get close enough to touch it…

AlwaysThe painting is the focal point when you walk in the room, but when you face the vanity, you see this sharp collection of man-stuff, served up on a silver platter…

Bathroom counterOk, maybe not a silver platter…a hammered silvertone tray, from Target, for a mere $12.99. The two glorious vintage-look highball glasses, a steal at $1 each at Goodwill! The oil bottle, filled with colorful, minty-fresh mouthwash, is also from Target, for $4.99.

Bathroom counter frontA super sleek, yet affordable way to display your toiletries, and not have them just look like random man-stuff. This is, after all, a super-cool bachelor pad!

little things :: the hand edition

23 November 2015 by Andrea Leave a Comment

image1-768x1024b

Recently I had the opportunity to finish a little project that’s been curing for a while. If I’d known it would be so quick and easy I would have completed it ages ago!

I bought this awesome cast iron hand to hold jewelry in my bathroom from one of my favorite shops in Columbus, Elm and Iron (they have a shop in Cincinnati too)…

image4-768x1024a

And while the cast iron look is great, it was not the look I was going for in my bathroom. So I broke out some leftover champagne metallic spray paint and gave it a spritz.

After a mere two quick coats, it looks like this…

image5-1024x819a

Exactly the look I was going for.

So I hung it below my affirmation art…

image6-768x1024a

…and added a little gold paint pen to the screw heads so they didn’t stick out like a sore thumb. (Get it? Sore thumb?)

image8-1024x819a

Add jewelry and voila! A stylish piece with a practical application!


image1-768x1024a


image3-820x1024a


image7-768x1024a


Hands down, a super fun project!

(OK, I’ll stop with the puns now.)

the design studio is now open

7 September 2015 by Andrea Leave a Comment

pink doorThe Homage Style design studio is reopening…so come on in!

I will now be accepting local clients for home styling and decorating, as well as home staging. This is very exciting for me as I’ve been yearning to get back into a more creative life and I love helping people make their homes a beautiful and peaceful respite.

If you’re in the Columbus, Ohio area and want some design help, give me a call! I’m thrilled to have my design studio doors open again, so let’s add some style to your home!

Or, if your home is for sale or you’re planning to put it on the market, home staging will help you sell quickly and for top dollar! So give me a call!

If you’re not local, no worries, because I will also be doing virtual design consults, where we’ll work together over the phone to get your home styled up! Or if you’re selling your home, I’ll be doing virtual home staging for those outside the Columbus, Ohio area.

So whether your home needs a little sprucing up or you’re getting ready to unload the place, give me a buzz, and together we can work some magic!

Call Andrea at 6 1 4 . 2 8 2 . 5 1 4 1 today to set an appointment! I can’t wait to help make your dreams of home come alive!


the tornado lounge

1 July 2015 by Andrea Leave a Comment

tornado lounge cover Living in central Ohio, there is an occasional tornado. And more frequently than actual tornadoes are tornado warnings.

Things get all conflabbergested when there’s a tornado warning (for those of you not living in the Midwest, this means that a funnel cloud has occurred or is imminent based on radar) – the tornado sirens go on and the TV meteorologists get all serious, trying not to look as excited as they are about the impending weather phenomenon, and people are advised to take shelter.

Where? In your basement if you have one.

Well we have one. It’s unfinished and inglorious. Not exactly a place where people are dying to spend time.

But since we do head down there at least on several occasions each spring and summer for the inevitable tornado warning, I wanted to put together a little something that I call the Tornado Lounge. A mod little place where we can cool our heels while the weather does its thing.

Introducing the Tornado Lounge…

tornado loungeIt’s got a lofty, industrial mod feel with the exposed rafters and the concrete floor and walls. Perfect for the occasional hangout in the basement. (And don’t mind the folding table off to the right of the pic…it *is* my basement after all.)

Just about everything is from Ikea – couch, coffee table, side table, TV stand, and orange chair. The orange chair is actually from Ikea by way of my local town’s Facebook buy/sell housewares page, where I picked it up lightly used for a mere $15! If you’re not already a member of your local Facebook buy/sell, I suggest you check it out.

The coffee table and TV stand are older products from Ikea and no longer available. Ditto for the couch cover. Needless to say, several aspects of this project spent some important curing time. I mean, why should this project be different than any other of my projects? It wasn’t until I asked my gentleman caller for help putting together the TV stand that I was finally able to finish this project.

tornado lounge closeupThe paper lanterns and light kits are from World Market. And the dehumidifier is, well, a necessity.

I figured that the hanging cable wire and lamp kit wires were no big deal in this setting and just add to the industrial feel of the space.

tornado lounge paper lanternNow let me give you fair warning in the event that you’ve never hung a paper lantern before…you need to get rid of your need for perfection, because these damn things will not hang perfectly straight. Trust me. I tried. And tried. And tried again. So get comfortable with imperfection folks.

Not too bad for a Tornado Lounge!

Now off you go to design your own Tornado Lounge…don’t get caught without one in bad weather!


getting started

23 March 2015 by Andrea 6 Comments

Kathleen front My first home

Your first place. Just those three small words evoke so many images for so many of us. A first apartment when you go out on your own. Or a hip bachelor pad. Or maybe the first home you bought with your new husband or wife. Or the first home you bought after your kids were born. Or the first place you lived after getting a divorce. Or maybe it’s just you and you finally screwed up the courage to realize that maybe it’s going to be just you for a while and it’s time to dive in and buy your own place.

No matter what your first place means to you, it’s a place of new beginnings. A fresh start. A place where you can express yourself and no one else gets a vote. Your home.

My first home was a wonderful place that I loved so very dearly. And still love it and miss it to this day.

38 Willowbrook Lane. There couldn’t be a sweeter sounding address.

And this home was close to perfect.

It seems like it was yesterday, but it was almost 17 years ago that this adorable little place was built. Hard to imagine how time flies and how much has changed since. My sweet little toddler daughter was a wild little three year old when we bought our first home.

Zoe at 38 WillowbrookMy daughter, then 3, exploring the house that would soon be home

Back then I was still married and we would drive by that cute little house every day as it was being built. Even though we drove by daily, I was so afraid to get my hopes up, fearing that somehow we wouldn’t get the house, wouldn’t qualify, or something would just fall through.

But we did get that house. And we moved there in 1997 and began to make it our own.

38 Willowbrook back yardThe fabulous little back yard at 38 Willowbrook

Before I lived in this house, I had no idea that I wanted to be an interior designer. Or even that I wanted to create. That lovely home nurtured in me something I never even knew existed. It made me realize the importance of creating beauty in the space in which we live.

Stained glass

Stained glass flowers that I painted

So I experimented there. Some experiments went better than others. Like the carnival-colored sheers in the family room – probably not my best work.

carnival

Carnival sheers…not so great!

But trying this and trying that led me to find my style and to nurture and grow it, leading me on a path of creativity that blossomed into a full-blown passion!

Family room

I grew into a classier design style in my first home

Not only did that first little home introduce me to my great love of decorating, but also to my love of whimsical decorative painting.

blueberries and fireflies

Blueberries and firefly evenings, painted on my kitchen wall

First with my daughter’s room as I decorated with flowers and gardens and whimsical fairies, but then when my son was born and we brought him home to this lovely little house, I painted his room with silly jungle animals, all painted in shades of blue. And let’s not forget their underwater bathroom, teeming will all manner of whimsical sea creatures!

undersea bathroom

The undersea bathroom…one of my favorite rooms ever

As the kids grew older, so did their rooms, and garden fairies and jungle animals were replaced by preteen girl funky stripes and a little boy’s cowboy room.

Pre-teen girl's room

My daughter’s room when she became a teenager

And before you know it, there came a time when we felt it was time to move on – to another state far away and soon to another life very different from the one we all shared in that quaint little house.

But it will live on fondly forever in our memories. Such is the power of your first place. A first home is the true meaning of getting started.

Twig over entertainment centerA birch branch from our old home hangs in our new home

another glorious chalkboard project

31 December 2014 by Andrea Leave a Comment

another glorious chalkboard projectRemember the 1990s?

I do, mostly because my kitchen table and chairs remind me of the 90s on a daily basis…

90s tableWith the table legs being a full-on tribute to the 90s…

90s table closeup
But the 90s table is all I have and nowhere in my mostly non-existent budget is there a line item for a new kitchen table, so I had to get creative.

You know how I love chalkboard paint, right? It’s already kind of a theme in my kitchen, since I painted my kitchen cabinets with chalkboard paint and did a section of the wall in chalkboard too. Why stop there?

I decided to paint my kitchen table in chalkboard paint.

Of course the peanut gallery (ie, my kids) thought it was a terrible idea. And of course I could care less about their opinion on such matters because I had a vision! So I set about painting it with chalkboard paint.

I started out with the legs and underside. I used an angled brush to get into the corners, nooks, and crannies, but mostly used a small foam roller designed for painting cabinets to get the smoothest application.

After just the first coat things were looking a little scary. Like maybe my kids were right and I had made a GIANT mistake…

First coat madness

  1. Chalkboard paint not looking like it’s going to cover or stick to the surface. (No I didn’t prime or sand…this is me we’re talking about!)
  2. Christmas tree not yet decorated, despite it being 3 weekends before Christmas. Yes, in fact, I was procrastinating on my decorating by painting my kitchen table. What of it?
  3. My son’s laundry. Just keeping it real, people.
  4. Dog photobombing my picture like it’s her job. And yes, she does have bows in her hair.

With regard to #1, what could I do, other than press onward. So I did…

First coats of paintI painted 5 coats on the legs and sides of the table. Not too bad – only took a couple of hours. Then I let it dry and flipped the table over to paint the top. The top got 6 coats. Sounds like a lot of time and effort, but since it was such a small area (not a complete wall or room), the actual painting time didn’t take long. And while each coat was drying, I just went on about my business. You know, avoiding decorating for Christmas and whatnot. I started the project at 2pm and put the last coat on around 11pm.

Here it is, beginning to come together and not looking so scary…

Beginning to come together

The most awesome finished product…Chalkboard table completeNot only does it look fabulous, but I’m thinking it looks a kind of Pottery Barn. All for the price of a can of chalkboard paint, which was about 10 bucks! Can’t beat that!

Plus the formerly 90s table legs got a new lease on life, with a line of chalk drawn in the inset…

Line of chalkI had thought about maybe doing gold leaf in the inset, but then realized that a chalk line would be the perfect casual addition to the table! Plus I can change the colors when I feel like it or erase it completely, depending on my mood.

Here’s my first scribbling on the new table…

Merry Christmas tableNow if you think that’s the end of the story, you clearly haven’t been reading here for too long.

It was only moments before I realized that with a 14-year-old and a 21-year-old, I probably made a very grave mistake in painting anything chalkboard. Let’s just say they added some “commentary” to my otherwise glorious chalkboard project…

Merry Christmas commentarySigh. And it only got worse from there. Most of it wouldn’t even be considered PG-13, so I won’t elaborate. But I’m sure you can use your imagination. At least the table looks great.

PROJECT UPDATE

And by project update, I mean project FAIL!

So this happened…

so this happenedIt started out with a couple of scratches in the paint, then a couple of areas that bubbled, followed by the kids and I having a paint peeling party one day at dinner.

Lesson learned: USE PRIMER!

So we continue to peel away portions. It’s far more rewarding than sanding. And I guess I will either a) leave it as it once it’s fully peeled, or b) eventually repaint, this time using a primer.

Why can’t anything ever be easy? Hahahaha! And that, my friends, is the true nature of DIY!

If you enjoyed this blog post, please share…


when things get boring in the bedroom

11 September 2014 by Andrea Leave a Comment

when things get boring in the bedroom

Sometimes things get boring in the bedroom. Stale. Just the same old thing, day after day, week after week, month after month. A sense of ennui sets in and all you can think about is how something has to change. You just can’t continue the way things are.

No, I don’t mean that has gotten boring! I mean your decor has. Geez, you people always have your minds in the gutter!

Well, when things have gotten dull, spice it up! Consider it a marriage encounter for your decor!

Recently I was feeling bored (with my decor) and so I decided to spruce things up a bit. As always, I’m on a tight budget, so it included a combination of rearranging some of what I already have, using some things that have been curing for years, and adding a little bit of new to the mix.

In general, I’m moving from a more traditional look to a more eclectic look – vintage and shabby chic marry mod. OK, so that’s more of a threesome than a traditional marriage, but when we’re decorating we don’t always need to follow societal norms!

Let’s start with the armoire. Here’s the before pic, with fake plants that look just fine, but no doubt more in the traditional vein…

Armoire beforeGoodbye fake plants, hello gold dress form trussed in faerie lights!

Armoire after with lightsThe faerie lights were $11.99 plus shipping. Well worth the expense. They’re battery operated, so there are no pesky wires running over the side of the armoire. Plus they run on a timer, so I can turn them on and six hours later they go off automatically. Perfect for when you need to spice things up with some ambiance!

Here’s how it looks during the day with the lights off…

Armoire after in daylightYou will notice that the dress form is off center, and there’s a lot of empty, open space on the top of the armoire. I’m really trying to get OK with imperfection. That includes getting comfortable with negative space and off-center presentation. I’ve actually grown to love the oddness of it all…it really highlights the dress form as the featured element.

Speaking of the dress form, this beauty has been curing for years! I purchased her for $1.25 at a local high school rummage sale. Been waiting to find the perfect place for her. Think I’ve found it!

Moving on…

Let’s take a look at one of my favorite possessions. A Picasso print of A Mother and Child and Four Studies of Her Right Hand. This was my grandmother’s print and I always loved it in her home from the time I was a kid. I’ve had it in my bedroom since I got it, but thought it needed to be featured a little more prominently, so I added some black and white polka dotted washi tape to frame it out…

Picasso print 1I just eyeballed the tape placement, because that’s what I do, but you could always be more precise and measure it out like a normal human.

(If you’re wondering why I have such weird angles with the wall hangings, it’s because I get a lot of light in this room so the angle is the only way to avoid glare in the pic. Carry on…)

Another angle…

Picasso printI love, love, love how this looks! It really brings out the tiny, black rim on the frame, as well as the black in the sketch. Plus the washi tape was a steal – I got 3 rolls for $2.99 at Michaels. More to come later with one of the other rolls of tape.

By the way, polka dots are my fave. Especially black and white polka dots. So this just makes me happy every single day when I see it! Here’s a close-up so you can better see the polka dots (as well as the aforementioned glare)…

Picasso print 2Enough about that. On to the one splurge.

Before the splurge, there was an angel print, accompanied by a broken vintage bracelet…

Angel print with braceletThe splurge was spending $40 on a custom-printed Lumineers poster on Etsy…

Lumineers 2I love the Lumineers and I superlove the poster art! The perfect mod piece to start the sexy love affair with vintage and shabby chic.

Sadly, I won’t be sharing the artist info here, because it took over a month and opening a case on Etsy to finally get the seller to ship, despite having paid. But at least I finally received it and I’m in love!

I tossed it into a basic poster frame and voila! Here it is from another wacky angle…

Lumineers 1And you can see the vintage bracelet remained.

To the left of my bed I tightened up the placement of the pieces that were already hanging on that wall, to give them more of a vignette feel…

frame artAnd on the right side of my bed I added a gorgeous mermaid print I bought a while back on Etsy from artist Amy Huddleston. (You know the drill…it was curing for a while.) I placed it in a mod white frame, which really brought an eclectic feel to the grouping. Talk about mod and vintage and shabby chic!

eclectic art grouping 3The blues and aquas and in mermaid print bring out the blue in the Girl with a Pearl Earring by Vermeer. Which, by the way, I found on the back of a Reader’s Digest magazine and decoupaged to a piece of painted wood.

But the white frame seemed too stark. Something was still missing…know what I mean?

eclectic art grouping 2Oh yeah. Washi tape, part deux.

eclectic art group with washi tapeI added some black and white chevron washi tape – part of my $2.99 three-pack – and it did the trick! Toned down the starkness of the white and tied it to the black in the other two pieces. Here’s a close-up…

eclectic art with washi tapeTaping perfection. Just eyeballed this as well. You could do the same, or maybe even be more precise and measure.

Although those are all awesome, we’re still not finished.

Previously, I had this angel art all lined up in a row…

Angel art beforeVery pristine and orderly, but where’s the flair?

I’ll tell you where the flair is…right here…

angel art groupingI mixed those bad boys up for a touch of the unexpected! We can’t be angelic and perfect all the time, especially when things have gotten boring in the bedroom!

Here’s where they are in the room…

angel artAnd finally, I dug deep into the world of curing and found these vintage mailbox doors that I purchased on eBay approximately 10 years ago.

mailboxes as artI figured that it was time to take the focus off the alarm system and the light switch – boring! – and add something interesting to this spot!

Now mind you, I did slice my finger open adding picture hanging wire to the back of these and heavily debated whether I needed a tetanus shot – I didn’t end up getting one and fortunately lockjaw has not set in – but they were certainly worth the effort!

mailboxes as art 2They just look so cool all lined up and are another metallic element, adding to the mixed metals in the room, accents of silver and gold and bronze.

A  whole new fun, updated bedroom for less than $100. Cheaper than sexy lingerie and a night out on the town! Who’s bored now?

Take my advice…don’t be afraid to mix it up in the bedroom!

little things :: closet edition

10 September 2014 by Andrea Leave a Comment

I decided to have a little fun in the closet…man, your mind is in the gutter! I mean the place where I store my clothes!

I found these awesome, vintage-look galvanized metal letters at Michaels. I especially fell in love the the letter “F” since it’s so thick and chunky and stylized. So I had to buy the “F”! And what word could I spell with the letter “F” other than “FUN”? (Well, there is one other word I could think of, but I was trying to come up with words that wouldn’t have anyone calling children’s protective services on me…)

So here it is…FUN in the closet!

Fun in the Closet 3aIt’s kind of perfect, since it’s someplace I visit every morning and now I have a friendly reminder to have FUN every day!

A view of FUN with my laundry basket…

Fun in the Closet 2aAs I’m walking into the closet…

Fun in the Closet 1aSome people might not even consider decorating their closet, but I say, why not have some fun in the closet? 😉


organic mod kitchen update

7 September 2014 by Andrea Leave a Comment

A while back I did a little kitchen update but didn’t get around to sharing it here. So it in the spirit of better late than never, I introduce you to my organic mod kitchen update.

My house is kind of traditional, especially considering the kitchen cabinets. I always like to let the house speak to me, rather than forcing a certain style of decor. But I decided to move out of my “funky chicken” phase and into my new phase in which I combine modern, more organic elements with the more traditional style of the house.

But enough yammering on about it…here are the pics!

Let’s start with the simple things…my new napkin holder…

IMG_0433aYes, indeed, you are correct. It is a rock.

Part of what I was going for was bringing in some organic elements – things from nature. What says nature more than a rock? That’s right. Nothing. So a rock it is. Plus it has some sentimental value. It’s a rock that my son found in our yard when he was little and he gave it to me as a gift. Now it has a purpose in our home. And the price was right. Free.

Next I swapped out a chicken lamp – you know, part of the funky chicken phase – to a cool, glass lamp.

Here’s the chicken…

IMG_0428aKind of traditional. A look I’m moving away from.

The new glass lamp…

IMG_0436aIt’s a gorgeous green glass. I have it on a timer, so I never have to mess with it.

To the left of the lamp is the phone and answering machine, along with some funky chicken art covering the phone jack.

IMG_1069bI swapped out the chickart for an amazing art piece of my own making, designed by framing a dish towel. Oh, but not just any dish towel…

IMG_1084bThis amazing dish towel says:

you drink too much. you cuss too much. you have questionable morals. you’re everything i ever wanted in a friend.

The moment I saw this dish towel, I bought one for myself and my best friend! Because it just says it all.

Of course, framing a dish towel is not as simple as one might think. I imagined (in my mind where all projects work perfectly) that I would just lay the towel in this awesome wood and metal frame from Target and that I’d just fold the rest of the towel and tuck it inside the back of the frame. All 24 inches of fabric. Um yeah, that didn’t work out. So I had to cut down the towel and tape it down on the cardboard insert. Me telling this story now makes it sound as if it took about 5 minutes. Trust me…it didn’t. Probably took an hour to get the whole thing worked out to picture hanging perfection. But the time spent was worth it, because it is fun and awesome!

IMG_1083bAnd then there’s my pink fruit tray. Talk about adding a touch of mod! Got this as part of a food gift basket a couple of years ago.

IMG_0434aPlease excuse the fact that there’s hardly any fruit there. Let’s just pretend that we ate it.

Well, if you thought that those were the only incidents of funky chickens in my pre-makeover kitchen, you’d be mistaken. There was also this tray, which was covering an electrical outlet…

IMG_1063aI found this amazing cheese cutting board, also from Target, that I decided I wanted to hang on the wall because it just shouted organic mod to me.IMG_1073aThe wood grain called my name, lulled me into a trance, and made me pick it up and carry it to the cash register.

This is a perfect example of decorating with things that you love and that are beautiful and using them in ways other than they were originally intended. And also a way to decorate on the cheap. I can’t recall the exact price, but I’m thinking it was in the $12.99-$14.99 range.

It was flat on the back as well as the front, so I figured I would hang it with Command picture hanging strips. The chicken tray was hung this way as well. In fact, I had attached it to the outlet cover and thought I would do the same with the cheese board. But the cheese board was heavier than the tray and therefore wasn’t as stable. Plus the tray back was set in, so there was an allowance for the outlet cover, whereas there wasn’t with the cheese board, making it stick out too far, as well as being wobbly. Then this happened…

IMG_1068aYeah, so the outlet cover broke right off the wall. Guess the solid wood cheese board was too heavy for this approach. Fortunately, I have a stash of outlet covers in the basement and then I came up with this brilliant idea…

IMG_1075aI nailed paint stirring sticks to the wall, which were just about flush with the outlet cover. Yes, necessity is indeed the fricking mother of invention!

Then I attached the command strips to the paint sticks and voila!

IMG_1076aThe perfect way to hang the cheese board and cover the outlet!

IMG_1077aAh, the cleverness of me! Doesn’t that look fab?


interview with the novogratz

3 July 2014 by Andrea Leave a Comment

NOVO_portrait-web-optimized

I’m so excited I can barely contain myself! Why? Because I interviewed the Novogratz on my other blog, BringingBackAwesome.com for our #SummerOfAwesome! Be sure to check out how Bob and Cortney Novogratz answered 7.5 fun questions…

Next Page »
  • Email
  • Facebook
  • Instagram
  • Pinterest
  • Twitter

subscribe, baby!

Homage Style on Twitter
Homage Style on Facebook
Pin me! Homage Style on Pinterest

archives

WORK IN PROGRESS...

work in progress :: rose painting

FAVORITE PROJECTS...

the tornado lounge

another glorious chalkboard project

freshening up the family room

industrial chic curtains

angsty teen boy's room

almost instant art

vintage cowboy room

Copyright © 2025 · Beautiful Pro Theme on Genesis Framework · WordPress · Log in